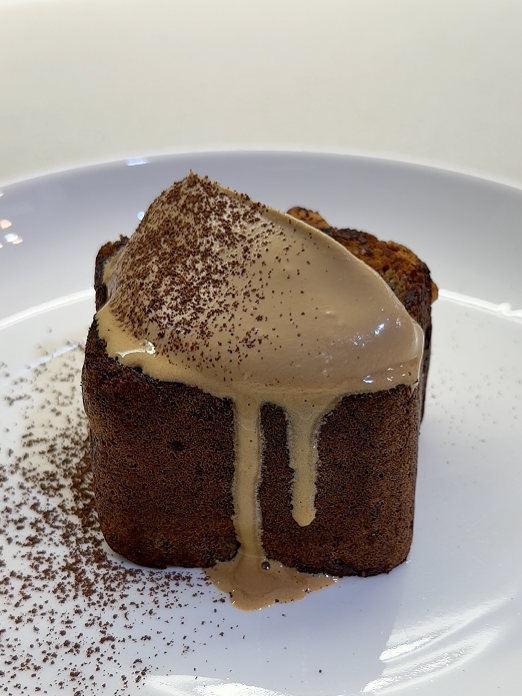
巧克力古早蛋糕 Chocolate Taiwanese Castella Cake
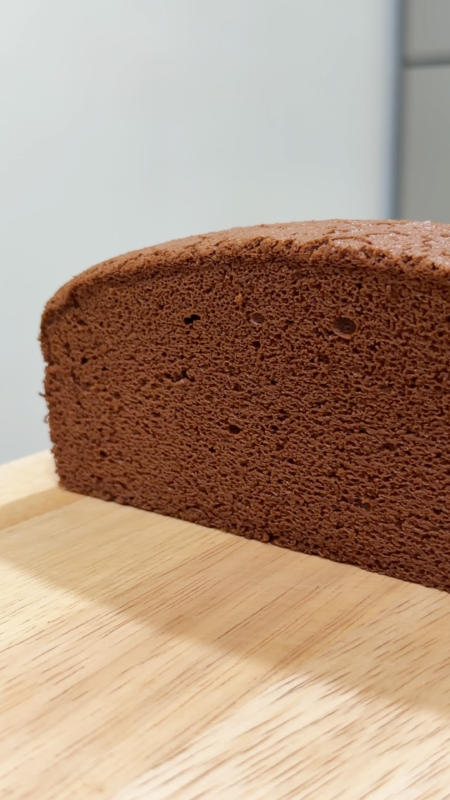
但凡我做甜食,巧克力口味都会是首选,而且可可味都是给它满上,非常浓郁的类型!如果你是巧克力控,别错过了今天这个巧克力古早蛋糕的食谱哟!古早蛋糕曾经在几年前在我国和邻国刮起大风,虽然现在已经不再站在甜品小吃界的顶峰,但我觉得这款蛋糕和戚风一样,不怎么华丽,但却是个永远不退流行的甜食!一般上我很少在家里做蛋糕给自己吃,比如说奶油蛋糕,做一颗小颗的,付出的时间太多不值得,做大颗的呢,又吃不完,但古早蛋糕就另当别论了,不仅操作和配料都很简单,而且松软不甜腻的类型很合我的胃口,一点都没有吃不完的顾虑!哇哈哈!
巧克力古早蛋糕
Jump to Recipe为什么你会喜欢这个巧克力古早蛋糕?
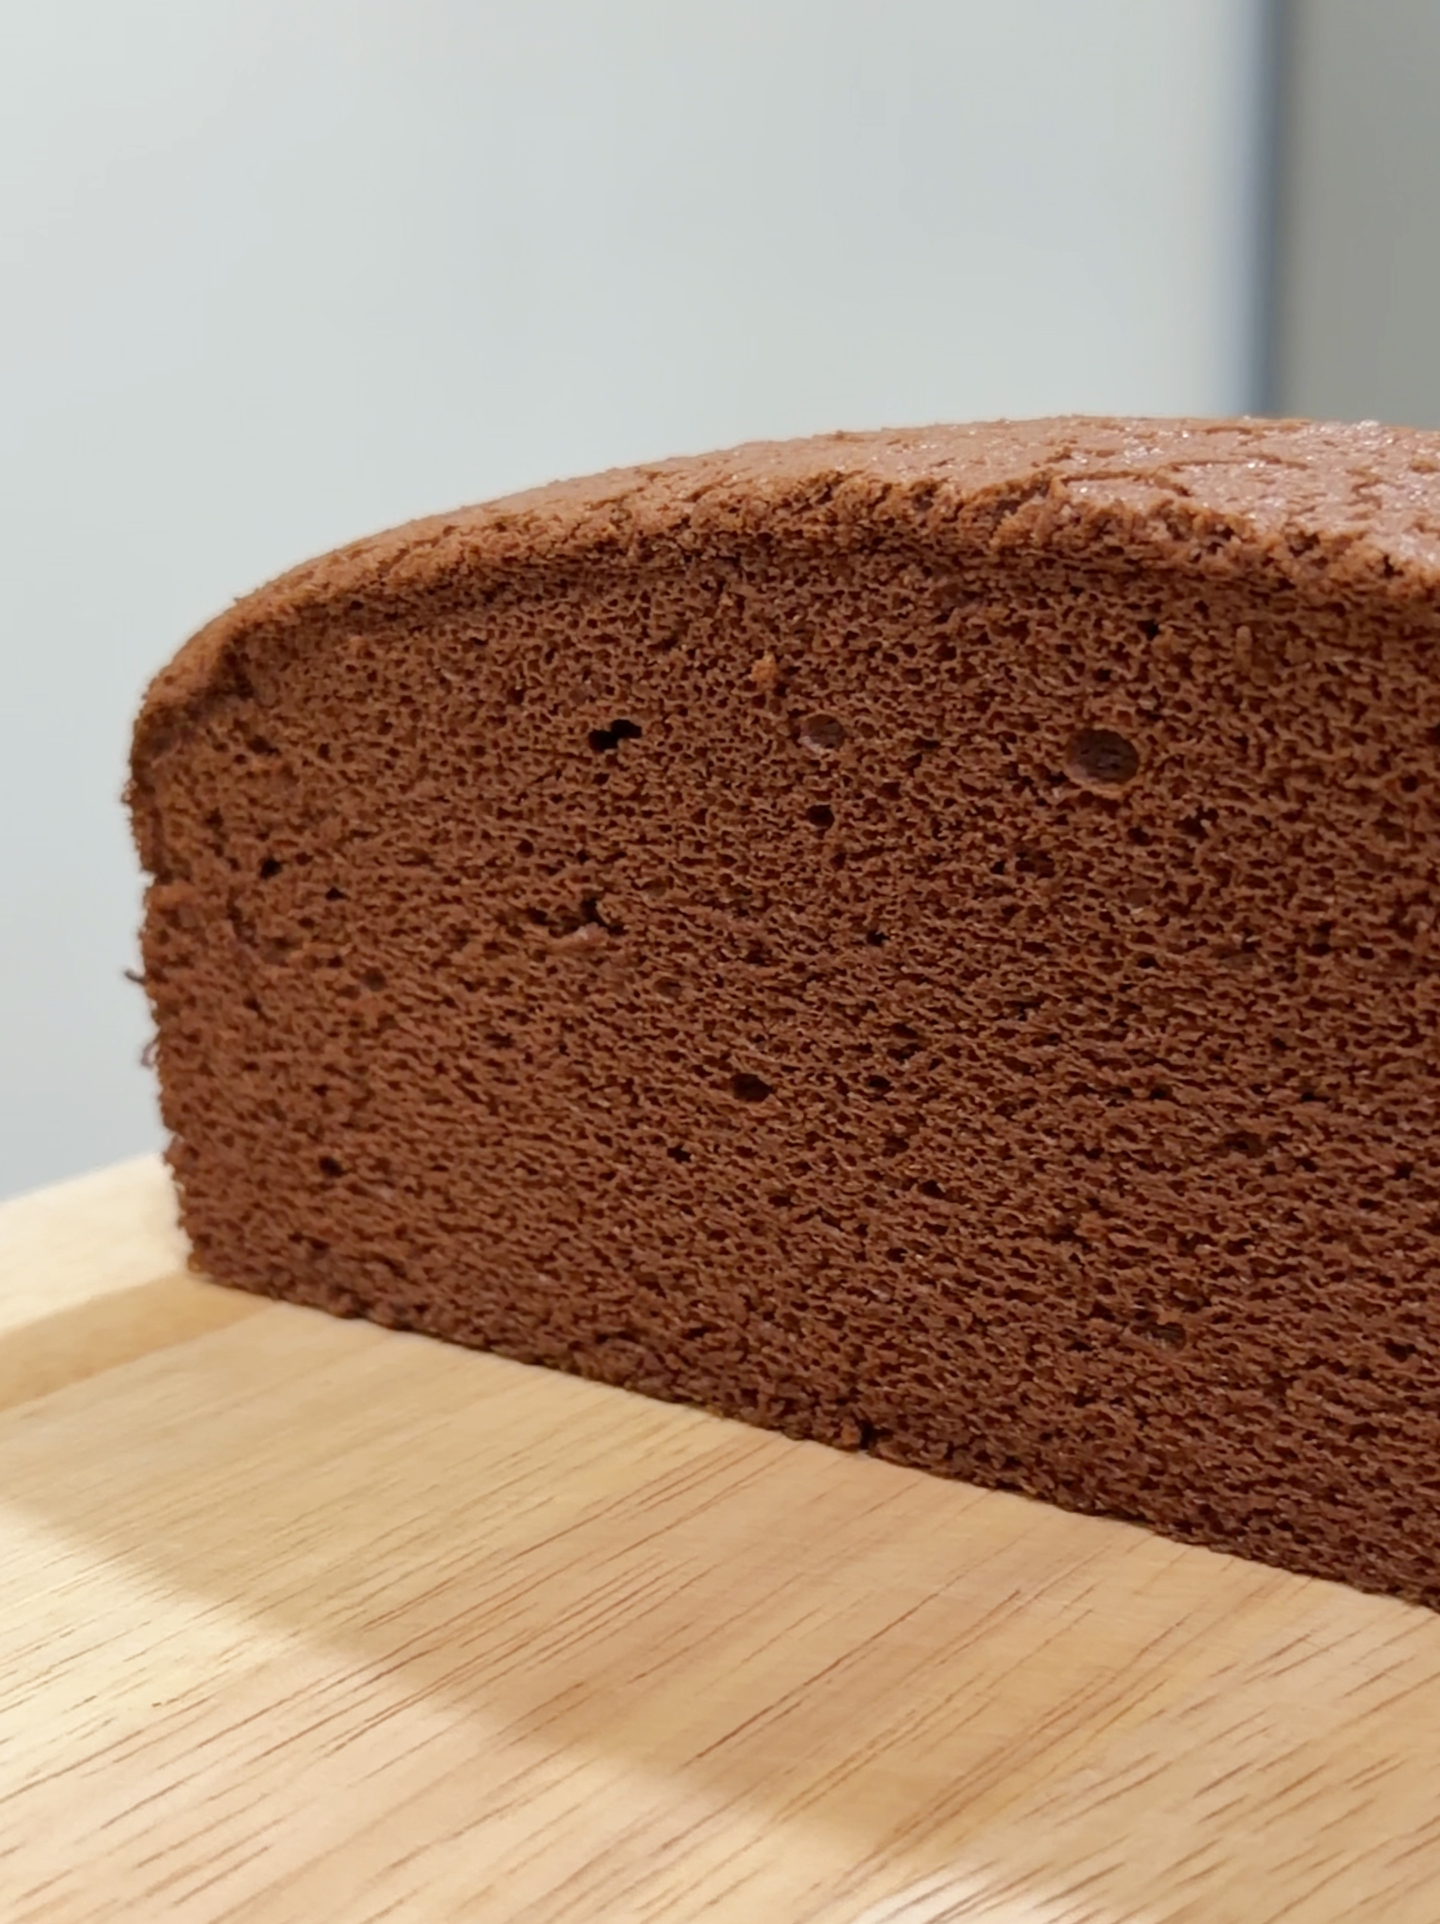
古早蛋糕看似很像戚风蛋糕,但其实口感上区别还挺大的。古早蛋糕强调的是非常湿润,但仍然轻盈且绵密的口感,而戚风蛋糕则是弹性级好,类似海绵的空气感是它的首要特征。今天这个食谱我反复修改了很多次,保留了我写这个食谱的初衷,就是想要一个外面较难买到的浓郁可可味的古早!而且现在这个配比非常稳定,冷却后不回缩,也不塌陷,放冰箱几天都依然和当天做好一样那么湿润哦!
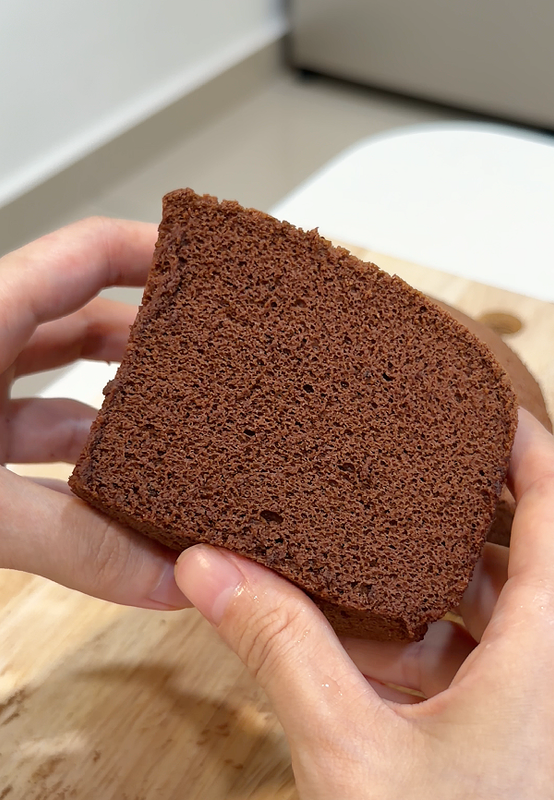
所需要的食材
蛋白霜 :
- 68g 糖
- 168g 蛋白
- 1g 盐
- 5g 米醋
面糊 :
- 50g 低筋面粉
- 20g 可可粉
- 45g 玉米油
- 75g 蛋黄
牛奶:
- 75g 全脂牛奶
- 3g 即溶咖啡粉
- 1g 浓缩香草精
模具:7寸蛋糕模具
备料重点
鸡蛋——
鸡蛋的重量其实不用太准确,不管是蛋黄还是蛋白,加减 5g 都不是问题。写上克数是为了让大家有个更好的参考价值,因为我只用了4颗蛋,不过是Size A, 所以如果你家的蛋和食谱上写的相差较远,那可能需要补半颗至一颗。
新手宝宝建议一开始就把蛋白和蛋黄分离,先冷冻蛋白。冷冻过的蛋白由于温度较低,打发的时间也相对需要更久一丢丢,但是打出来的蛋白霜会比较稳定,蛋白霜打得好了,基本上这蛋糕就没有失败的可能。
装蛋白和打蛋白的碗和所有器具,都必须要无水无油哦。新鲜、冷藏的鸡蛋会比较容易对蛋黄进行分离不破裂。如果你的蛋黄不小心破了,那就最好是把这鸡蛋留给自己吃吧,碗擦干净,重新来过,免得其他东西都准备好了,但是蛋白霜打不起来,前功尽弃呢~
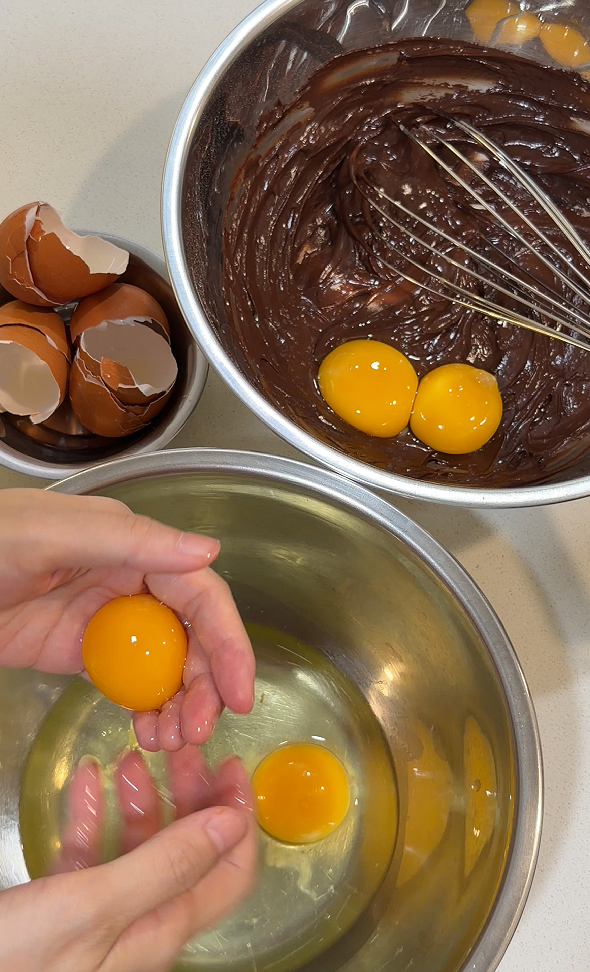
可可粉——
收到评论区有个小伙伴问我能否用compound chocolate 代替可可粉,其实不可以哦~ 巧克力和可可粉的性质不同,无法和其他材料完美乳化融合的话,会导致面糊油水分离,所以要做可可口味的蛋糕,可可粉是必须的,而且可可粉必须要是无糖可可粉哦~
巧克力块或者巧克力粒可以作为额外的馅料,这样就是双重巧克力古早蛋糕了!比如说面糊倒一半进模具里后,撒上巧克力粒,或者切碎的巧克力块,再把剩余的面糊铺盖上去;也可以把巧克力粒最后撒在面糊表面,不过放表面的话,compound chocolate 比较不合适,容易烧焦,需要用couverture chocolate (真可可脂巧克力)。
牛奶——
刚刚提到备料的时候第一件要做的事是把蛋白和蛋黄分离,接着第二件事就是把牛奶秤起来。
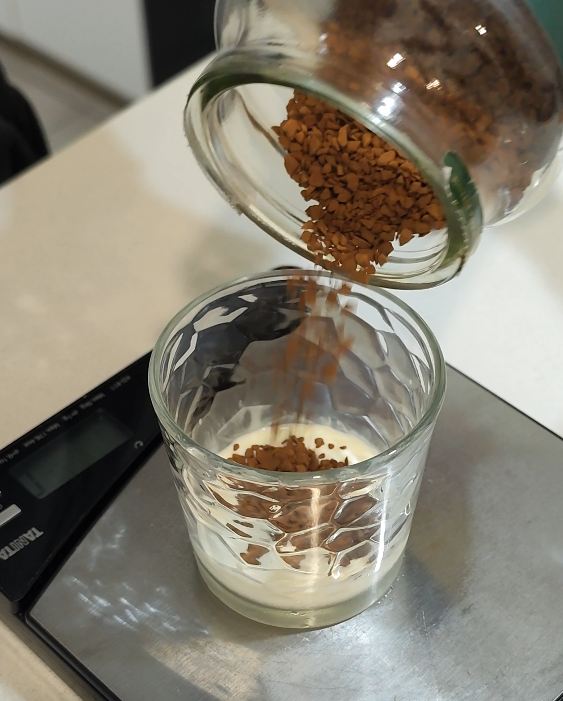
除了让牛奶稍微退回室温以外,还有需要把即溶咖啡粉浸泡至融化,以方便后续的操作。我用的是freeze dried coffee 颗粒比较大,在冷液体里没那么快融化,也不合适把牛奶加热,免得面糊和蛋白霜的温度相差太大导致消泡,所以记得要提早把牛奶称好哦~
牛奶的选择最好是全脂牛奶哦,它和脱脂牛奶还是有区别的。全脂牛奶不但奶味更足,而且里面含有的油脂也是帮助乳化的成员之一,就像蛋黄那样。
米醋——
米醋的作用是稳定蛋白霜,很多烘焙师会选用塔塔粉(Cream of tartar powder) 或者罐装柠檬汁,我家没有这些,新鲜的柠檬也不是我常备的东西,所以米醋是我最常用的选择。如果你有以上说的随便哪一种食材,都可以用来代替米醋哦~
油脂——
油脂的部分虽然首选是玉米油,但也是可以用其它无色无味的植物油代替的,比如说葵花籽油、菜籽油、大豆油。牛油的话比较不建议,因为这款古早蛋糕也很适合冷藏之后吃,但如果用的是牛油,冷藏后油脂会凝固,蛋糕的口感或许比较不理想哦~
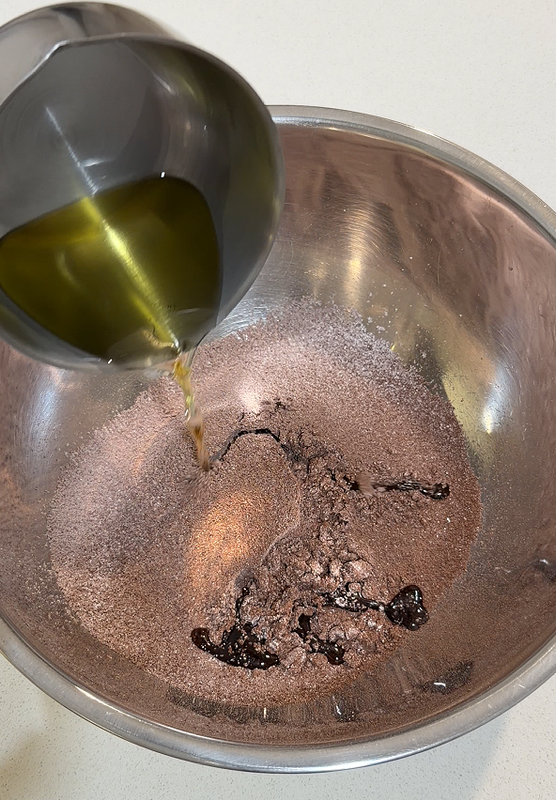
盐、咖啡、浓缩香草精——
盐、咖啡、浓缩香草精,都是让这蛋糕吃起来更香的小秘密,虽然可以选择不放,但既然做了,何不把它做到最好呢?
盐在这里扮演的角色和在其它甜品里一样,虽然只是非常非常少的占比,却可以让甜品吃起来更加顺口,也减低了腻重感,就像是奶茶上的鲜甜口奶盖一样。
这是巧克力口味的古早蛋糕,那为什么还要加咖啡呢?加咖啡不是为了让它变成摩卡(mocha) 口味的蛋糕哦,而是为了增添风味。一丢丢的咖啡香可以衬托出更浓郁的可可风味,让你吃了回味无穷!
而香草精也一样,如果你有注意到,其实不管是巧克力粒,巧克力块,即溶即饮的巧克力粉,或者市面上任何巧克力口味的零食,其实90%以上都会添加香草的成分,因为香草和可可本来就是天生一对!我这样说你能理解吧?哈哈!我用的是浓缩版的香草精(vanilla extract),如果你用的是普通香草精(vanilla essence),那可以放2g哦~
~ 视频教程 ~
料理步骤
- 首先,准备磨具,内层铺上烘焙纸,如果是活低的磨具,外层需要再包两层铝箔纸,防止进水。
- 接着让烤箱开始预热。
- 把蛋白和蛋黄分离,蛋白放冷冻备用。
- 混合牛奶,咖啡,和香草精,放一旁备用。
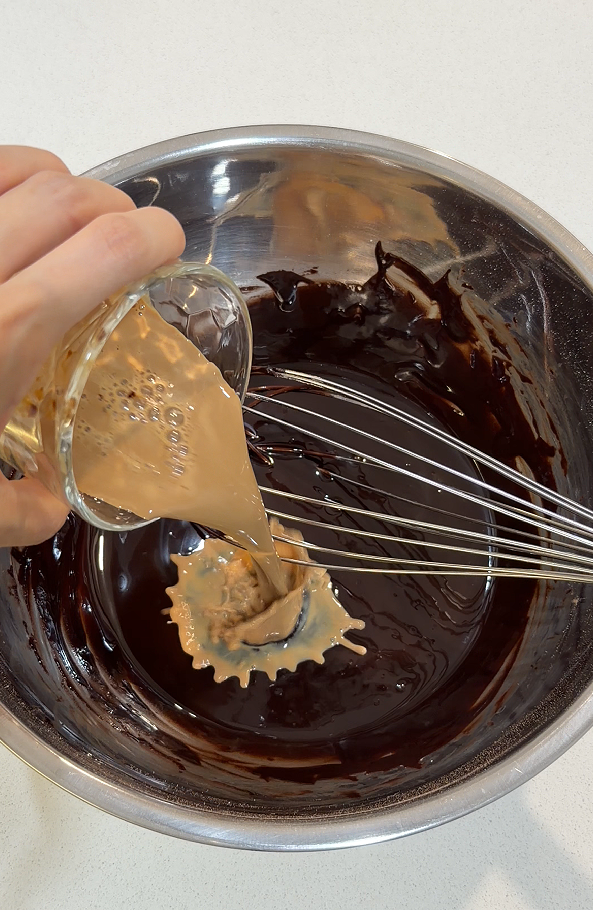
- 把低筋面粉和可可粉过筛,加热玉米油至75C-80C,一次性倒完进面粉里面,搅拌至顺滑无颗粒。
- 倒入所有的牛奶(接近室温),再混合均匀,也确保无面糊疙瘩。
- 然后加入所有的蛋黄,再次搅拌至完全顺滑,用保鲜膜保湿,放一旁备用。
- (烤蛋糕时需要热水,没有热水机的话在打发蛋白之前可以开始煮一锅水,做好面糊时应该就差不多沸腾了)
- 现在来打发蛋白,这时候蛋白应该有一部分已经冷冻成冰碴了,一次性加入所有的白糖,盐和白醋。
- 开始打蛋白前,稍微用打蛋器的蛋抽,手动破冰并搅拌一下,以免冰碴到处飞溅。
- 全程用中速打发,打发的过程不要着急用手划大圈圈,这样会产生大气泡。
- 就像在视频里显示那样,打蛋器是中速,但手移动缓慢一点,这样打出来的蛋白会很细腻哦。
- 中途可以用干净的刮刀刮一下边边,确保所有蛋白都有被打到。
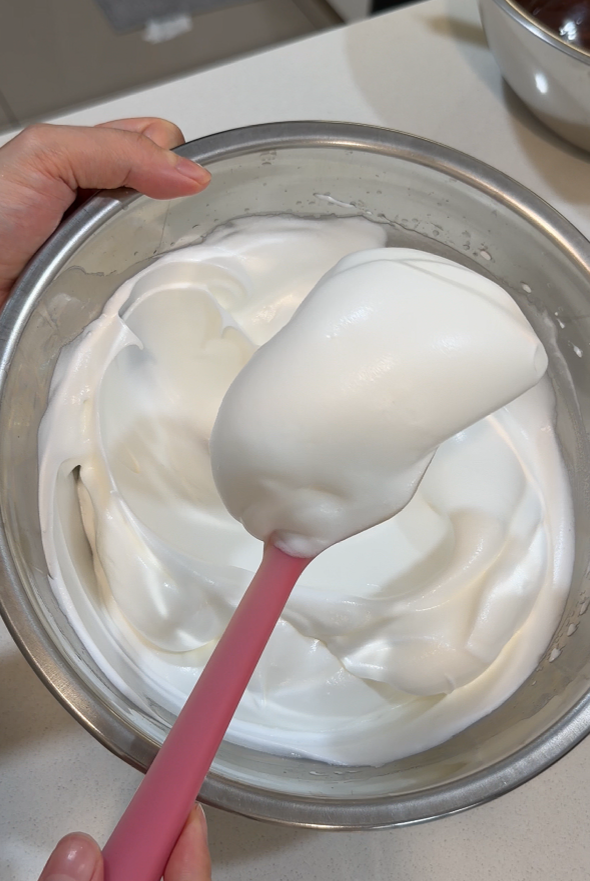
- 把蛋白霜打到soft peak,看起来是细腻有光泽的,提起来有个有弹性的弯钩就可以咯(参考视频)。
混合面糊
- 把大约1/4的蛋白霜混合到先前做好的面粉糊里,可以用蛋抽来混合,但不需要过度搅拌。
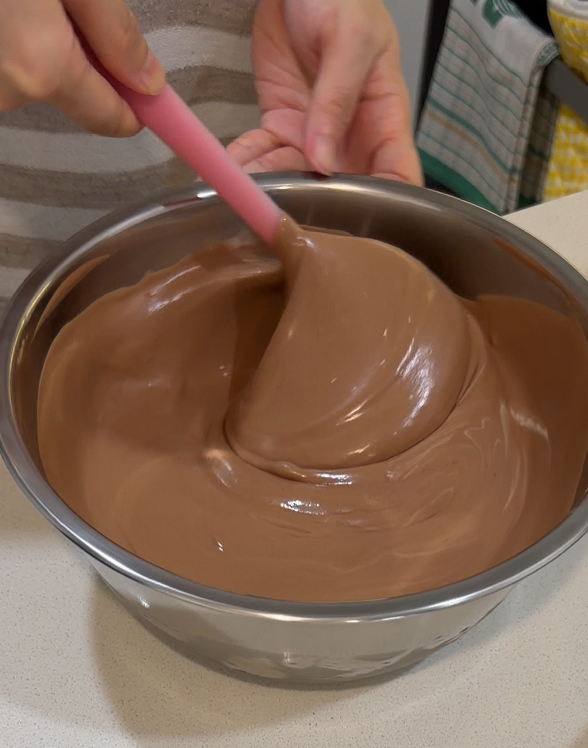
- 再把混合好的面粉糊全部倒回蛋白霜里,也是用蛋抽混合,但是沿着碗,用同一个方向翻拌。
- 大致上看不见蛋白霜后,用刮刀抄底,把碗的边边和底部都刮一遍,确保没有遗留的蛋白霜。
- 从高处把面糊倒入摸具里,用一支筷子或是竹签划散大气泡,再震两下,震出大气泡。
水浴法烘烤
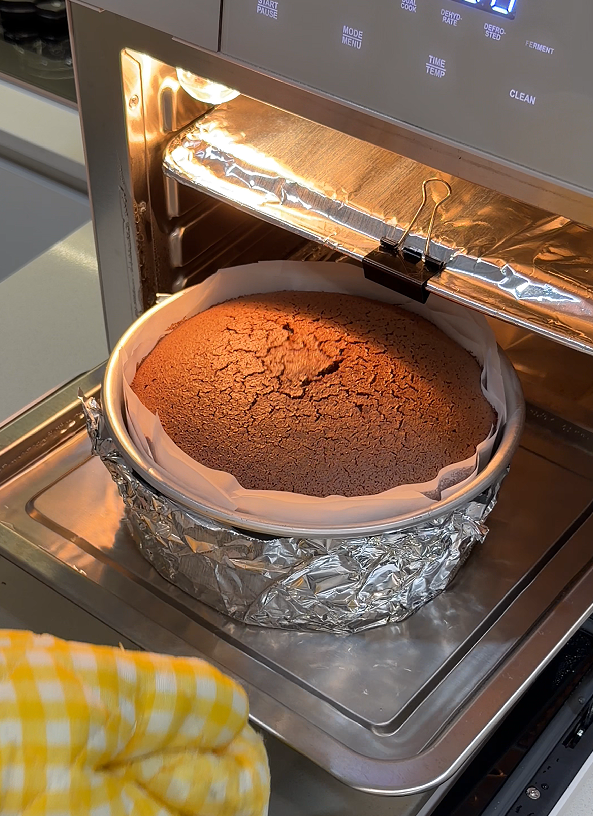
- 烤盘至少放上一厘米的热水,再放入装好面糊的蛋糕磨具。
- 无法关掉风炉模式的话,可以和我一样在模具上方盖层锡纸,避免直接风干。
- 平炉模式,140C 烤 20分钟,再转为130C 烤50分钟。
- 出炉立刻脱膜,撕下周围的烘焙纸,可以立即趁热开吃,剩下可以冷藏,冷藏之后也很好吃哦!
烫面法
把玉米油加热后来烫面粉的主要目的有两个,一是让面粉糊化,降低面筋生成的概率;二是糊化的面粉会有更好的吸水和保湿的效果,可以让蛋糕吃起来更加湿润,也能延迟蛋糕老化,冷藏几天都不会变得干硬。
食材 Ingredients
Equipment
步骤 Method
- 首先,准备磨具,内层铺上烘焙纸,如果是活低的磨具,外层需要再包两层铝箔纸,防止进水。
- 接着让烤箱开始预热。
- 把蛋白和蛋黄分离,蛋白放冷冻备用。
- 混合牛奶,咖啡,和香草精,放一旁备用。
- 把低筋面粉和可可粉过筛,加热玉米油至75C-80C,一次性倒完进面粉里面,搅拌至顺滑无颗粒。
- 倒入所有的牛奶(接近室温),再混合均匀,也确保无面糊疙瘩。
- 然后加入所有的蛋黄,再次搅拌至完全顺滑,用保鲜膜保湿,放一旁备用。
- (烤蛋糕时需要热水,没有热水机的话在打发蛋白之前可以开始煮一锅水,做好面糊时应该就差不多沸腾了)
- 现在来打发蛋白,这时候蛋白应该有一部分已经冷冻成冰碴了,一次性加入所有的白糖,盐和白醋。
- 开始打蛋白前,稍微用打蛋器的蛋抽,手动破冰并搅拌一下,以免冰碴到处飞溅。
- 全程用中速打发,打发的过程不要着急用手划大圈圈,这样会产生大气泡。
- 就像在视频里显示那样,打蛋器是中速,但手移动缓慢一点,这样打出来的蛋白会很细腻哦。
- 中途可以用干净的刮刀刮一下边边,确保所有蛋白都有被打到。
- 把蛋白霜打到soft peak,看起来是细腻有光泽的,提起来有个有弹性的弯钩就可以咯(参考视频)。
- 把大约1/4的蛋白霜混合到先前做好的面粉糊里,可以用蛋抽来混合,但不需要过度搅拌。
- 再把混合好的面粉糊全部倒回蛋白霜里,也是用蛋抽混合,但是沿着碗,用同一个方向翻拌。
- 大致上看不见蛋白霜后,用刮刀抄底,把碗的边边和底部都刮一遍,确保没有遗留的蛋白霜。
- 从高处把面糊倒入摸具里,用一支筷子或是竹签划散大气泡,再震两下,震出大气泡。
- 烤盘至少放上一厘米的热水,再放入装好面糊的蛋糕磨具。
- 无法关掉风炉模式的话,可以和我一样在模具上方盖层锡纸,避免直接风干。
- 平炉模式,140C 烤 20分钟,再转为130C 烤50分钟。
- 出炉立刻脱膜,撕下周围的烘焙纸,可以立即趁热开吃,剩下可以冷藏,冷藏之后也很好吃哦!
小贴士 Tips
Chocolate Taiwanese Castella Cake
Whenever I make sweets, chocolate flavor is always my first choice—and I go all in on the cocoa, making it rich and intense! If you’re a true chocoholic, you won’t want to miss today’s recipe for Chocolate Castella Cake.
A few years back, this nostalgic sponge swept across Malaysia and our neighboring countries. Though it’s no longer the star of the dessert scene, I think it’s just like chiffon cake: not flashy, but forever timeless.
Honestly, I rarely bake cakes just for myself at home. Take layered cream cakes, for example—if I make a small one, the effort hardly feels worth it; if I make a big one, I can’t finish it. But Castella cake is a whole different story. The method and ingredients are simple, the texture is soft yet never cloying, and it suits my taste perfectly. No worries about leftovers here—wahaha!
Taiwanese chocolate castella cake
- Why would you love this castella cake?
- All you need
- Ingredient notes
- Egg
- Cocoa powder
- Full cream milk
- Rice vinegar and substitution
- Fat
- Salt, coffee, vanilla
- Steps of making
- Tang Mian method
- What I Use
Why would you love this Chocolate Castella?
Taiwanese castella cake may look a lot like chiffon, but the texture is actually quite different. Castella emphasizes a moist yet still light and velvety crumb, while chiffon is all about that airy and sponge‑like bounce.
I’ve adjusted this recipe many times, but I held onto my original intention: to create a rich cocoa flavor Castella that’s hard to find in stores. The current formula is wonderfully stable—no shrinking, no collapsing after cooling—and even after a few days in the fridge, it stays just as moist as the day it was baked!
All you need
Meringue:
- 68g Sugar
- 168g Egg white
- 1g Salt
- 5g Rice vinegar
Batter:
- 50g Cake flour
- 20g Cocoa powder
- 45g Corn oil
- 75g Egg yolk
Milk:
- 75g Full cream milk
- 3g Instant Coffee powder
- 1g Vanilla extract
Mold: 7 inches Cake mold
Ingredients notes
Eggs——
The exact weight of the eggs doesn’t need to be too precise—whether yolks or whites, a difference of about 5g is no big deal. I list the grams mainly as a reference, since I used just 4 Size A eggs. If the eggs you have differ quite a bit from what’s written, you may need to add half to one extra egg.
For beginners, I recommend separating the whites and yolks right from the start, and freezing the whites. Chilled egg whites take a little longer to whip, but the meringue turns out more stable. And once your meringue is well‑beaten, the cake is practically fail‑proof.
Remember: the bowl and utensils for whipping must be completely free of water and oil. Fresh, refrigerated eggs make it easier to separate the yolks cleanly. If a yolk breaks, it’s best to save that egg for another use, wipe the bowl dry, and start again—otherwise you risk preparing everything only to find the meringue won’t whipped up, wasting all your effort.
Cocoa powder——
Someone in the comment section asked if compound chocolate can replace cocoa powder—actually, it can’t. Chocolate and cocoa powder behave differently, and if they don’t emulsify properly with the other ingredients, the batter will split. So for cocoa‑flavored cake, cocoa powder is essential—and it must be unsweetened cocoa powder.
That said, chocolate chunks or chips make a wonderful extra filling, turning it into a double‑chocolate Castella cake! For example, pour half the batter into the pan, sprinkle in chocolate chips or chopped chunks, then cover with the remaining batter. Or you can scatter chocolate chips on top at the end. Just note: if you’re adding them on the surface, compound chocolate isn’t ideal—it tends to burn. Use couverture chocolate (made with real cocoa butter) instead.
Milk——
After separating the egg whites and yolks, the next step is to measure out the milk.
Besides letting the milk come back to room temperature, you’ll also need to dissolve the instant coffee powder ahead of time. I use freeze‑dried coffee, which has larger granules that don’t melt quickly in cold liquid. Heating the milk isn’t ideal, since a big temperature difference between the batter and the meringue could cause deflation.
As for the milk itself, whole milk is best. Compared to skim, it has a richer flavor, and the fat content helps with emulsification—just like egg yolks do.
Rice vinegar——
The role of rice vinegar here is to stabilize the meringue. Many bakers prefer cream of tartar powder or bottled lemon juice. I don’t usually keep those on hand, and fresh lemons aren’t something I stock regularly either—so rice vinegar is my go‑to choice.
If you happen to have any of the above ingredients, feel free to use them as substitutes for rice vinegar. They’ll all work just fine.
Fat——
While corn oil is the first choice, you can also substitute other neutral, flavorless vegetable oils such as sunflower, canola, or soybean oil. Butter, however, isn’t recommended. This cake is especially nice served chilled, but if you use butter, the fat will solidify in the fridge and the texture may turn out less than ideal.
Salt, coffee, vanilla——
Salt, coffee, and concentrated vanilla extract are the little secrets that make this cake extra fragrant. Technically, you could skip them—but since you’re already baking, why not make it the best it can be?
Salt plays the same role here as in other desserts: though the amount is tiny, it rounds out the flavor and cuts through heaviness, much like the sweet‑savory milk foam on bubble tea.
And why add coffee to a chocolate cake? Not to turn it into mocha flavor, but to deepen the flavor. Just a hint of coffee aroma enhances the richness of cocoa, leaving a lingering, irresistible aftertaste.
Vanilla works the same magic. If you’ve noticed, nearly all chocolate products—chips, bars, instant cocoa mixes, or snacks—contain vanilla, because cocoa and vanilla are natural soulmates. I’m using concentrated vanilla extract; if you’re using regular vanilla essence, add about 2g.
~ Video tutorial ~
Steps of making
- Line the mold with baking paper. If using a base-removable cake mold, wrap the outside with two layers of foil to prevent water from seeping in.
- Get your oven warming while you prep the batter.
- Separate the eggs, and whites go into the freezer for later use.
- Combine milk, coffee, and vanilla extract. Set aside.
- Sift cake flour and cocoa powder together. Heat corn oil to 75–80 °C, pour it all in at once, and stir until smooth and lump‑free.
- Then pour in all the room‑temperature milk, mix until silky with no clumps.
- Add the yolks and incorporate until smooth. Cover with cling film to keep moist and set aside.
- (You’ll need hot water for baking later. If you don’t have a hot water dispenser, start boiling a pot before whipping the whites—it should be ready by the time the batter is done.)
- By now, part of the whites should have frozen into shards. Add all the sugar, salt, and vinegar at once.
- Break up the ice gently with your whisk before start beating, to avoid splattering.
- Whip at medium speed throughout. Move the whisk slowly to avoid large bubbles.
- Scrape down the sides with a clean spatula midway.
- Beat until soft peaks: glossy, fine, with a flexible hook when lifted.
Combine mixtures
- Mix about ¼ of the meringue into the flour batter with a whisk—no need to over‑stir.
- Pour this back into the remaining meringue. Fold gently with a whisk in one direction.
- Once no streaks remain, use a spatula to scrape the sides and bottom to ensure no meringue is left unmixed.
- Pour the batter into the mold from a height. Use a chopstick or skewer to break large bubbles, then bang the mold lightly to release air pockets.
Bake in hot water bath
- Place the cake mold in a tray with at least 1 cm of hot water.
- If you can’t turn off the convection fan, use a foil to cover the top of the cake mold (like in the video) to prevent direct drying.
- Use convectional mode : bake at 140 °C for 20 minutes, then lower to 130 °C for 50 minutes.
Finish
- When done baking, remove from oven, unmold immediately, and peel off the baking paper from the side.
- Enjoy warm, or chill in the fridge—this cake stays deliciously moist even after cooling.
Cook‑Flour Method (Tang mian method)
Heating corn oil and pouring it over the flour serves two main purposes:
- Improved moisture retention Gelatinized flour absorbs and holds water more effectively, resulting in a cake that tastes extra moist and stays fresh longer. Even after a few days in the fridge, it won’t dry out or harden.
- Gelatinizing the starch This reduces gluten formation, giving the cake a softer, more tender texture.
Full Printable Recipe
食材 Ingredients
Equipment
步骤 Method
- Line the mold with baking paper. If using a base-removable cake mold, wrap the outside with two layers of foil to prevent water from seeping in.
- Get your oven warming while you prep the batter.
- Separate the eggs, and whites go into the freezer for later use.
- Combine milk, coffee, and vanilla extract. Set aside.
- Sift cake flour and cocoa powder together. Heat corn oil to 75–80 °C, pour it all in at once, and stir until smooth and lump‑free.
- Then pour in all the room‑temperature milk, mix until silky with no clumps.
- Add the yolks and incorporate until smooth. Cover with cling film to keep moist and set aside.
- (You’ll need hot water for baking later. If you don’t have a hot water dispenser, start boiling a pot before whipping the whites—it should be ready by the time the batter is done.)
- By now, part of the whites should have frozen into shards. Add all the sugar, salt, and vinegar at once.
- Break up the ice gently with your whisk before start beating, to avoid splattering.
- Whip at medium speed throughout. Move the whisk slowly to avoid large bubbles.
- Scrape down the sides with a clean spatula midway.
- Beat until soft peaks: glossy, fine, with a flexible hook when lifted.
- Mix about ¼ of the meringue into the flour batter with a whisk—no need to over‑stir.
- Pour this back into the remaining meringue. Fold gently with a whisk in one direction.
- Once no streaks remain, use a spatula to scrape the sides and bottom to ensure no meringue is left unmixed.
- Pour the batter into the mold from a height. Use a chopstick or skewer to break large bubbles, then bang the mold lightly to release air pockets.
- Place the cake mold in a tray with at least 1 cm of hot water.
- If you can’t turn off the convection fan, use a foil to cover the top of the cake mold (like in the video) to prevent direct drying.
- For a conventional oven (without a fan mode): bake at 140 °C for 20 minutes, then lower to 130 °C for 50 minutes.
- When done baking, remove from oven, unmold immediately, and peel off the baking paper from the side.
- Enjoy warm, or chill in the fridge—this cake stays deliciously moist even after cooling.
小贴士 Tips
声明 Disclosure:
以下的链接会带你到 Shopee,方便查看真实产品。请大家务必货比三家哦,有时候线下 market 会更便宜!如果你通过链接购买,我可能会获得少量佣金,作为支持阿琴继续创作的一小部分❤️,但不会增加你的费用哦~ 我只推荐自己实际使用并认可的产品,所有推荐均基于真实体验,也是阿琴长期复购的厨房调料,请放心参考!
The links below will take you to Shopee, making it easy to check out the actual products. Please do compare prices — sometimes local markets can be cheaper! If you purchase through them, I may earn a small commission ❤️ — a tiny sprinkle of support that fuels more recipes. This won’t add any extra cost for you. I only recommend products I personally use and trust; these are items I’ve repurchased many times, so you can be confident they’re truly my reliable picks.
我的好物分享 What I Use
冻干即溶咖啡Moccona10, Freeze Dried Instant Coffee Moccona 10