鳞片炸鸡 Flaky Fried Chicken Leg
你们有没有跟我一样,每一次吃KFC的时候总是很好奇,炸鸡外壳的鳞片到底是怎么来的?在鸡肉会非常多汁的情况下,如果只是普通的平面脆壳,炸得再脆,都会很快回潮。由于鳞片没有直接接触到鸡肉,不会这么快被鸡汁浸湿,所以它们扮演着给炸鸡维持酥脆的角色~ 这个食谱一成功之后我就迫不及待跟你们分享了~ 已复刻成功的小伙伴们,举手!
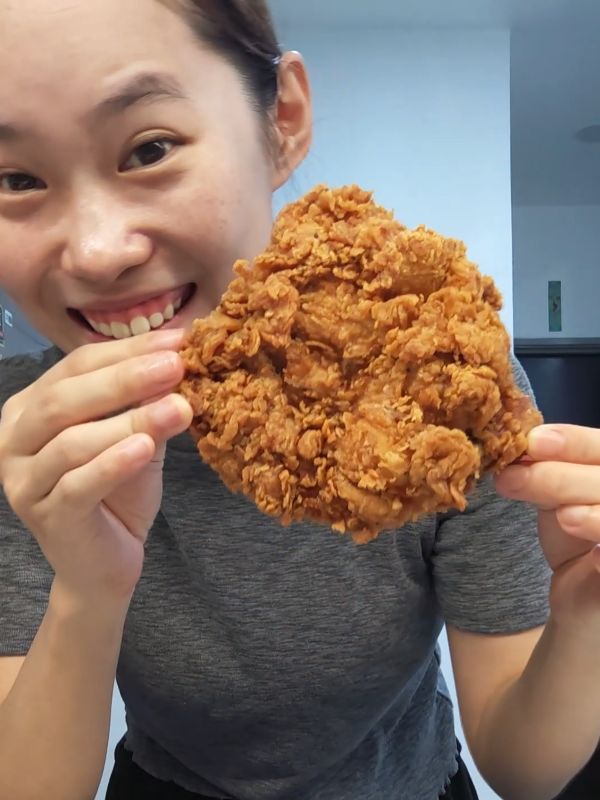
为什么你会喜欢这道菜?
谁不爱吃炸鸡?如果你不爱吃,也不会点进这个文章里来哈哈!咔呲响的外壳,多汁香甜的肉,谁能抵挡住这样的诱惑!没错你绝对可以用炸鸡来收买我,但请用优秀的炸鸡。。。
所需要的食材
腌制鸡肉(一块):
- 1/4 tsp 盐
- 1/4 tsp 咖喱粉
- 1/8 tsp 辣椒粉
- 少许白胡椒粉
- 少许鸡精
- 1/2 tsp LP sauce
- 1 tbsp 水
裹粉:
- 100g 普通面粉
- 25g 玉米粉
- 10g 马铃薯粉
- 3g 盐
- 1 tsp 黑胡椒碎
- 0.5 tsp 白胡椒粉
- 1.5 tsp 咖喱粉
- 0.5 tsp 辣椒粉(Pran brand)
- 0.5 tsp 13香
- 0.5 tsp 鸡精
- 0.5 tsp 烟熏甜椒粉
- 1/4 tsp 蒜粉
- 1/4 tsp 洋葱粉
- 0.5 tsp 泡打粉
一碗水,给鸡肉裹粉的时候用
备菜重点
鸡肉——
你当然可以单纯以盐和胡椒粉来腌汁你的鸡肉,但是如果你刚好有我写上的材料,也不妨试一试这个腌制的组合,会香许多~
鸡肉必须提前腌制至少半小时,而我的习惯都是提前一晚腌制,这样香料的味道才可以完全渗透~
如果你也腌制隔夜,油炸前记得要提早半小时让鸡肉退回室温哦~
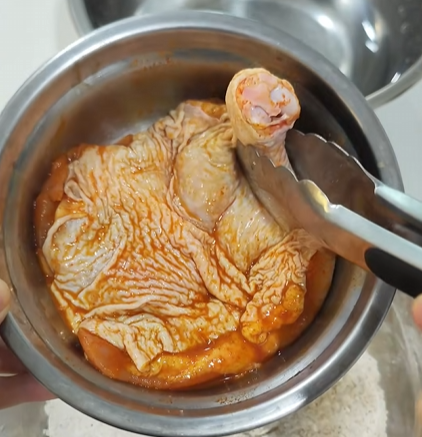
裹粉 ——
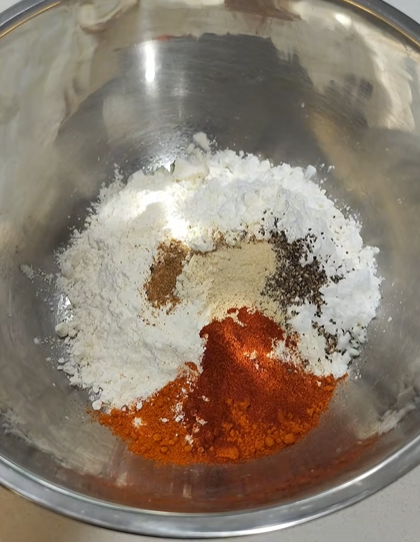
可能你会觉得这些香料粉有点多,但其实在好吃的西式炸鸡裹粉里,香料比这更复杂的,其实也很普遍。面粉本身没啥味道,靠的就是这些香料给它撑起的腰,吃起来更香,油炸之后颜色也更诱人好看。这样炸出来的炸鸡,根本不需要任何沾酱。
玉米粉和薯粉在炸物裹粉里,各自扮演着不同的角色,两者都用上才能有互补的效果~
~ 视频教程 ~
料理步骤
- 把裹粉的所有材料混合均匀
- 把鸡肉放入面粉中均匀地裹上面粉,然后抖掉多余的干粉
- 拎着鸡腿的关节处,把鸡肉浸泡在水里2-3秒
- 再放回面粉里,再次裹上粉之后,用手掌搓揉出鳞片
- 抖掉多余的干粉后,就可以看到鳞片了
- 油温160C,先炸4-5分钟定型,也让鸡7分熟
- 取出炸鸡,晾在一旁休息2分钟
- 再用180C,翻炸第二次,至外壳金黄酥脆
- 打铁要趁热,吃炸鸡也一样,
- 姐妹们,开吃啊!
食材 Ingredients
步骤 Method
- 把裹粉的所有材料混合均匀
- 提前准备好一碗水
- 把鸡肉放入面粉中均匀地裹上面粉,然后抖掉多余的干粉
- 拎着鸡腿的关节处,把鸡肉浸泡在水里2-3秒
- 再放回面粉里,再次裹上粉之后,用手掌搓揉出鳞片
- 抖掉多余的干粉后,就可以看到鳞片了
- 油温160C,先炸4-5分钟定型,也让鸡7分熟
- 取出炸鸡,晾在一旁休息2分钟
- 再用180C,翻炸第二次,至外壳金黄酥脆
- 打铁要趁热,吃炸鸡也一样,
- 姐妹们,开吃啊!
小贴士 Tips
- 想要更入味的话提前一晚腌制哦~
- 油炸前记得要提早半小时让鸡肉退回室温~
Flaky Fried Chicken Leg
Do you ever wonder, like I do, how those crispy “scales” on KFC fried chicken come to be? When the meat is extra juicy, a flat crust—even if fried to perfection—softens quickly. But the scales don’t touch the meat directly, so they resist soaking up the juices and keep the chicken crunchy. Once I nailed this recipe, I couldn’t wait to share it with you. Hands up if you’ve already tried recreating it successfully!
Flaky Fried Chicken
Why would you love this recipe?
Who doesn’t love fried chicken? If you didn’t, you wouldn’t have clicked into this post, haha! That crackling crust, the juicy, savory meat—who can resist? Yes, you could definitely bribe me with fried chicken, but only if it’s excellent fried chicken…
All you need
Chicken Marination (1 piece):
- 1/4 tsp salt
- 1/4 tsp curry powder
- 1/8 tsp chili powder
- A pinch of white pepper
- A pinch of chicken powder
- 1/2 tsp LP sauce
- 1 tbsp water
Coating:
- 100g all-purpose flour
- 25g corn flour
- 10g potato starch
- 3g salt
- 1 tsp crushed black pepper
- 0.5 tsp white pepper
- 1.5 tsp curry powder
- 0.5 tsp chili powder (Pran brand)
- 0.5 tsp 13-spice blend
- 0.5 tsp chicken powder
- 0.5 tsp smoked paprika
- 1/4 tsp garlic powder
- 1/4 tsp onion powder
- 0.5 tsp baking powder
A bowl of water (for dredging chicken)
Tips in preparing ingredients
Chicken –
Of course, you can simply marinate with salt and pepper only, but if you happen to have the ingredients I listed, give this combo a try—it would be much for tastier! The chicken needs to be marinated for at least 30 minutes, but I usually do it overnight so the spices can fully penetrate.
If you marinate overnight, remember to bring the chicken back to room temperature for half an hour before frying.
Coating –
You might think there are LOTS of spices invloved, but in good Western-style fried chicken, the seasoning is often even more complex. Flour tastes bland; it’s the spices that give it backbone, aroma, and that beautiful golden color after frying. With this coating, the chicken doesn’t need any dipping sauce at all.
Corn flour and potato starch, each plays different role in the crust’s texture, so it’s best to use both together if possible.
~ Video Tutorial ~
Steps of Cooking
- Mix all the coating ingredients evenly.
- Place the chicken into the flour mixture, coat evenly, then shake off excess dry flour.
- Holding the drumstick by the joint, dip the chicken into the water for 2–3 seconds.
- Going back to the flour mixture, coat again, then rub with your palms to form the “scales.”
- Shake off excess flour—you’ll see the scales appear.
- Oil is heated to 160°C, fry for 4–5 minutes to set the crust and cook the chicken for about 70%.
- Take out the chicken and let it rest aside for 2 minutes.
- Raise oil temperature to 180°C, fry again until the crust is golden and crispy.
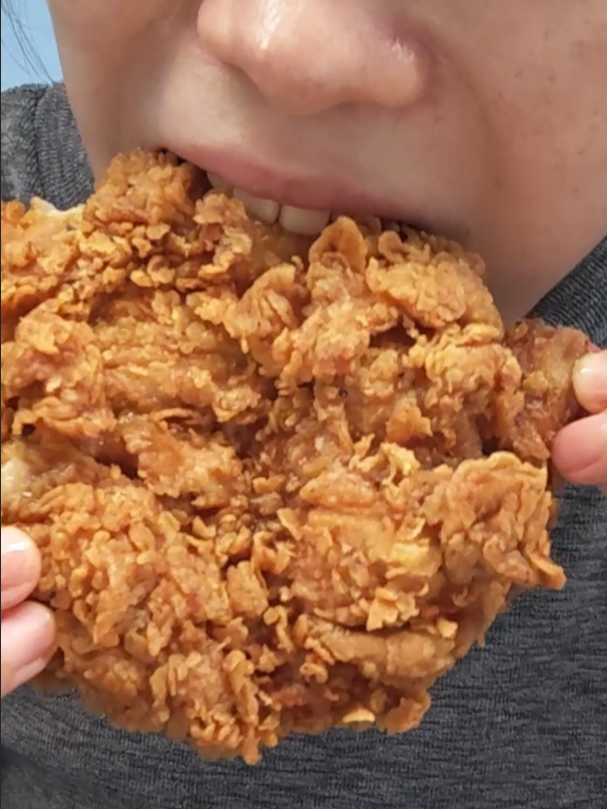
- Fried chicken is best eaten right away!
- Watch out your gum and teeth while you digging in to the freshly fried chicken, buddies!
Printable Full Recipe
食材 Ingredients
步骤 Method
- Mix all the coating ingredients evenly.
- Place the chicken into the flour mixture, coat evenly, then shake off excess dry flour.
- Holding the drumstick by the joint, dip the chicken into the water for 2–3 seconds.
- Going back to the flour mixture, coat again, then rub with your palms to form the “scales.”
- Shake off excess flour—you’ll see the scales appear.
- Oil is heated to 160°C, fry for 4–5 minutes to set the crust and cook the chicken for about 70%.
- Take out the chicken and let it rest aside for 2 minutes.
- Raise oil temperature to 180°C, fry again until the crust is golden and crispy.
- Fried chicken is best eaten right away!
- Watch out your gum and teeth while you digging in to the freshly fried chicken, buddies!
小贴士 Tips
- For best flavour, marinated the chickent overnight!
- Leave it back to room temperature for at least 30 mins before fry
声明 Disclosure:
以下的链接会带你到 Shopee,方便查看真实产品。价钱请自行货比三家, 有时候线下 market 会更便宜!如果你通过链接购买,我可能会获得少量佣金,作为支持阿琴继续创作的一小部分❤️,但不会增加你的费用哦~ 我只推荐自己实际使用并认可的产品,所有推荐均基于真实体验,也是阿琴长期复购的厨房调料,请放心参考!
The links below will take you to Shopee, making it easy to check out the actual products. Please do compare prices — sometimes local markets can be cheaper! If you purchase through them, I may earn a small commission ❤️ — a tiny sprinkle of support that fuels more recipes. This won’t add any extra cost for you. I only recommend products I personally use and trust; these are items I’ve repurchased many times, so you can be confident they’re truly my reliable picks.
我的心头好调料品牌 My go‑to ingredient brands
LP Sauce (Lee & Perrins)