花生酱 Peanut Butter
已经不记得多久没有去超市买 peanut butter 了,原因很简单——自己做的特别好吃嘻嘻 😀
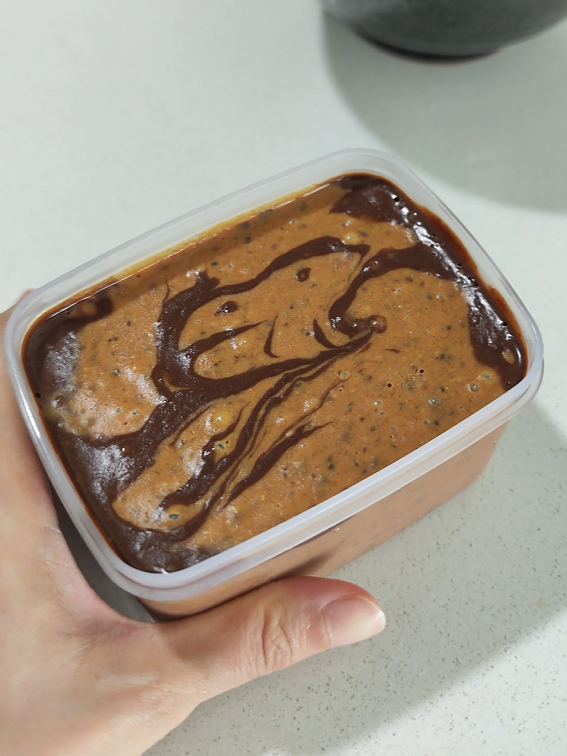
自制花生酱
Jump to Recipe为什么自制花生酱?
给自己做花生酱的最大好处——可以按自己的喜好客制化。不管是掌握甜度,混搭风味,还是添加其他食材来增加花生酱的口感和营养价值,一切都可以心想事成哦!再说了,平均一罐花生酱的价钱可以买一公斤的花生,这不就是花小钱办大事么 XD
所需要的食材
- 400g 花生 (一人份,看份量参考)
- 一撮盐
可选:
- 1 tsp 糖,或者根据喜好添加
- 适量 奇亚籽
- 适量 亚麻籽
- 1 tbsp 巧克力粒, 或者根据喜好添加
- 1 tsp 可可粉, 或者根据喜好添加
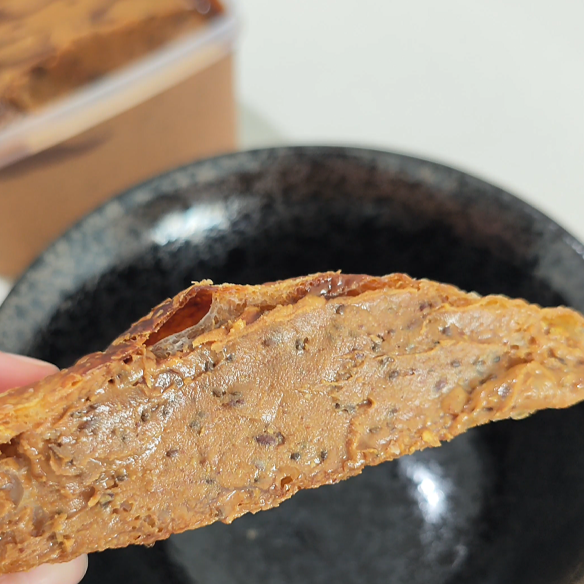
备料重点
选购花生——
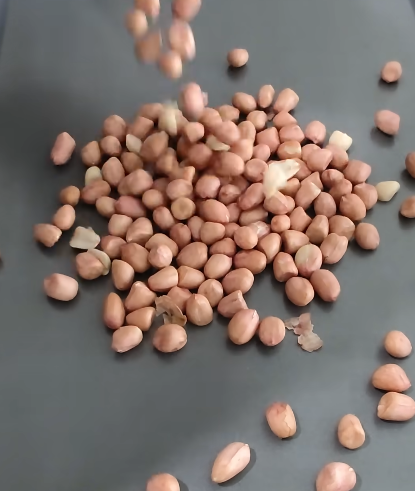
选购花生时,建议大家选择完整的花生仁,最好是带皮的,而不是花生碎。我用过中国和印度的带皮花生,我觉得各有优势,中国的较甜,印度的较香,两者都很适合做花生酱,而制作这个视频教程的时候用的花生是产自中国的。
虽然花生碎可能对搅拌机比较友好,但不推荐的原因有二:
- 花生碎的保质期本身就比完整的花生仁更短,因为他们被磨碎了,接触空气的面积更大,所以氧化更快。如果你有注意到,通常花生碎的包装都是真空包装,而生花生仁却可以赤裸裸地放在超市的箱子里任人挑选,对吧?所以如果使用花生碎来做花生酱的话,恐怕你的花生酱会更快变质,更快有油耗味哦~
- 整颗的花生仁更便于我们把坏的挑选出来,或者是说,在购买的时候更加好辨识这花生的品质是否良好,因为肉眼非常容易看见这花生的颜色是否有异样。但花生碎就另当别论了,即便是一颗长了霉的花生被混合在里面一起搅打成碎碎了,我们也几乎不可能察觉得到~
花生仁,洗还是不洗?
其实我并不建议大家洗花生,因为市售的生花生是干燥物,遇水会快速吸收。如果清洗过后没有适当烘烤至全干,会大大增加花生酱长黄曲霉素的风险。
如果你真的觉得超市里让大家自由选称的花生很脏,那可以购买独立包装的花生仁,那就应该没那么多灰尘吧~ 如果你非洗不可,那一定要低温加长时间烘焙至完全干燥,再升温让花生上色哦~
花生皮,去还是不去?
不去,花生皮富含比花生仁本身还更丰富的膳食纤维和抗氧化成分,去掉实在可惜。只要用145C-150C 的温度慢烤花生,花生皮都不会糊,也不苦涩,这都不算什么,最重要是它给花生酱的香气大大加分,味道更加立体。再说了,省去了一个最烦人的步骤,这花生酱不吃起来更香么?嘻嘻
~ 视频教程 ~
料理步骤
- 把花生放进预热好的烤箱,145C-150C,风炉模式,烤30-40分钟,或直到花生上色为止。
- 奇亚籽和亚麻籽可以一同在锅子上,中小火慢炒,直到亚麻籽开始一一爆开/会跳舞,就可以取出咯~
- 烤好的花生,静置稍微冷却5分钟。
- 5分钟之后花生应该是还非常温热,但不烫手的温度。
- 把花生放进搅拌机里,加盐,糖,并开始搅打
- 过程中只要刀片开始空转,就停下来,用刮刀刮一刮,捞一捞底部。
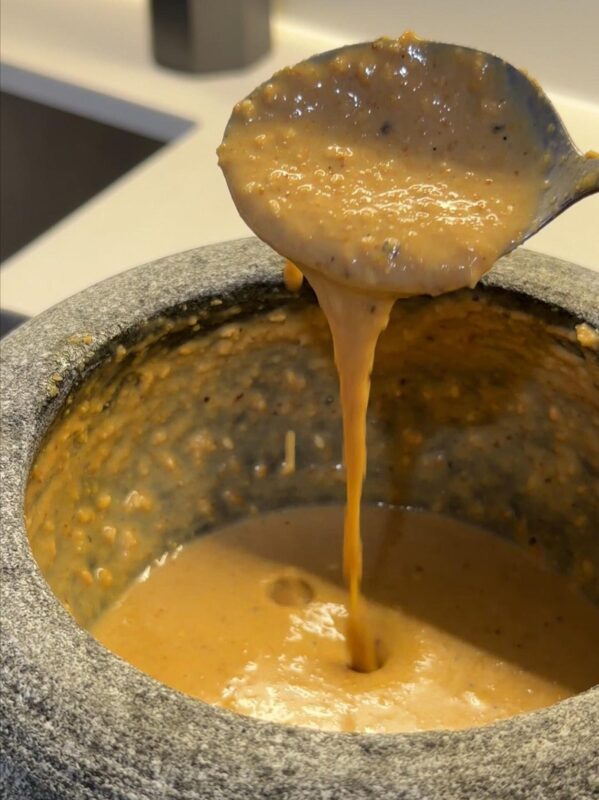
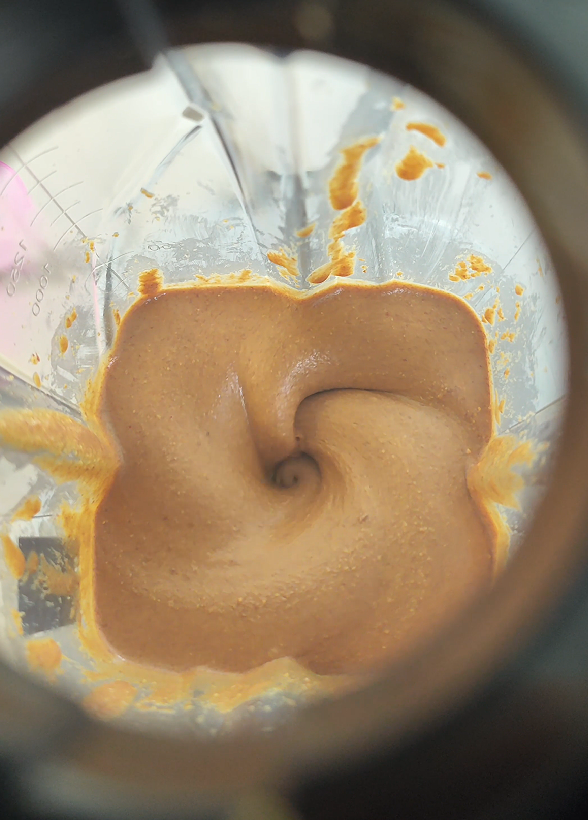
- 一直打到变成顺滑,能自动流淌的酱。
- 放入提前准备好的亚麻籽和奇亚籽,用搅拌机迅速混匀即可。
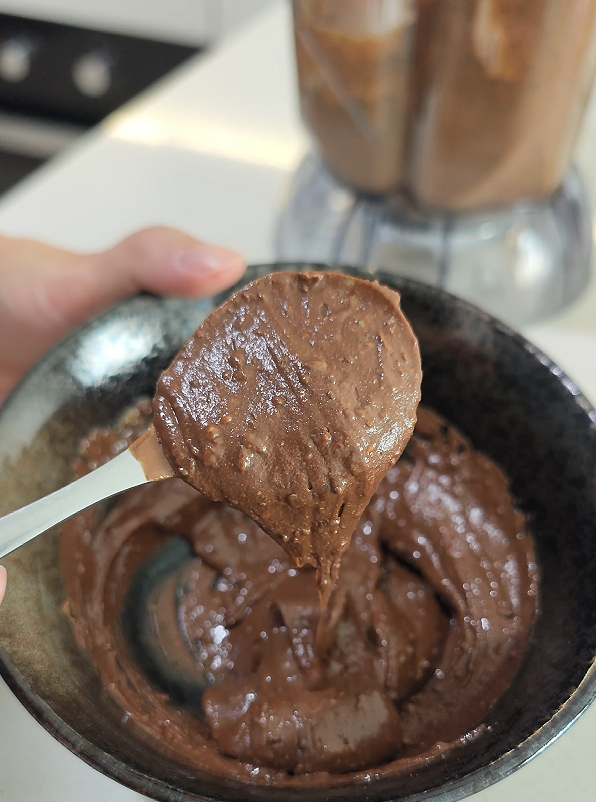
- 取一部分想要做成巧克力口味的花生酱,趁热加入可可粉和巧克力粒,搅拌至完全混合均匀
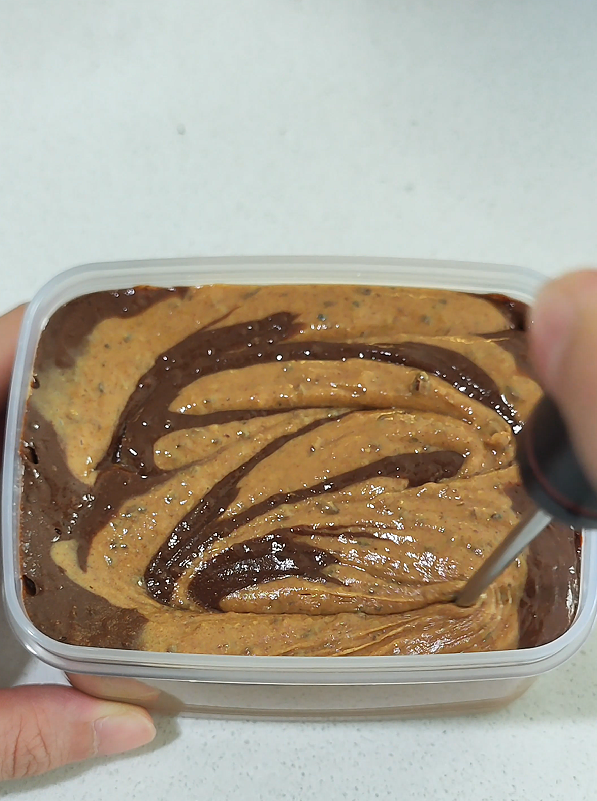
- 把原位和巧克力口味的花生酱分次加入容器中,再用尖细的工具稍微混合
- 放凉后盖上,再冷藏,就搞定咯!
阿琴小贴士
烤花生
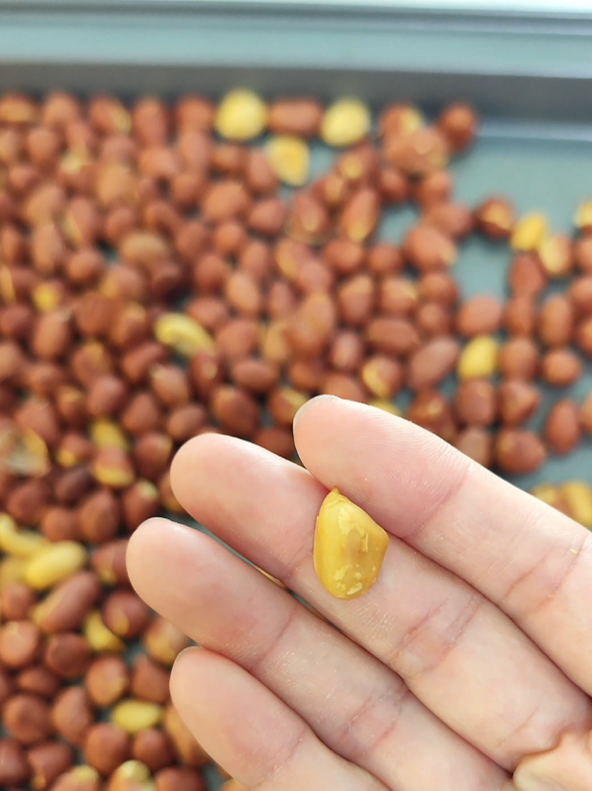
烘烤不足的花生颜色淡淡的,做出来的花生酱会看起来没那么有食欲,也会导致缺乏香气。花生必须烤到如图那样,明显上色哦~
烤好的花生千万别放至完全凉透再打,否则会更难打得顺滑哦~
搅拌机
马力较强的破壁机最合适用来做花生酱,但如果家里的搅拌机力度没这么好,也是做得成的!只是需要多一点耐心,搅打至空转,就停下来手动搅拌,再打,再停,再打,再停… …花生一定会被磨成酱的哦!
不管是用什么搅拌机,由于花生本身就是温热的,加上搅打过程中产生的摩檫力,会让电机升温。过程中可以适当让机器休息1-2分钟,避免机器过热减短寿命,借此机会也让花生油渗出来,再搅打时就会更快变成顺滑的花生酱哦!
份量参考 & 如何储存
放凉的花生酱立即密封冷藏,建议在1-2个月内食用完毕。400g 的花生酱刚好够我一个人吃一个月左右,是每天吃那种。你可以按照这个份量来估计你需要制作多少花生酱。确保在制作过程中使用的所有器具,和食用时用的匙具,都保持干燥无水份,避免霉菌滋生哦~
食材 Ingredients
步骤 Method
- 把花生放进预热好的烤箱,145C-150C,风炉模式,烤30-40分钟,或直到花生上色为止。
- 奇亚籽和亚麻籽可以一同在锅子上,中小火慢炒,直到亚麻籽开始一一爆开/会跳舞,就可以取出咯~
- 烤好的花生,静置稍微冷却5分钟。
- 5分钟之后花生应该是还非常温热,但不烫手的温度。
- 把花生放进搅拌机里,加盐,糖,并开始搅打
- 过程中只要刀片开始空转,就停下来,用刮刀刮一刮,捞一捞底部。
- 一直打到变成顺滑,能自动流淌的酱。
- 放入提前准备好的亚麻籽和奇亚籽,用搅拌机迅速混匀即可。
- 取一部分想要做成巧克力口味的花生酱,趁热加入可可粉和巧克力粒,搅拌至完全混合均匀
- 把原位和巧克力口味的花生酱分次加入容器中,再用尖细的工具稍微混合
- 放凉后盖上,再冷藏,就搞定咯!
小贴士 Tips
I can’t even remember the last time I bought peanut butter from the supermarket—the reason is simple: homemade version tastes way better, hehe 😀
Homemade Peanut Butter
- Why make your own peanut butter?
- All you need
- Ingredient notes
- Type of peanuts
- Peanuts, to wash or not to wash?
- Peanut skins, remove or keep?
- Steps of making
- Cheen’s little tips
- Toasted peanuts
- Blender
- How much to make & How to store
- What I Use
Why make your own peanut butter?
The biggest perk is customization—you can adjust the sweetness, mix and match flavors, or add extra ingredients to boost texture and nutrition, all exactly the way you like it! Plus, the price of one jar of peanut butter can usually buy you a whole kilo of peanuts. Isn’t that the perfect example of spending less for more? XD
All you need
- 400g Peanuts (for 1, refer to the quantity guide)
- Pinch of salt
Optional:
- 1 tsp Sugar, or adjust sweetness to your preference
- Chia seeds, as needed
- Flax seeds, as needed
- 1 tbsp Chocolate chips, or as needed
- 1 tsp Cocoa powder, or as needed
Ingredient Notes
Type of Peanuts——
When choosing peanuts, I recommend going for whole kernels, preferably with the skin on, rather than crushed peanut. I’ve tried peanuts from China and India, with skin on, and I think each has its own strengths—Chinese peanuts tend to be sweeter, while Indian peanuts are more fragrant. Both are excellent for making peanut butter, and in this video tutorial I used peanuts sourced from China.
Although crushed peanuts might seem friendlier to the blender, but I don’t recommend them for two reasons:
- Shorter shelf life – Crushed peanuts spoil faster than whole kernels because they’ve already been broken down, exposing more surface area to the air and accelerating oxidation. If you’ve noticed, crushed peanuts are usually vacuum-packed, while raw whole peanuts can sit openly in supermarket bins for customers to pick and weight. So if you use crushed peanuts for peanut butter, your spread will likely go rancid faster.
- Harder to spot bad peanuts – Whole kernels make it easy to identify and remove any spoiled ones, since you can see discoloration with the naked eye. But if its crushed, it’s a different story—if even one moldy peanut gets mixed in and ground up, it’s almost impossible to detect.
Peanuts, to wash or not to washed?
Honestly, I don’t recommend washing peanuts, because raw peanuts sold in supermarkets are already dried. Once they come into contact with water, they absorb it quickly. If they aren’t properly roasted until completely dry after washing, the risk of aflatoxin developing in your peanut butter increases significantly.
If you really feel that the loose peanuts sold in bulk at the supermarket are too dirty, you can opt for individually packaged kernels. But if you insist to wash them, make sure to dehydrate at a lower temperature for a longer time until fully dry, then raise the oven temperature to roast it until golden brown.
Peanut skins, remove or keep?
Nope—I don’t remove the skins! Peanut skins are actually richer in dietary fiber and antioxidants than the kernels themselves, so tossing them would be a real waste. As long as you slow‑roast the peanuts at 145–150°C, the skins won’t burn or taste bitter. But that’s not even the best part—the skins add a huge boost to the aroma, giving the peanut butter a deeper flavour. And let’s be honest—skipping the most annoying step of peeling the skins makes the peanut butter taste even better, right? Hehe.
~ Video Tutorial ~
Steps of making
- Place the peanuts in a preheated oven at 145–150°C, fan mode, and roast for 30–40 minutes, or until golden.
- Toast chia seeds and flaxseeds together in a pan over medium‑low heat until the flaxseeds start popping/dancing, then remove from the pan.
- Let the roasted peanuts cool for about 5 minutes.
- After 5 minutes, the peanuts should still be very warm but not too hot to touch.
- Transfer the peanuts to a blender, add salt and sugar, and start blending.
- Whenever the blades begin to spin without crushing anything, stop and scrape down the sides and bottom with a spatula.
- Continue blending until it becomes a smooth texture.
- Add the toasted flaxseeds and chia seeds, and blend for seconds to combine.
- For the chocolate flavour, take a portion of the warm peanut butter and mix in cocoa powder and chocolate chips until fully incorporated.
- Layer both the original and chocolate peanut butter into containers, swirling lightly with a tool to mix them up a bit.
- Let cool, cover, and refrigerate—and you’re done! 🎉
Cheen’s little tips
Toasted Peanuts
Peanuts that aren’t roasted enough will look pale, and the peanut butter made from them won’t be as appetizing—it’ll also lack of aroma. The peanuts need to be roasted until they’re clearly turned into golden colour, just like in the photo below.
And don’t wait until the roasted peanuts are completely cooled before blending—if they’re too cold, it’ll be much harder to achieve a smooth texture!
Blender
A high‑powered blender is the best choice for making peanut butter, but even if your blender isn’t that strong, it can still get the job done! You’ll just need a little more patience—blend until the blades start spinning freely, then stop, stir manually, blend again, stop again… repeat this cycle, and eventually the peanuts will definitely turn into butter!
No matter what blender you use, remember that peanuts are already warm, and the friction during blending will heat up the motor. It’s a good idea to let the machine rest for 1–2 minutes during the process. This not only prevents overheating and extends the motor’s lifespan, but also gives the peanut oil time to release—making it easier to achieve a smooth, creamy peanut butter when you blend again.
Quantity guide & How to store
Once the peanut butter has cooled, cover it and keep in chiller immediately. It’s best to finish it within 1–2 months. For me, 400g of peanut butter is just enough for about a month, while I’m eating it daily. You can use this quantity as a guide to estimate how much you’ll need to make. Be sure that all utensils used during preparation, and the spoons you use when serving it, are completely dry and free of moisture—this helps prevent mold growth.
Full Printable Recipe
食材 Ingredients
步骤 Method
- Place the peanuts in a preheated oven at 145–150°C, fan mode, and roast for 30–40 minutes, or until golden.
- Toast chia seeds and flaxseeds together in a pan over medium‑low heat until the flaxseeds start popping/dancing, then remove from the pan.
- Let the roasted peanuts cool for about 5 minutes.
- After 5 minutes, the peanuts should still be very warm but not too hot to touch.
- Transfer the peanuts to a blender, add salt and sugar, and start blending.
- Whenever the blades begin to spin without crushing anything, stop and scrape down the sides and bottom with a spatula.
- Continue blending until it becomes a smooth texture.
- Add the toasted flaxseeds and chia seeds, and blend for seconds to combine.
- For the chocolate flavour, take a portion of the warm peanut butter and mix in cocoa powder and chocolate chips until fully incorporated.
- Layer both the original and chocolate peanut butter into containers, swirling lightly with a tool to mix them up a bit.
- Let cool, cover, and refrigerate—and you’re done! 🎉
小贴士 Tips
声明 Disclosure:
以下的链接会带你到 Shopee,方便查看真实产品。请大家务必货比三家哦,有时候线下 market 会更便宜!如果你通过链接购买,我可能会获得少量佣金,作为支持阿琴继续创作的一小部分❤️,但不会增加你的费用哦~ 我只推荐自己实际使用并认可的产品,所有推荐均基于真实体验,也是阿琴长期复购的厨房调料,请放心参考!
The links below will take you to Shopee, making it easy to check out the actual products. Please do compare prices — sometimes local markets can be cheaper! If you purchase through them, I may earn a small commission ❤️ — a tiny sprinkle of support that fuels more recipes. This won’t add any extra cost for you. I only recommend products I personally use and trust; these are items I’ve repurchased many times, so you can be confident they’re truly my reliable picks.
我的好物分享 What I Use