Whole Wheat Sourdough Shokupan
Speaking of shokupan, most people immediately think of the classic Japanese milk bread. However, shokupan actually comes in many different varieties, and the sourdough version is one of my favorites. Whenever I work with sourdough, it’s so hard for me not to add whole wheat flour because the flavor and aroma of fermented whole wheat dough are simply incredible. And that’s exactly why today’s shokupan will be a relatively less sweet one— Whole Wheat Sourdough Shokupan.
What Makes Shokupan Different?
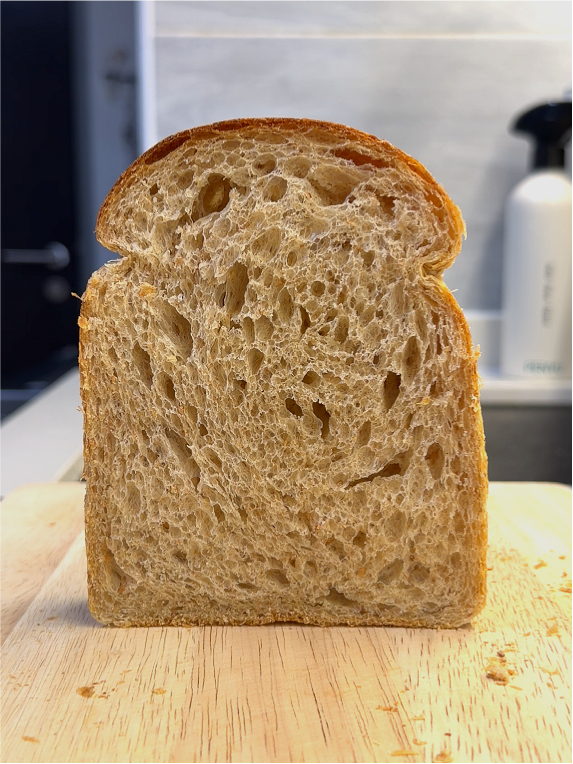
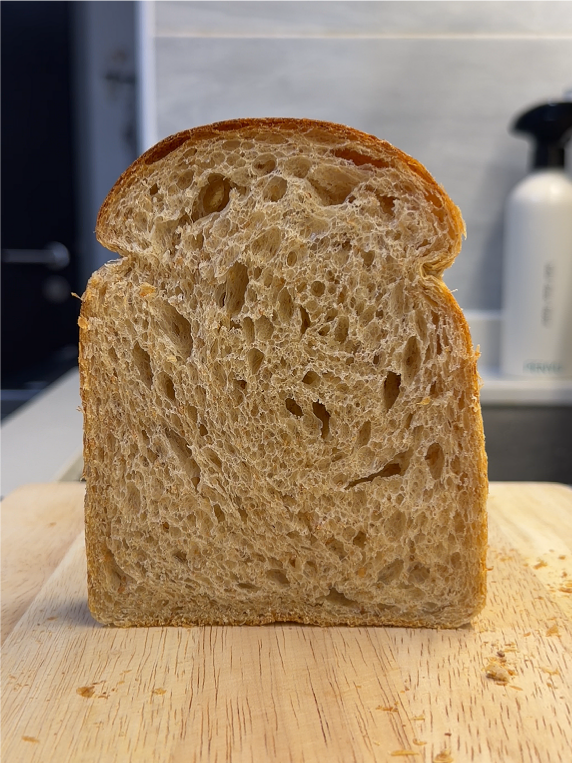
Shokupan, is known for its exceptionally soft, fluffy texture and delicate crumb. Unlike many Western sandwich breads, shokupan is designed to be light, tender, and easy to tear apart, with a subtle sweetness that makes it equally suitable for both sweet and savory toppings.
One of the defining characteristics of shokupan is its fine, even crumb structure. Each slice is soft enough to enjoy on its own, yet sturdy enough to hold fillings for sandwiches. This balance of softness and strength is what has made shokupan a staple in Japanese bakeries and households alike.
Traditional shokupan is typically enriched with ingredients such as milk, butter, and sugar, creating a rich and pillowy loaf. In this recipe, however, we’re taking a slightly different approach by incorporating sourdough and whole wheat flour. The result is a loaf that still delivers the signature softness of shokupan, but with deeper flavor, a more complex aroma, and a subtle nutty character from the whole wheat.
In other words, it has all the comfort of classic shokupan, with a little more personality.
Tangzhong vs. Traditional Sourdough Shokupan
When it comes to soft and fluffy bread, tangzhong, or called Yudane in Japanese is often the first technique that comes to mind. Made by cooking a portion of the flour and liquid before mixing the dough, tangzhong helps the dough retain more moisture, resulting in a loaf that stays soft and fresh for longer. It’s one of the reasons why many modern shokupan recipes achieve such a light, pillowy texture.
Traditional sourdough shokupan, however, takes a different path. Instead of relying on cooked starches, it develops its character through slow fermentation. Given enough time, a healthy sourdough culture not only leavens the dough but also enhances its flavor, aroma, and texture in a way that commercial yeast simply cannot replicate.
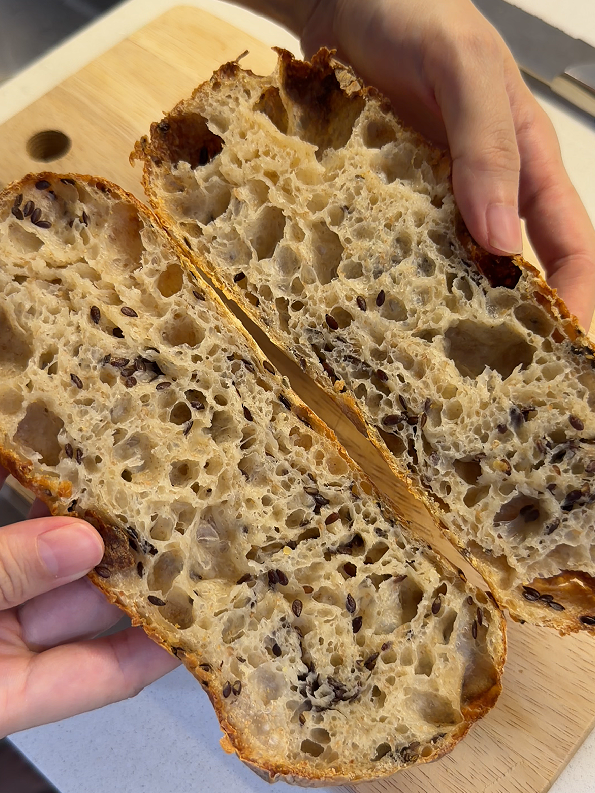
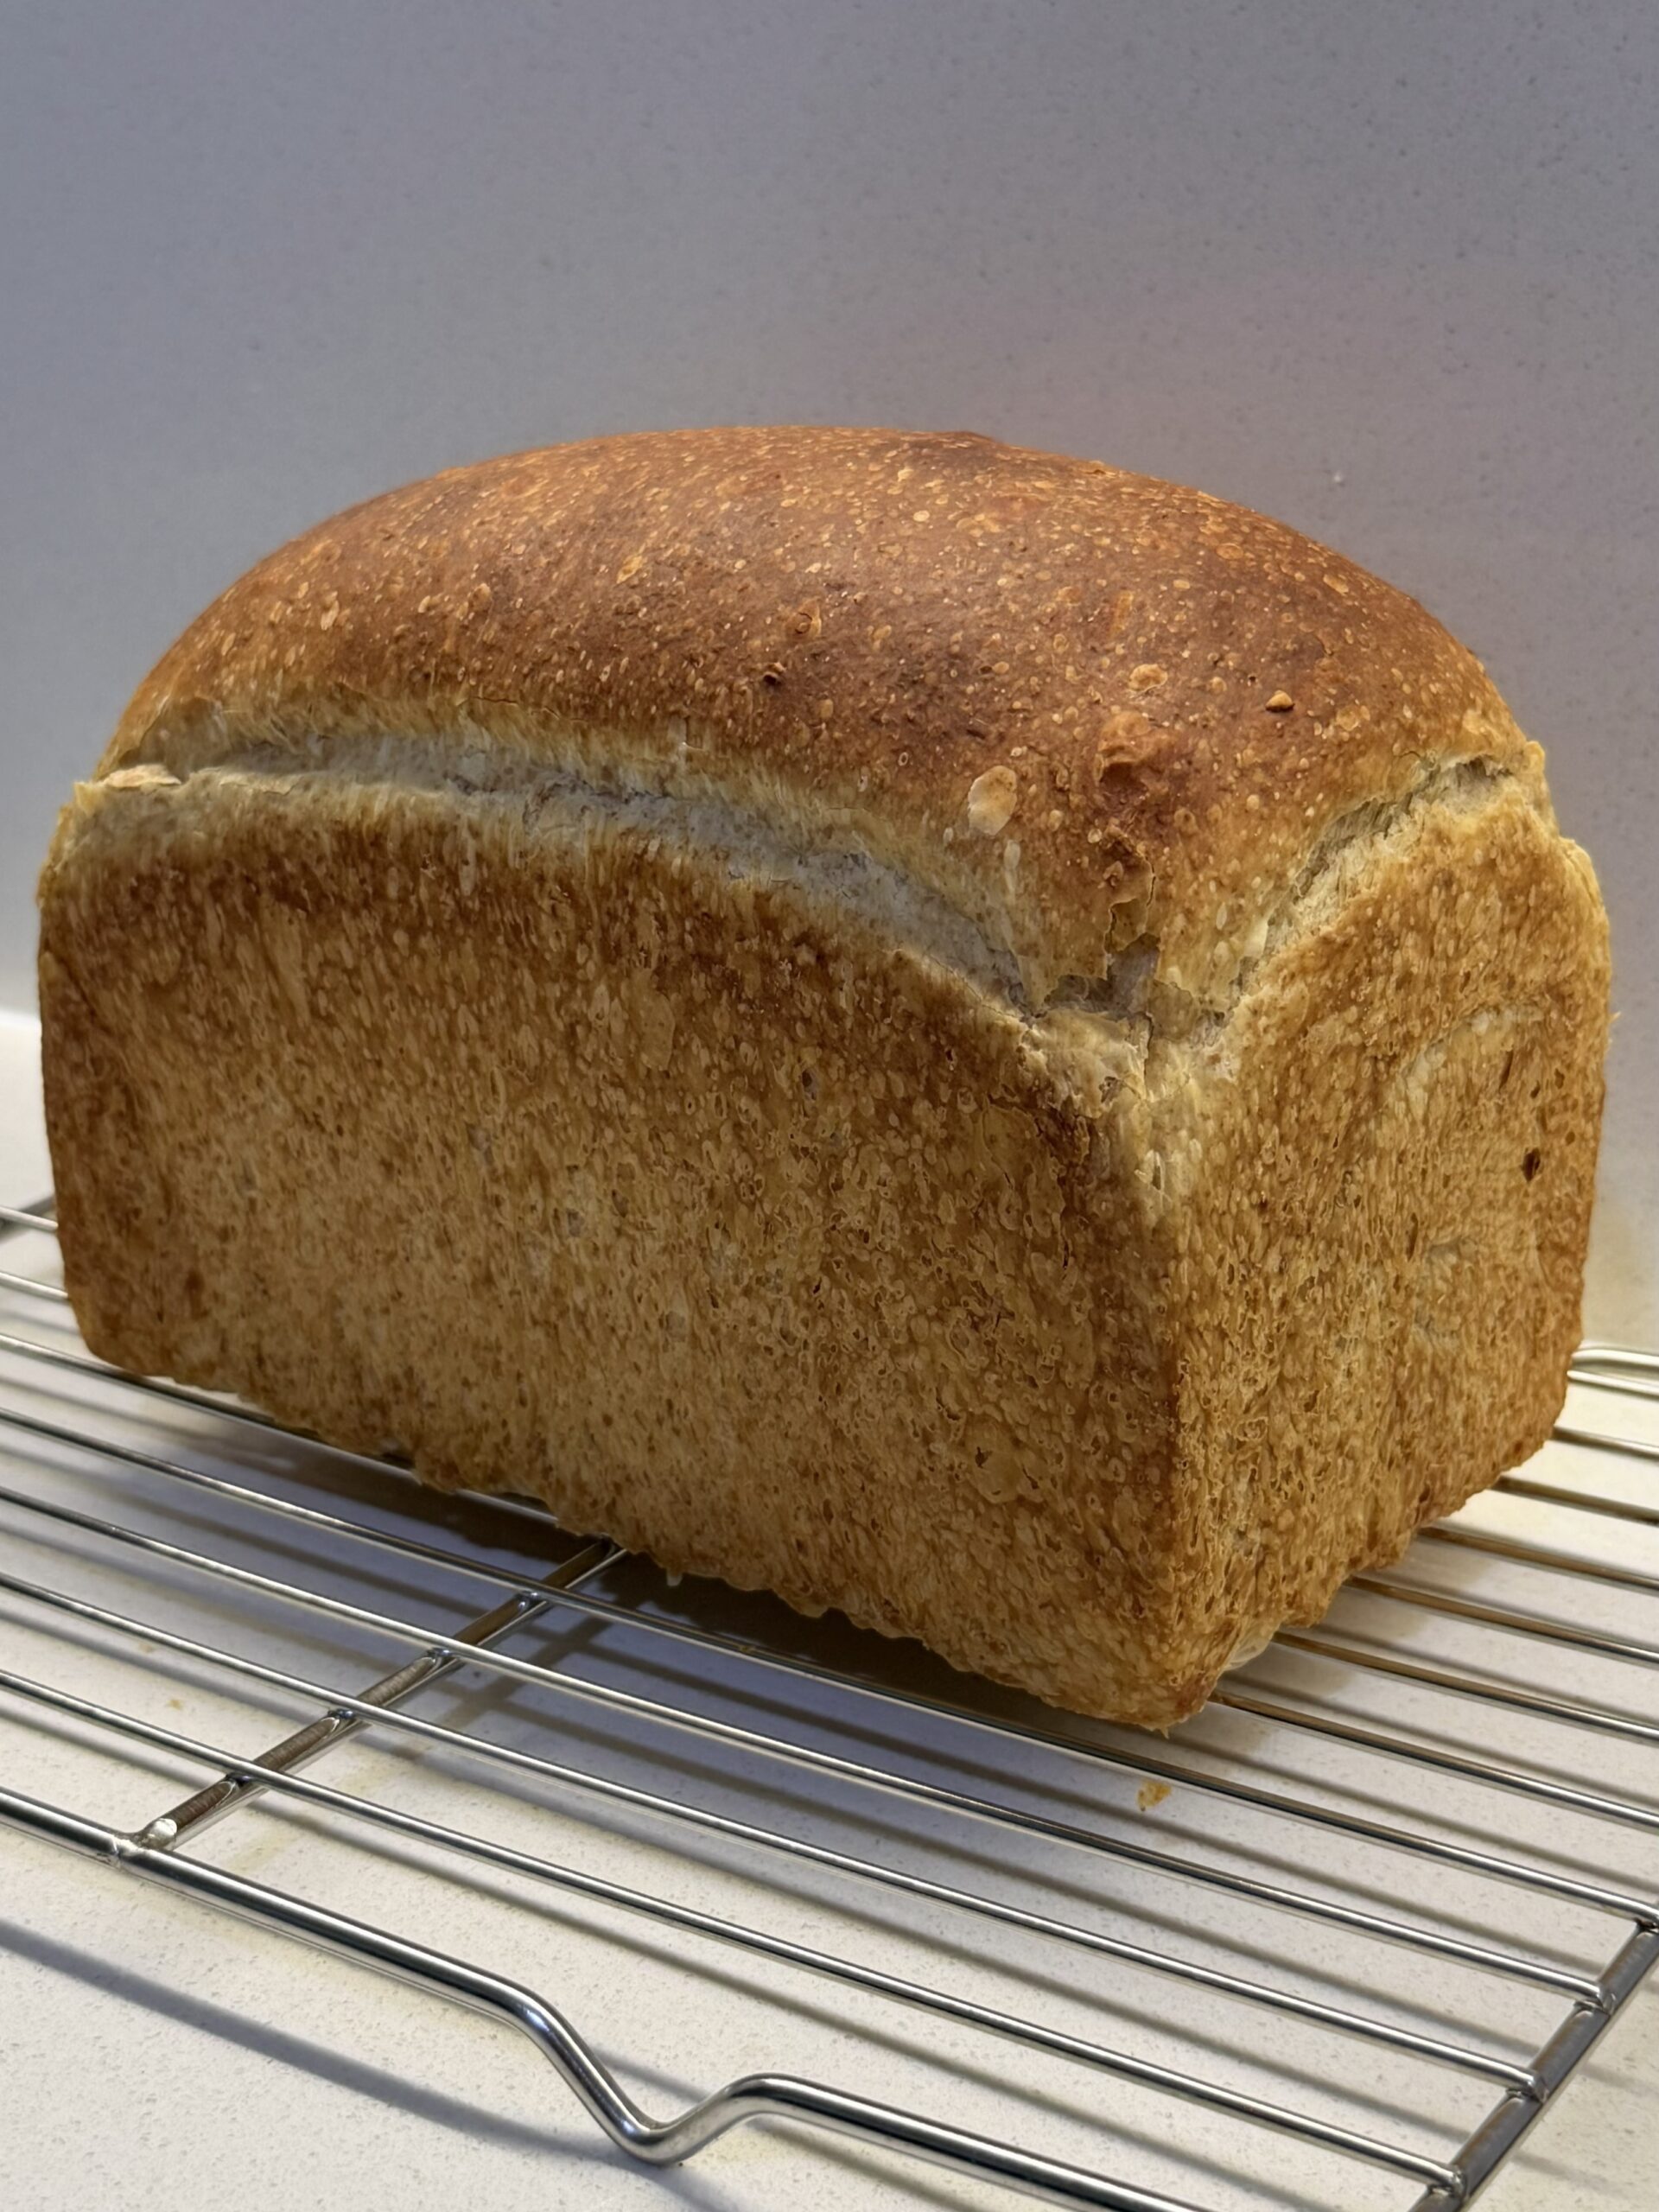
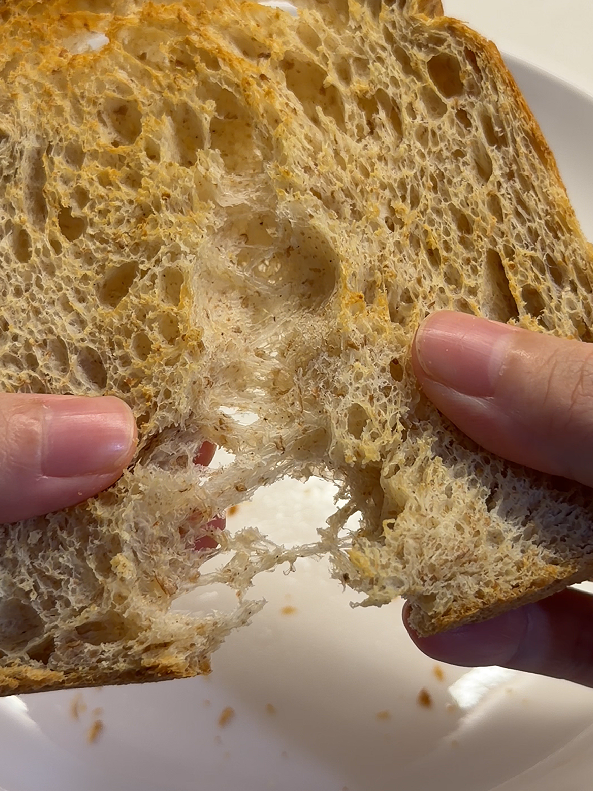
So for this loaf, I chose to lean into the strengths of sourdough and whole wheat. The goal wasn’t just softness, but a balance between texture and flavor. I wanted a shokupan that still pulls apart in tender strands while carrying the nutty aroma of whole wheat and the rich complexity that only natural fermentation can provide.
In the end, it’s not a question of which method is better, its just which of it and the flavor profile of the bread we preferred. Tangzhong and sourdough simply offer different experiences. One showcases softness at its finest, while the other brings depth and personality to every slice. This loaf is my attempt to enjoy a little of both worlds.
All You Need for This Perfect Loaf!
- 50g Whole Wheat Flour
- 170g Bread Flour
- 10g Full Cream Milk Powder
- 122g Water + 20g Cold Water
- 60g Egg
- 10g Honey
- 40g Whole Wheat Levain
- 5g Salt
- 20g Butter
How to Make Shokupan Step by Step
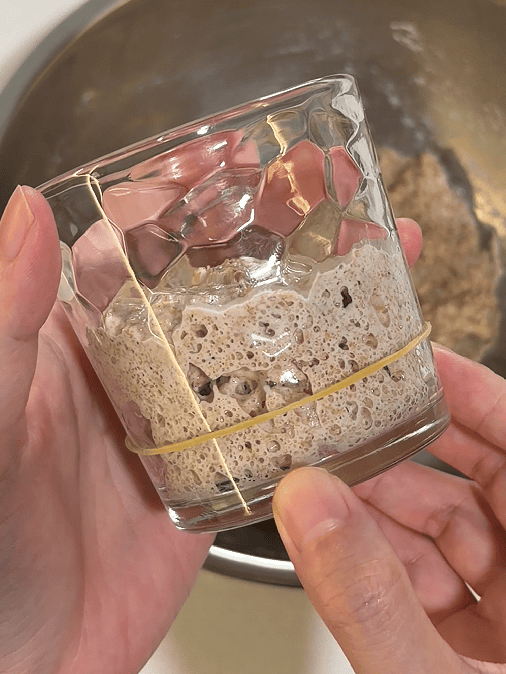
Feed your levain (sourdough starter)
- Feed your levain with a ratio of 1:1:1.5, which the 1.5 parts is whole wheat flour.
- While we’re waiting for the levain to reach its peak, let’s begin the autolyse.
Autolyse
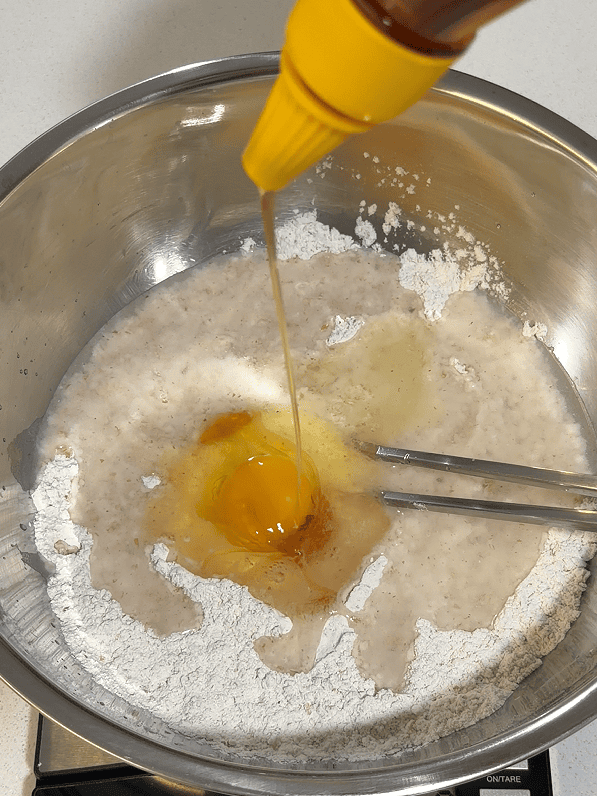
- Mix all the flour and milk powder together.
- Add 122g of water, egg and honey into the flour mixture.

- Roughly mix the dry flour with wet ingredients together until there is no visible dry flour left.
- Cover with cling wrap and let it autolyse in the chiller until our levain reaches its peak.
Final dough mixing
- When levain has doubled or tripled, add 40g of it, together with a bit of cold water to the dough.
- Knead the dough for about 1 minutes.
- Add salt and a little more of cold water into the dough.
- (We’re adding the 20g of cold water at this stage gradually. Depending on your flour’s absorption capacity, you may not need all of it. If the dough feels fully hydrated, stop adding more water. If use all the cold water, the hydration of the dough will be 85%.)
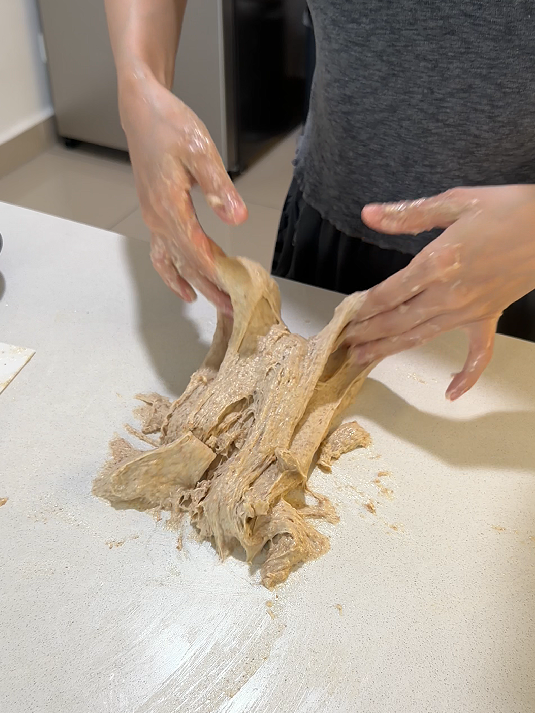
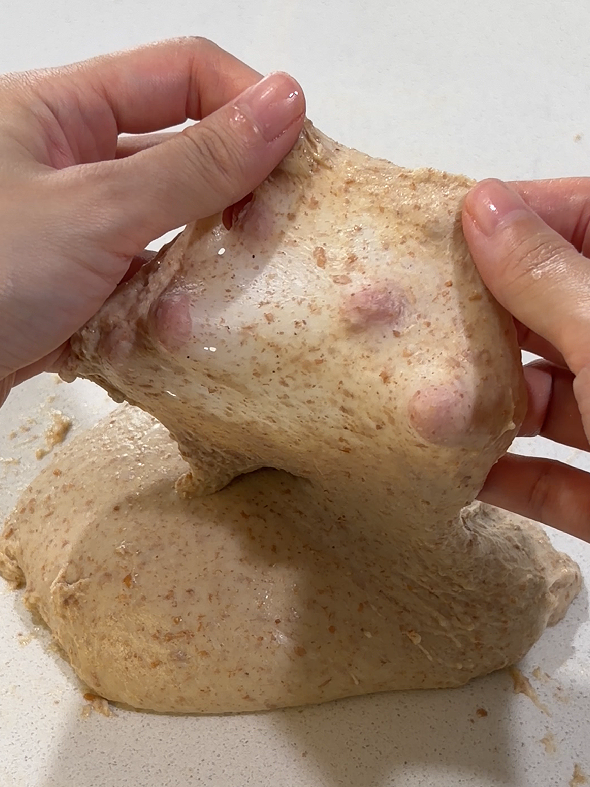
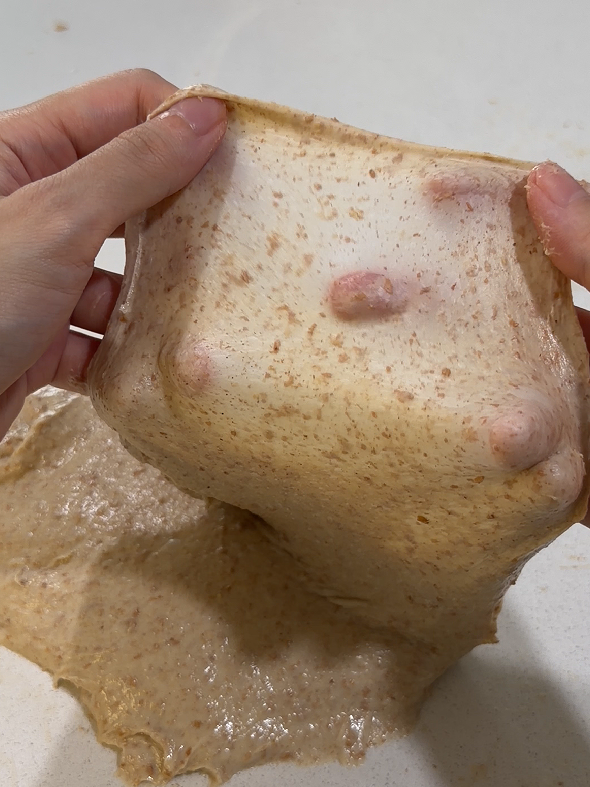
- Knead the dough until it reaches about 70% windowpane development. (For hand knead, best to use slap and fold technique that I showed before in shorts video.)
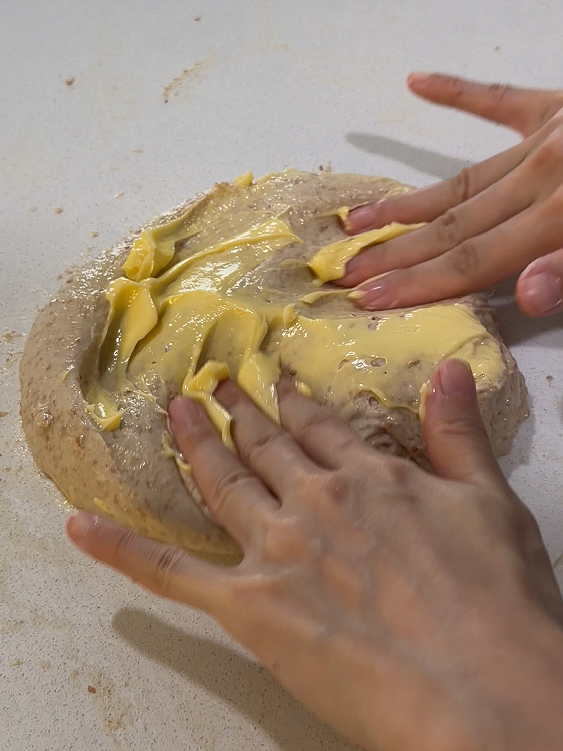
- Then add in softened butter, and continue to knead until the dough has good extensibility, reaching 90% windowpane development.
-
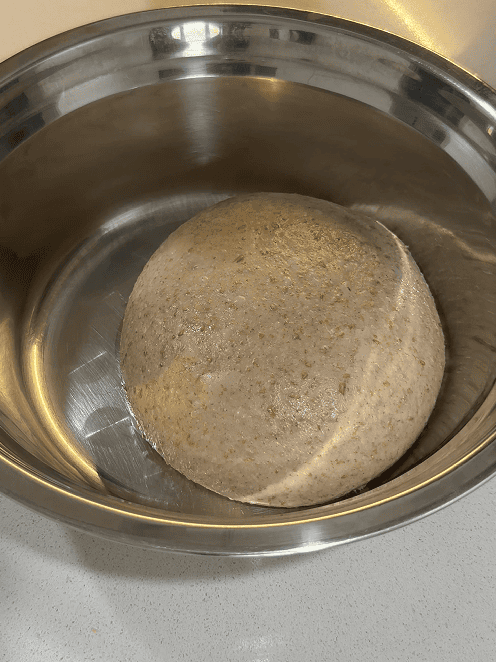
- Tidy up and round the dough using a scrapper, put it in a bowl, wrap and chill for 15 minutes.
Strengthening the dough + Bulk fermentation
- After chilling the dough for 15 minutes, let it rest for another 15 minutes at room temperature.
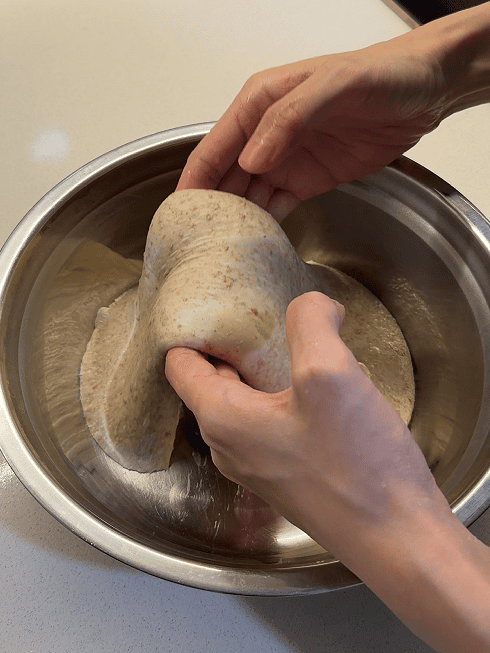
- Then, perform 3 sets of coil folds at 45-minute intervals.
- If the dough is collapsing quickly after last set, perform one additional set of coil folds.
Shaping
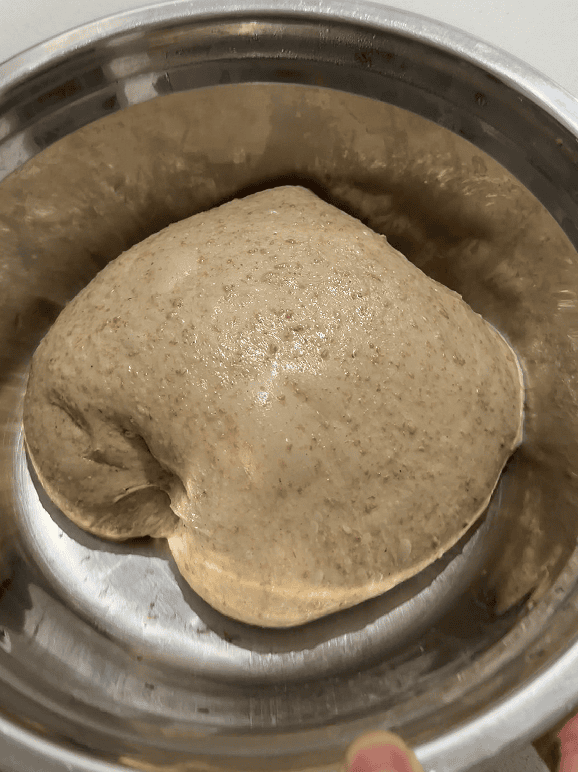
- When the dough has grow into about double in size, it’s ready to be shaped.
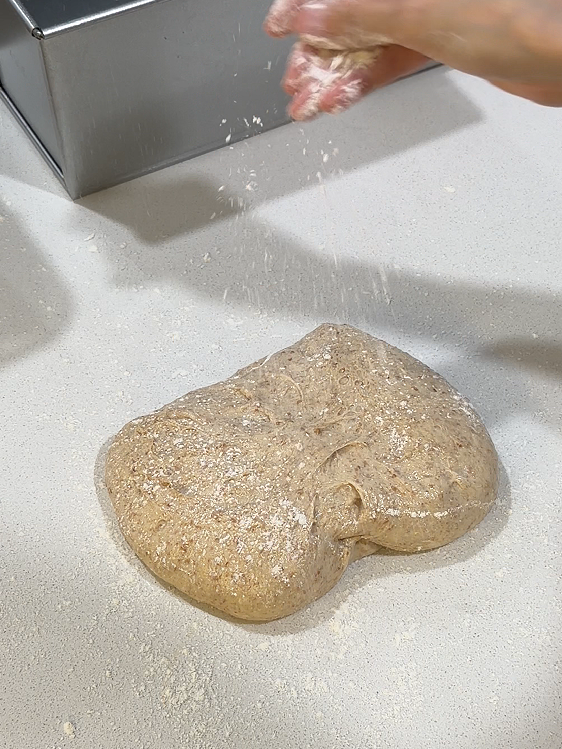
- Lightly flour your work surface and the dough, then gently flip the bowl and turn the dough out onto the counter.
- Dust another side of the dough with some flour again and flatten it out.
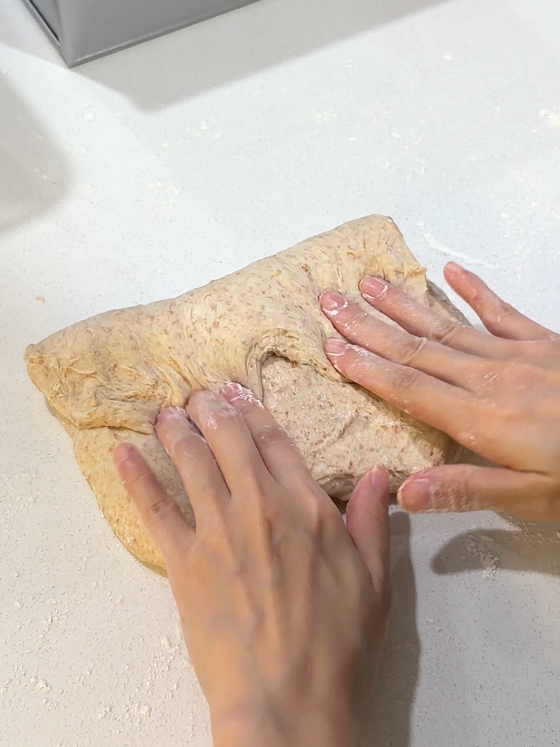
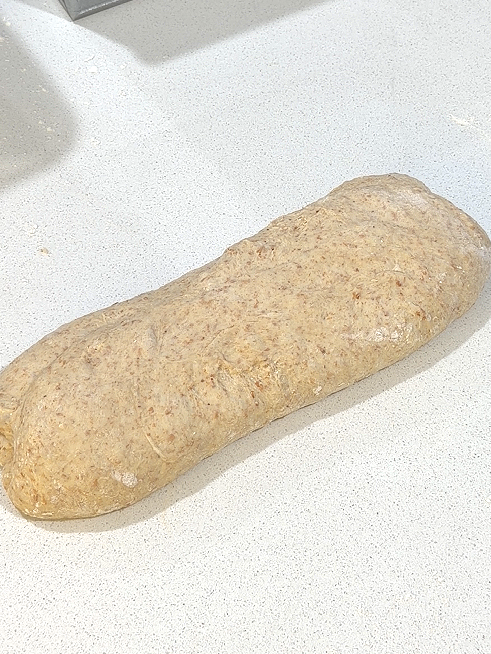
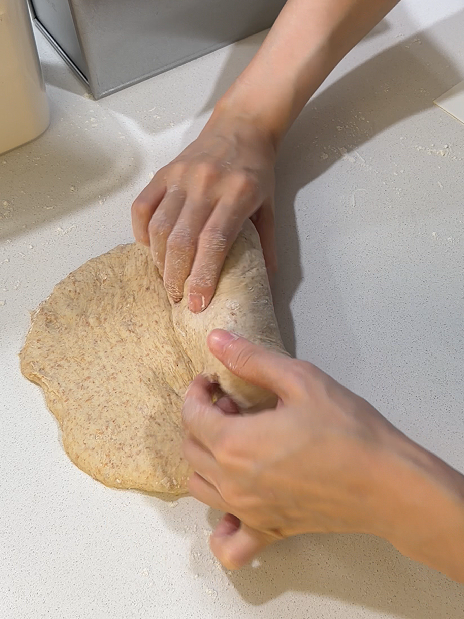
- Fold it into thirds (1/3), like a letter, then let it rest for 10 minutes.
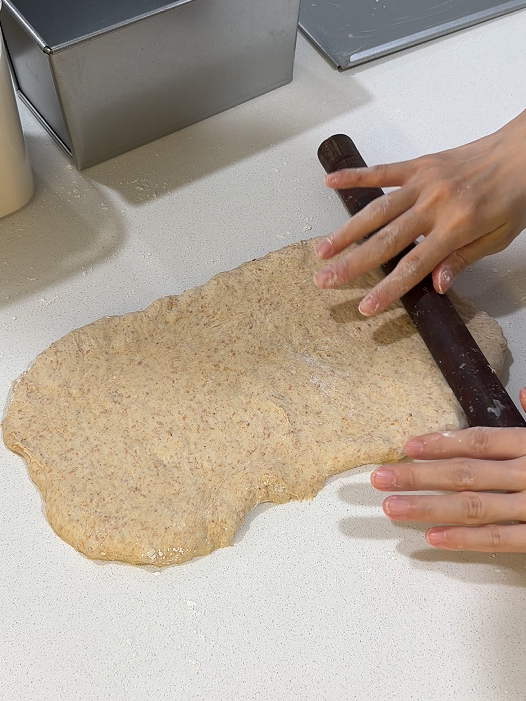
- Gently roll out the dough with a rolling pin, not to degas it too much, until the width is almost the same as your loaf pan.
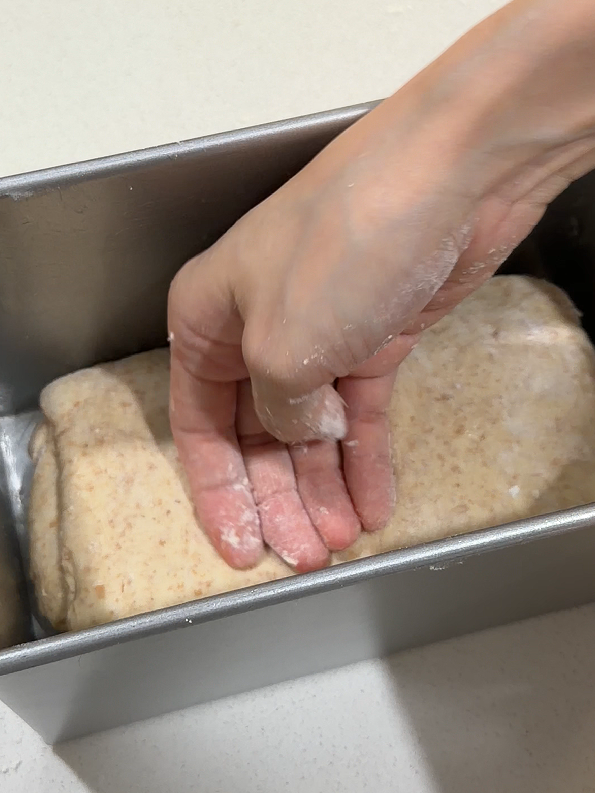
- Roll the dough into a log and place it seam side down in a greased loaf pan.
Cold Fermentation
- Cover the loaf pan with its own cover or just wrap it tightly.
- Place the dough in the refrigerator for overnight cold fermentation. Recommend not exceeding 12 hours.
Final proofing and baking
- Remove the dough from refrigerator and allow it to undergo final proofing at room temperature.
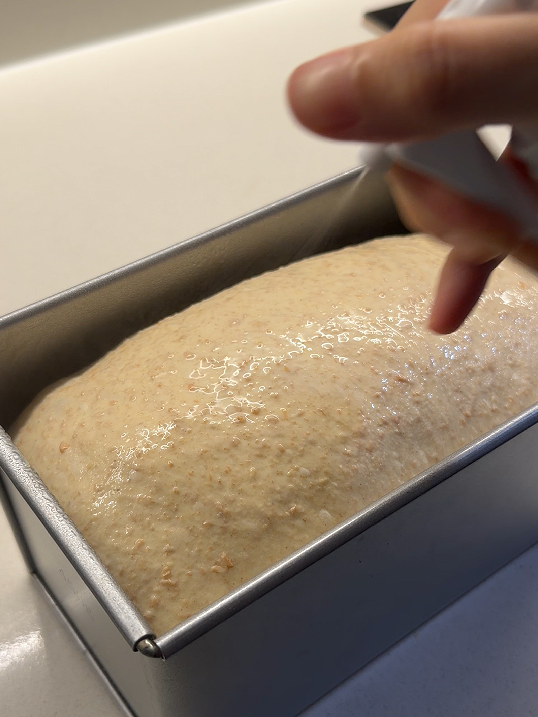
- When the dough has filled up the loaf pan for about 60%-70% , preheat your oven to 200C, conventional mode (fan off).
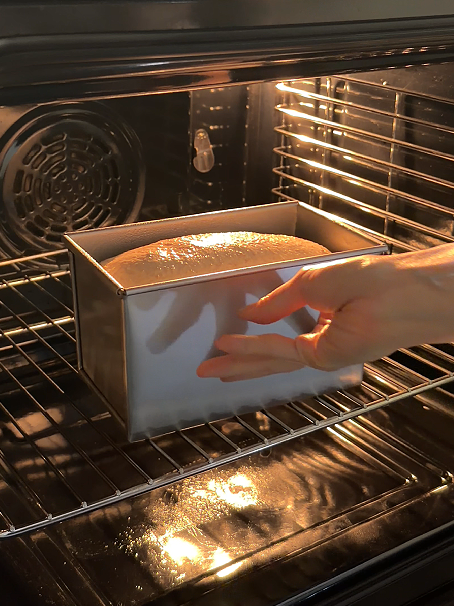
- Once the dough rises to 80% of the loaf pan, spray water on the surface and send it to the preheated oven.
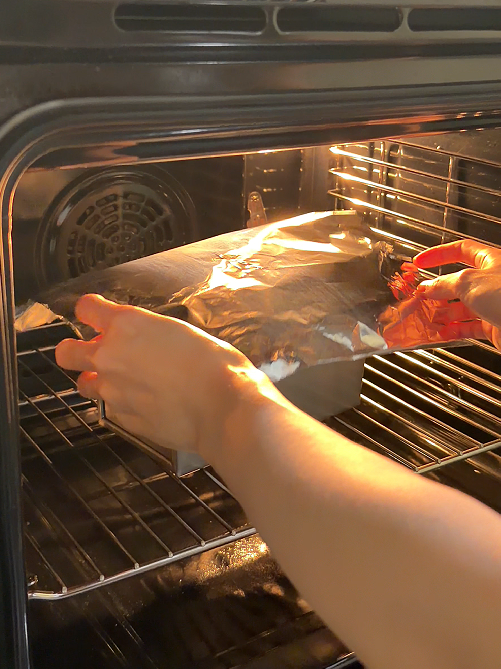
- Bake for 30 mins, rotate the pan half way through and cover loosely with aluminum foil if you’re satisfied with the color.
- When done baking, remove the loaf from the oven and knock the pan once to release excess steam.
- Unmold immediately and let it cool completely on a rack.
- Hooray! Sourdough shokupan unlocked!
How to Prevent Your Loaf from Sticking to the Pan?
If you’re using a regular loaf pan rather than a non-stick one, like I am, grease it thoroughly with a piece of cold butter or line it with parchment paper for easy release. I prefer greasing the pan with butter because it not only prevents sticking but also adds a subtle buttery flavor to the crust.
My Favorite Way to Enjoy It
Honestly, I don’t think I need to tell my fellow bread lovers how to enjoy a shokupan. I’m just sharing my favorite way and rambling a little, because that’s what food blogs are for, right? 😆
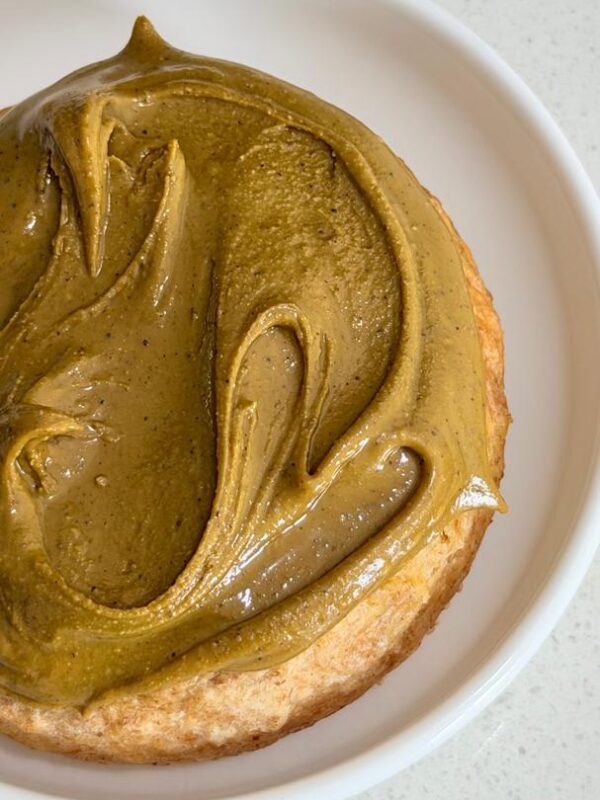
The best part of sourdough, for me, is its unique flavor and gentle tang. It’s so delicious that it can be enjoyed all on its own. A thin spread of butter, finished with a pinch of good-quality sea salt, is all it takes to elevate it even further. After spending an entire day nurturing and waiting for this loaf, I honestly think that’s the simplest and most satisfying way to enjoy the little baby we’ve created. Although I’d love to eat it with my homemade nut butter too, haha!
Printable Recipe
Whole Wheat Sourdough Shokupan
Ingredients | 食材
Method | 步骤
- Feed your levain with a ratio of 1:1:1.5, which the 1.5 parts is whole wheat flour.
- While we’re waiting for the levain to reach its peak, let’s begin the autolyse.
- Mix all the flour and milk powder together.
- Add 122g of water, egg and honey into the flour mixture.
- Roughly mix the dry flour with wet ingredients together until there is no visible dry flour left.
- Cover with cling wrap and let it autolyse in the chiller until our levain reaches its peak.
- When levain has doubled or tripled, add 40g of it, together with a bit of cold water to the dough.
- Knead the dough for about 1 minutes.
- Add salt and a little more of cold water into the dough.
- (We’re adding the 20g of cold water at this stage gradually. Depending on your flour’s absorption capacity, you may not need all of it. If the dough feels fully hydrated, stop adding more water. If use all the cold water, the hydration of the dough will be 85%.)
- Knead the dough until it reaches about 70% windowpane development. (For hand knead, best to use slap and fold technique that I showed before in shorts video.)
- Then add in softened butter, and continue to knead until the dough has good extensibility, reaching 90% windowpane development.
- Tidy up and round the dough using a scrapper, put it in a bowl, wrap and chill for 15 minutes.
- After chilling the dough for 15 minutes, let it rest for another 15 minutes at room temperature.
- Then, perform 3 sets of coil folds at 45-minute intervals.
- If the dough is collapsing quickly after last set, perform one additional set of coil folds.
- When the dough has grow into about double in size, it’s ready to be shaped.
- Lightly flour your work surface and the dough, then gently flip the bowl and turn the dough out onto the counter.
- Dust another side of the dough with some flour again and flatten it out.
- Fold it into thirds (1/3), like a letter, then let it rest for 10 minutes.
- Gently roll out the dough with a rolling pin, not to degas it too much, until the width is almost the same as your loaf pan.
- Roll the dough into a log and place it seam side down in a greased loaf pan.
- Cover the loaf pan with its own cover or just wrap it tightly.
- Place the dough in the refrigerator for overnight cold fermentation. Recommend not exceeding 12 hours.
- Remove the dough from refrigerator and allow it to undergo final proofing at room temperature.
- When the dough has filled up the loaf pan for about 60%-70% , preheat your oven to 200C, conventional mode (fan off).
- Once the dough rises to 80% of the loaf pan, spray water on the surface and send it to the preheated oven.
- Bake for 30 mins, rotate the pan half way through and cover loosely with aluminum foil if you’re satisfied with the color.
- When done baking, remove the loaf from the oven and knock the pan once to release excess steam.
- Unmold immediately and let it cool completely on a rack.
- Hooray! Sourdough shokupan unlocked!
Cheen’s Little Tips | 阿琴小贴士
全麦酸种日式吐司
说到日式吐司,大多数人第一时间都会想到经典的日式牛奶吐司。不过,日式吐司其实还有许多不同的变化版本,而其中我最喜欢的,莫过于采用天然酵母来制作的类型。
每次制作酸种面包时,我总是很难忍住不加入全麦面粉,因为经过发酵后的全麦香气和风味实在太迷人了。也正因为如此,今天要和大家分享的这款日式吐司,是一条甜味比较低的全麦酸种日式吐司!
日式吐司和西式吐司有何不同?
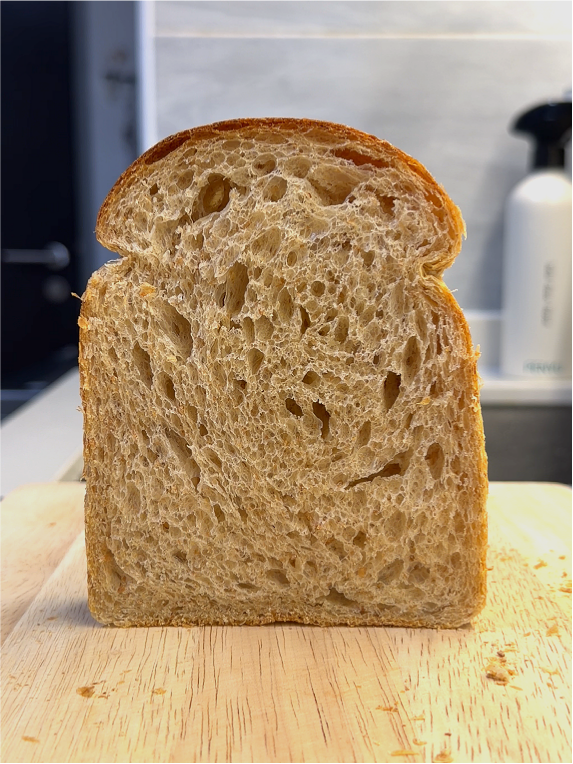
日式吐司 (Shokupan), 以其异常柔软蓬松的口感和细腻均匀的组织而闻名。与许多西式三明治面包不同,Shokupan 的特色在于轻盈柔软、容易撕开,并带有一丝淡淡的甜味,无论搭配甜口或咸口配料都非常合适。
日式土司最具代表性的特点之一,就是它细致且均匀的面包组织。每一片都柔软到即使单独享用也十分美味,同时又拥有足够的支撑力来夹入各种三明治内馅。这种在柔软与结构之间取得的完美平衡,也让这吐司成为日本家庭与面包店中不可或缺的人气面包。
传统的日式土司通常会加入牛奶、奶油和糖等丰富配料,因此拥有柔软如枕头般的口感。而这次的配方则稍微不一样,我加入了天然酵母和全麦粉。成品依然保有日式土司招牌般的柔软与湿润,却多了更丰富的风味层次、更迷人的发酵香气,以及全麦带来的淡淡坚果香。
换句话说,它拥有经典日式吐司的细腻与温柔,但同时也多了一点属于自己的个性。
汤种吐司 vs. 酸种吐司
说到柔软蓬松的面包,汤种(Tangzhong),或日文中的 Yudane,往往是许多人最先想到的,可以融入面团的技巧之一。通过预先将部分面粉与液体加热糊化,汤种能够让面团锁住更多水分,使烘烤出来的面包拥有更柔软湿润的口感,并且能够延缓面包老化。这也是许多现代日式土司能够拥有轻盈如云朵般组织的重要原因之一。
不过,传统的酸种日式吐司走的却是另一条路线。它并不依赖淀粉糊化来提升口感,而是透过缓慢而充足的发酵过程来塑造风味与质地。只要拥有状态良好的天然酵母,在足够的发酵时间下,它不仅能够让面团膨胀,还能赋予面包迷人的发酵香气,以及商业酵母难以复制的独特风味。
因此,这次的配方我选择加入酸种和全麦粉的特性。这款日式面包,不仅仅有高含水量带来的柔软,也能在口感与风味之间取得平衡。因为我喜欢的日式面包是能够拉出柔软细致的面包丝,同时拥有全麦特有的香气,以及酸种所带来的深度与层次感。
所以其实并没有哪一种做法是绝对的好,关键还是取决于我们偏爱的面包风味与口感。汤种与酸种只是带来了两种截然不同的体验。前者将柔软发挥到极致,后者则赋予每一口面包更丰富的个性与灵魂。
而这款面包,就是我尝试将两者优点结合在一起的成果,姐妹们,做起来!
你所需要的食材
- 50g 全麦面粉
- 170g 高筋面粉
- 10g 全脂奶粉
- 122g 水+ 20g 冷水
- 60g 鸡蛋
- 10g 蜂蜜
- 40g 全麦酸种
- 5g 盐
- 20g 黄油
酸种吐司的详细制作步骤
喂养酵种
- 用 1:1:1.5 的比例来喂养你的酵种,1.5 份指的是全麦面粉。
- 等到酵种涨到峰值的同时,我们先来让面团进行水合。
水合
- 把所有面粉和全脂奶粉混合均匀.
- 再加入 122g 的水,鸡蛋和蜂蜜到干粉里。
- 混合至看不见干粉,就可以盖上保鲜膜,放进冰箱冷藏水合,直到酵种达到峰值。
混合主面团
- 当酵种涨到 2-3 倍的时候,加入40g 的酵种和一点冷水到面团里。
- 混合约 1 分钟。
- 再加入盐,和一点冷水到面团里,继续打面/揉面。
- (食谱里有 20g 的冷水是后加的,而且是在这个阶段慢慢地加。用完全部这面团就是 85% 的含水量,高含水量的面团做出来的面包会很柔软,但也相对更粘手和难处理。最后这冷水要加多少需要取决于你的面粉的吸水量,如果觉得面团的水量已经非常饱满,那就停止加水)
- 把面团揉至大约 7 成筋的状态。(手揉的小伙伴们可以参考我在短视频里推荐的 Slap and Fold 的技巧)
- 然后加进软化的黄油,再继续把面团揉到延展性很好的 9 成筋。
-
- 用刮板把面团整理并收紧至圆形,保鲜膜包好,放进冰箱降温 15 分钟。
强化面筋 + 首次发酵
- 把面团冷藏 15 分钟之后,取出,室温再继续让面团休息 15 分钟。
- 然后做 3 组抱叠,每组间隔 45 分钟。
- 如果在最后一次抱叠之后面团还是坍塌得比较快,再抱叠多一次。
整形
- 当面团涨到大约两倍大的时候,就可以来整形了。
- 在工作台和面团上都撒点干粉,然后把面团倒扣出来。
- 面团的另一面也撒上一些干粉防沾。
- 把面团稍微整平,再折成 1/3 的长条状,然后让面团休息 10 分钟。
- 用个擀面杖把面团擀成和土司盒一样宽的长方形,小心不要挤出太多气泡哦~
- 然后把面团像毛巾一样卷起来,放进做好防沾的土司盒里,收口向下。
冷藏发酵
- 把土司盒盖起来,或者用保鲜膜包好。
- 把面团放进冰箱冷藏发酵,建议不超过 12 小时。
最后发酵 + 烘烤
- 隔天,把面团从冰箱里拿出来,再让它在室温继续发酵。
- 当面团涨到土司盒的 60% – 70% 时,预热烤箱至 200C,平炉模式。
- 面团涨到土司盒 80% 的高度的时候,在表面喷上水,送进烤箱烘烤。
- 一共烤 30分钟,中途需要翻面,同时上色已满意的话,松松地盖上锡纸。
- 烤好之后,取出面包,轻震一下,震出热气。
- 立刻脱膜,让它在架子上完全冷却。
- 耶!成功解锁酸种日式土司!
如何防止吐司沾粘土司盒?
如果你的吐司模不是不沾模,像我这款一样,可以先用一小块冰黄油把模具内壁仔细抹上一层,或是铺上烘焙纸方便脱模。我比较偏爱抹黄油的方法,因为除了防止粘模之外,烤好后的吐司外皮还会带着淡淡的黄油香,特别迷人。
我最喜欢的享用方式
老实说,跟面包爱好者讨论该怎么享用一条 Shokupan 有点多余,因为大家肯定都有属于自己的最爱吃法。不过我也只是想在这里分享一下我的方式,顺便碎碎念几句罢了。😆
对我来说,酸种面包最迷人的地方,就是它独特的风味和那一抹恰到好处的酸香。光是直接吃,就已经很喜欢。抹上一层薄薄的黄油,再撒上一小撮脆口的优质海盐,简单得不行,却让它变得更迷人!
当然,如果是搭配我自制的坚果酱,那也是让人难以抗拒的美味,哈哈!
可打印中文食谱
全麦酸种日式吐司
Ingredients | 食材
Method | 步骤
- 用 1:1:1.5 的比例来喂养你的酵种,1.5 份指的是全麦面粉。
- 等到酵种涨到峰值的同时,我们先来让面团进行水合。
- 把所有面粉和全脂奶粉混合均匀.
- 再加入 122g 的水,鸡蛋和蜂蜜到干粉里。
- 混合至看不见干粉,就可以盖上保鲜膜,放进冰箱冷藏水合,直到酵种达到峰值。
- 当酵种涨到 2-3 倍的时候,加入40g 的酵种和一点冷水到面团里。
- 混合约 1 分钟。
- 再加入盐,和一点冷水到面团里,继续打面/揉面。
- (食谱里有 20g 的冷水是后加的,而且是在这个阶段慢慢地加。用完全部这面团就是 85% 的含水量,高含水量的面团做出来的面包会很柔软,但也相对更粘手和难处理。最后这冷水要加多少需要取决于你的面粉的吸水量,如果觉得面团的水量已经非常饱满,那就停止加水)
- 把面团揉至大约 7 成筋的状态。(手揉的小伙伴们可以参考我在短视频里推荐的 Slap and Fold 的技巧)
- 然后加进软化的黄油,再继续把面团揉到延展性很好的 9 成筋。
- 用刮板把面团整理并收紧至圆形,保鲜膜包好,放进冰箱降温 15 分钟。
- 把面团冷藏 15 分钟之后,取出,室温再继续让面团休息 15 分钟。
- 然后做 3 组抱叠,每组间隔 45 分钟。
- 如果在最后一次抱叠之后面团还是坍塌得比较快,再抱叠多一次。
- 当面团涨到大约两倍大的时候,就可以来整形了。
- 在工作台和面团上都撒点干粉,然后把面团倒扣出来。
- 面团的另一面也撒上一些干粉防沾。
- 把面团稍微整平,再折成 1/3 的长条状,然后让面团休息 10 分钟。
- 用个擀面杖把面团擀成和土司盒一样宽的长方形,小心不要挤出太多气泡哦~
- 然后把面团像毛巾一样卷起来,放进做好防沾的土司盒里,收口向下。
- 把土司盒盖起来,或者用保鲜膜包好。
- 把面团放进冰箱冷藏发酵,建议不超过 12 小时。
- 隔天,把面团从冰箱里拿出来,再让它在室温继续发酵。
- 当面团涨到土司盒的 60% – 70% 时,预热烤箱至 200C,平炉模式。
- 面团涨到土司盒 80% 的高度的时候,在表面喷上水,送进烤箱烘烤。
- 一共烤 30分钟,中途需要翻面,同时上色已满意的话,松松地盖上锡纸。
- 烤好之后,取出面包,轻震一下,震出热气。
- 立刻脱膜,让它在架子上完全冷却。
- 耶!成功解锁酸种日式土司!
Cheen’s Little Tips | 阿琴小贴士
Disclosure:
The links below will take you to Shopee, making it easy to check out the actual products. Please do compare prices — sometimes local markets can be cheaper! If you purchase through them, I may earn a small commission ❤️ — a tiny sprinkle of support that fuels more recipes. This won’t add any extra cost for you. I only recommend products I personally use and trust; these are items I’ve repurchased many times, so you can be confident they’re truly my reliable picks.
What I Use | 我的好物分享
Unbleached bread flour | 无漂白高筋面粉
Aichermühle Whole wheat flour | Aichermühle 全麦面粉