Flaxseed Sourdough Ciabatta
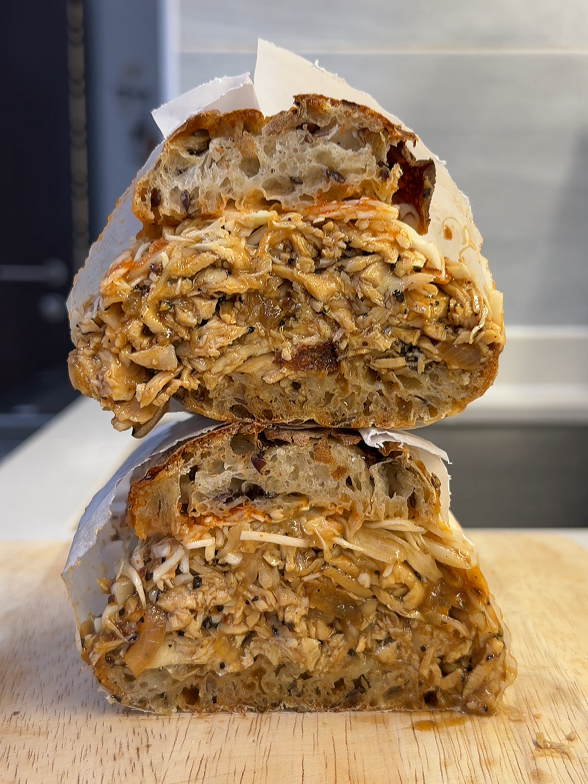
Do you love eating slippers? Oops—I mean ciabatta! The name actually means “slipper” in Italian, inspired by its flat, elongated shape. What makes ciabatta so beloved are its thin, crackly crust and airy, irregular crumb. Made with a sourdough starter, it develops a deeper, tangy, and complex flavor from natural yeast, while also becoming easier to digest. Add flaxseed, and you’ll get a nutty aftertaste—a delightful bonus for any sandwich!
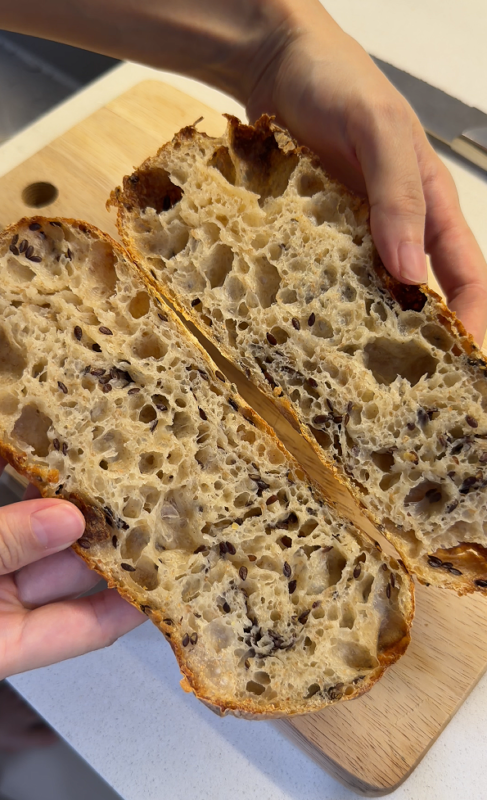
Flaxseed Sourdough Ciabatta
- Why would you love sourdough ciabatta?
- All you need for this ciabatta
- Some ingredients notes and explainations
- Sourdough starter (Levain)
- Flaxseeds
- Whole wheat flour
- Extra Virgin olive oil
- Steps of making for these slippers
- What I Use, for your reference 🙂
Why would you love these sourdough ciabatta?
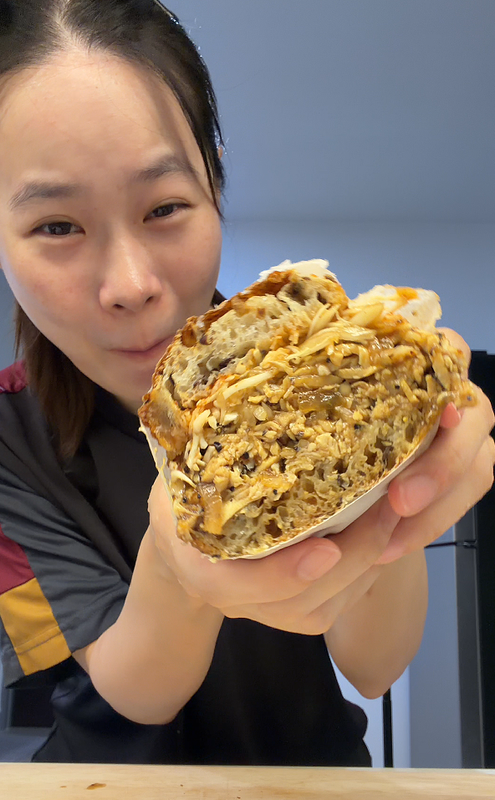
Whenever I talk about ciabatta, I think of sandwiches—something like Subway, loaded with fillings and plenty of sauce, yet the bread still holds up beautifully without turning mushy like commercial white bread. Ciabatta is definitely one of those breads that makes the best sandwiches on earth—or at least in my kitchen. If you don’t enjoy the crusty, almost poky edges of sliced sourdough but still want a satisfying crunch in every bite, ciabatta is a perfect candidate. With a sourdough starter, its airy crumb and tangy flavor make sandwiches even better! And of course, it’s delicious plain too, or the very Italian way: dipped in good extra‑virgin olive oil and balsamic vinegar, ecco fatto!
Everything you need for these Ciabatte!
- 185g Bread flour
- 45g Whole wheat flour
- 200g Water
- 45g Sourdough starter
- 5g Salt
- 5g Extra virgin olive oil
- 15g Flaxseeds, toasted
Ingredients Notes & Explanations
Sourdough starter (Levain) —
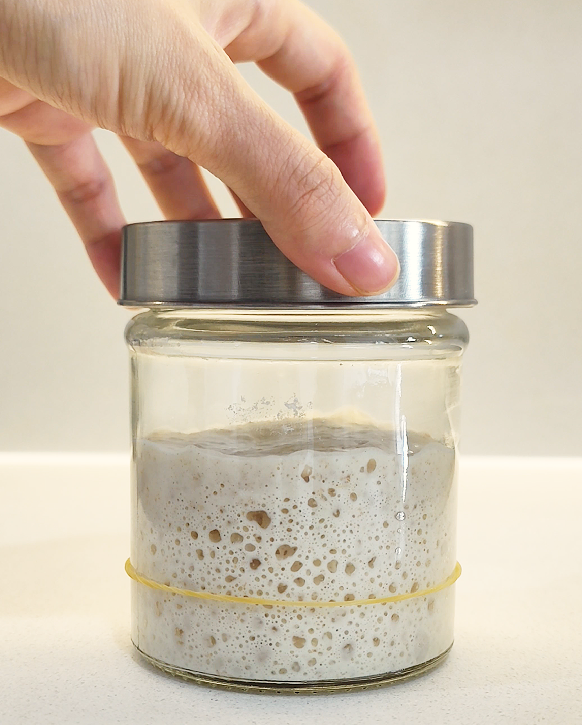
If you’re making sourdough breads almost like once in a week, like me, you need to take our your starter from the fridge, feed and refresh them at least twice before you start using it for bread making, to make sure it would not ruin all your hard work and time spent on the dough. Active sourdough starter is definitely the key to a beautiful, airy and fluffy loaf, that you’re aiming for.
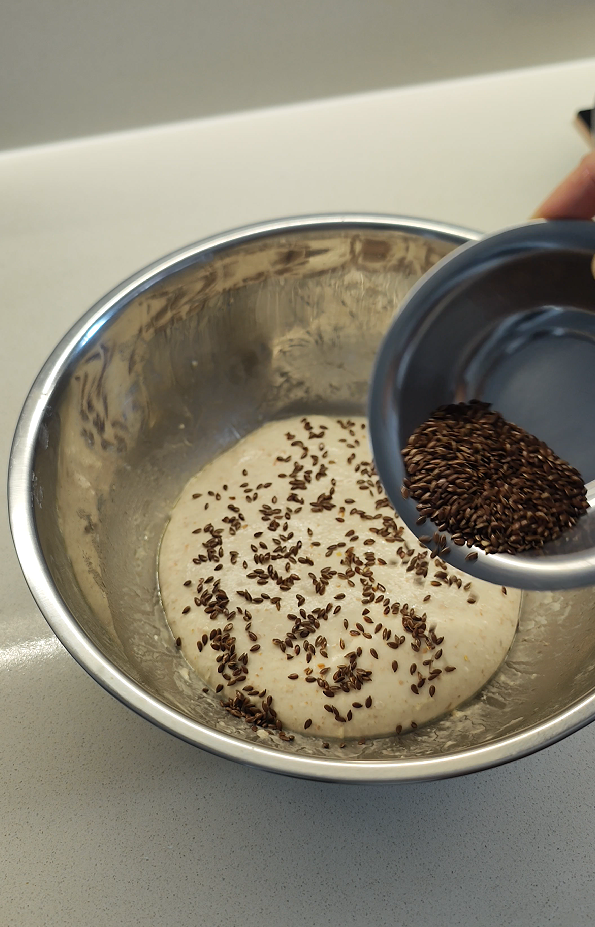
Toasted Flaxseeds ——
To maximum the aroma and nuttiness of flaxseeds, I highly recommend you to toast them before using it before mixing them into the dough. You can literally smell the fragrance even just by adding it to your dough and ferment together!
For me, toasting smaller seeds like this in a pan is more preferable than an oven because I can always keep an eye on it. Also I would not want to heat up an big oven just to toast 15 grams of seeds XD
To toast the flaxseeds, start with a cold pan, and low heat. While slowly toasting them, make sure you keep swirling or stirring them in the pan, so they can be toasted nicely and evenly. When they started to pop and dancing the the pan, there is when we can stop toasting and pour it into a bowl. Set aside and let it cool completely before adding them to the dough. So do it in advanced, maybe while your dough is autolysing in the fridge.
Whole wheat flour ——
I always add whole wheat flour into any kind of sourdough bread. Yes, it might weaken the gluten structure of the dough slightly, especially when I use whole wheat flour that is coarser and the bran shards is bigger, but for return, I get a loaf of bread that is so much better in terms of aroma and taste, than a plain white flour bread. They are just different. You could choose finer whole wheat flour like US brands does, for easier handling. But hey, do not worry too much, I know a lot of you are newbies in sourdough making and I gotcha! I will always keep the whole wheat flour content around 20% of the dough so it would not be a disaster on your bread making counter 😉
Also, feel free to subtitute it with normal bread flour when you do not want or do not have any whole wheat flour on hand.
Extra virgin olive oil ——
When making Italiano breads like this, ciabatta, focaccia or schiacchiata, extra virgin olive oil is always my first choice then normal olive oil. You might be saying, owh, the fragrance and nutrition of it actually will be reduced or even gone after baking in a high temperature oven, but honestly, the difference is quite obvious for me. Extra virgin olive oil always makes the bread leaving a subtle sweetness in my mouth after every bite, and the smell of it, especially once you done baking and take it out from the oven, is just fascinating!
However, it is just a very little amount in the recipe this time, because ciabatta do not need so much oil like focaccia and the others do, so the difference is quite limited I guess 😀
~ Video tutorial ~
Steps of making (Without machine)
- First thing to do, feed your levain with 1:1:1 ratio or 1:1:1.5 (last part is flour)
- Mix bread flour, whole wheat flour and water together, until no dry flour left, cover, and keep in chiller to autolyse, at least for 2 hours, or until your levain has reaches its peak.

- Put flaxseeds in a cold pan, start with low heat, keep stirring and toasting until some of the seeds can pop or when it starts to smoke, then pour it out and set aside to let cool.
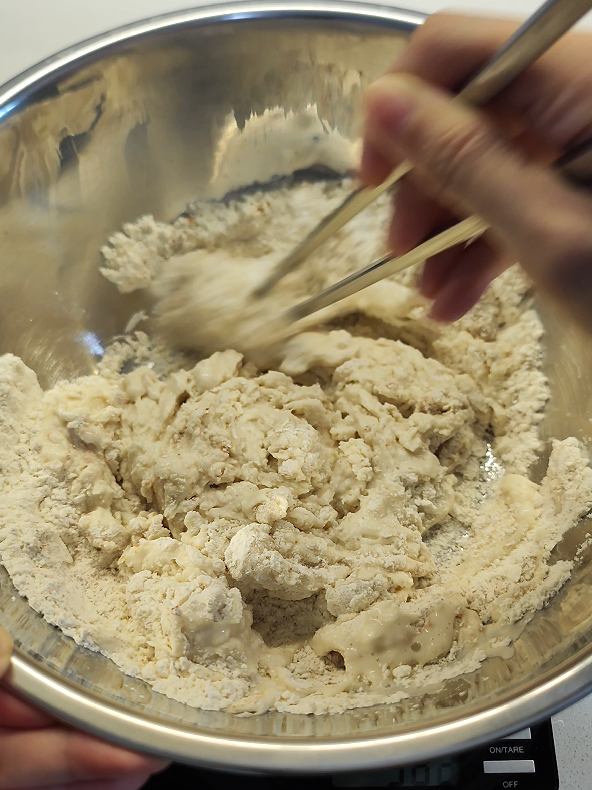
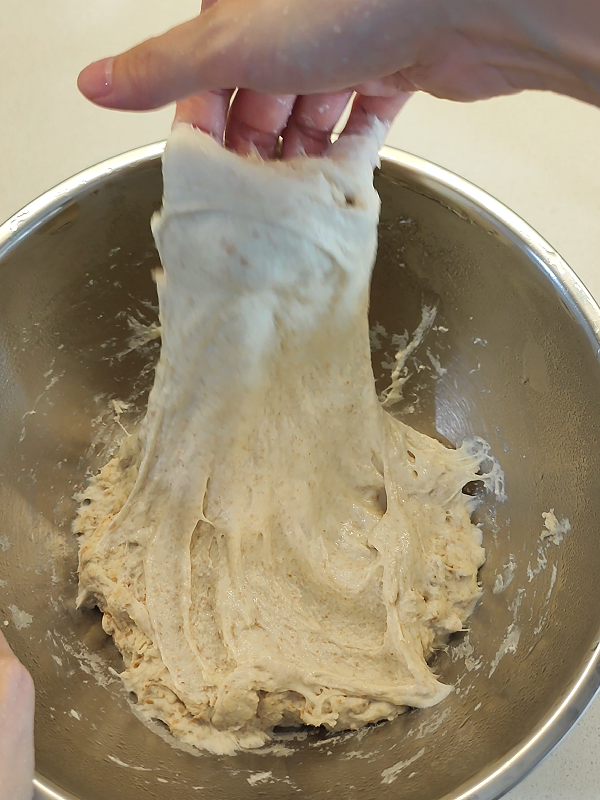
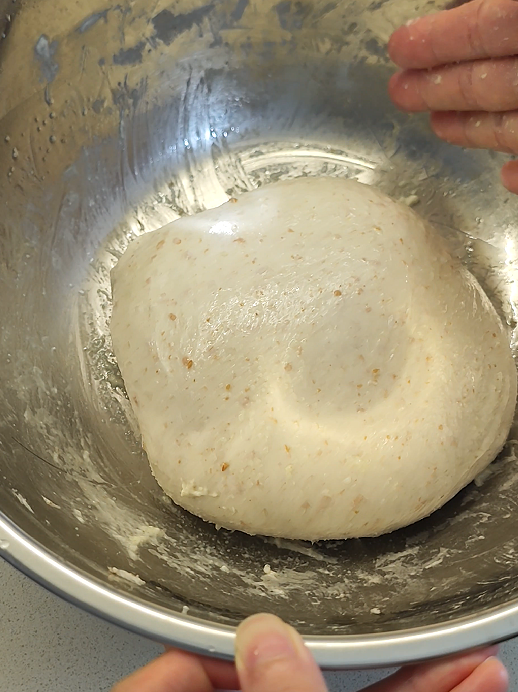
- When your levain reaches its peak, add it in to your chilled dough, spread the levain out with your hand first, then do a set of stretch and fold.
-
- Rest the dough for 30 mins.
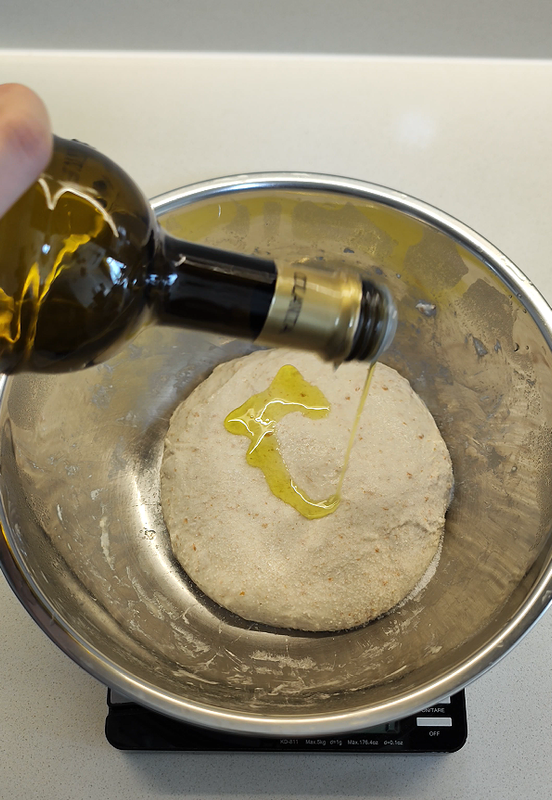
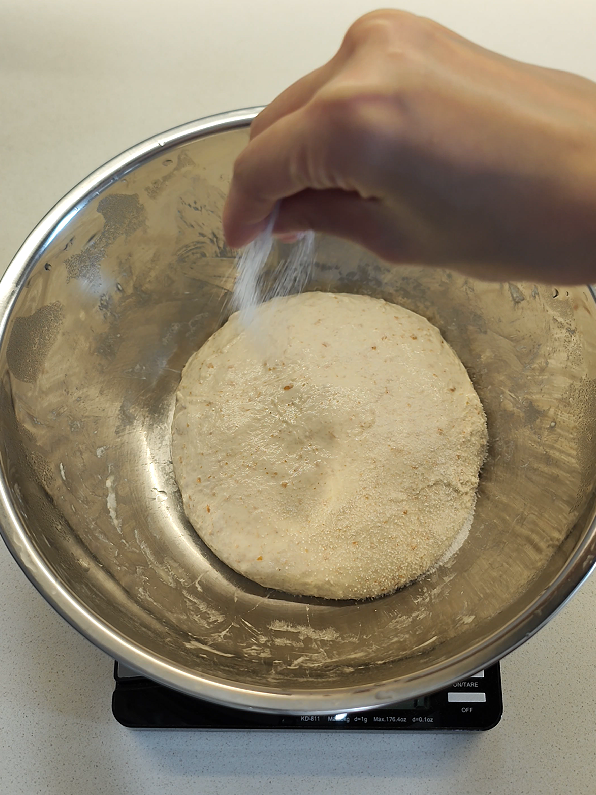
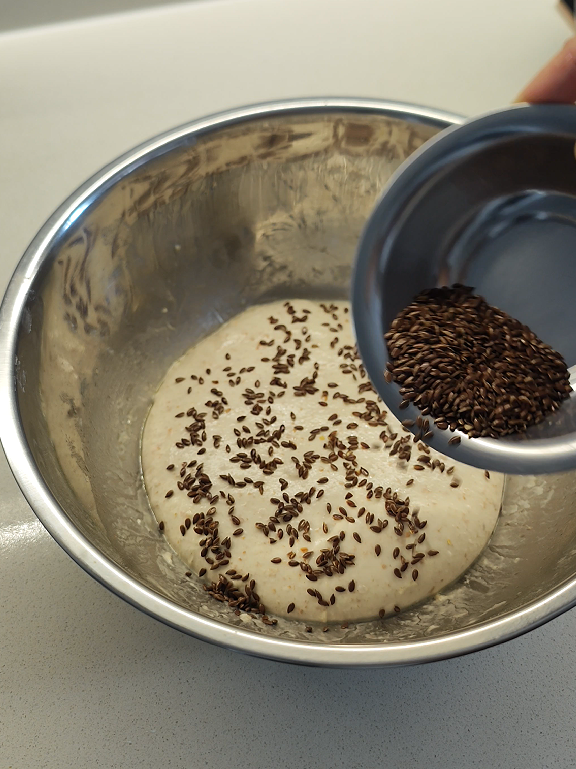
- Now add in salt, oil, and flaxseedss (or if you want add flaxseeds later while coil folding, also works)
-
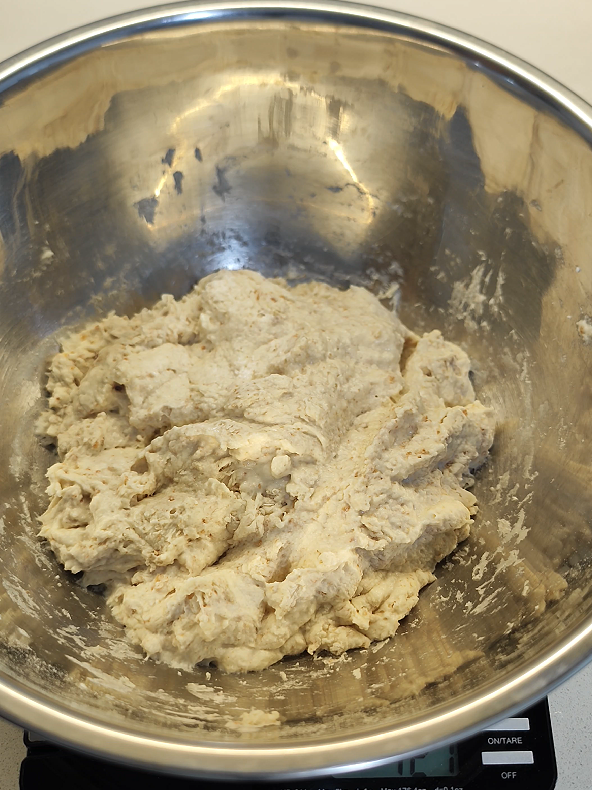
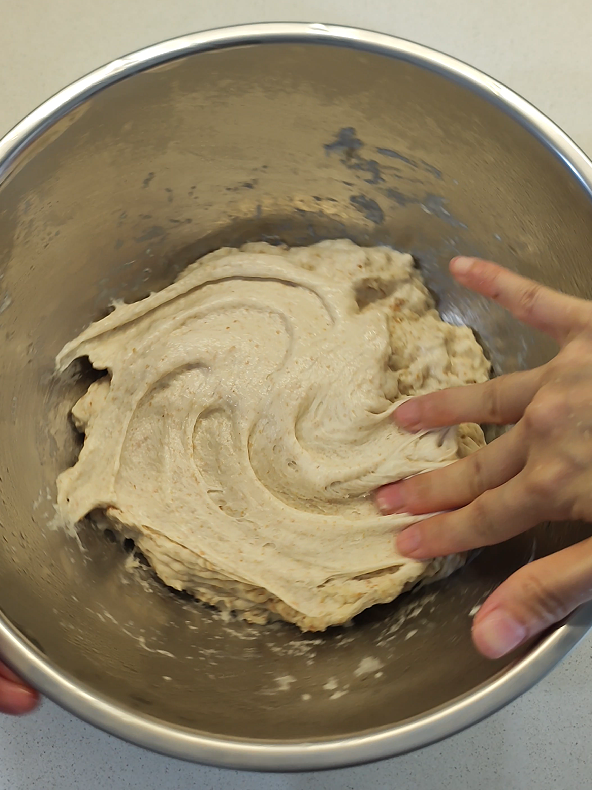
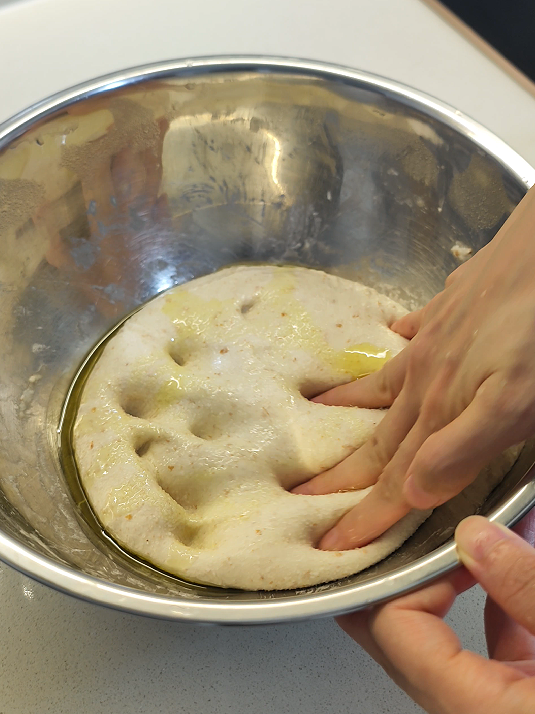
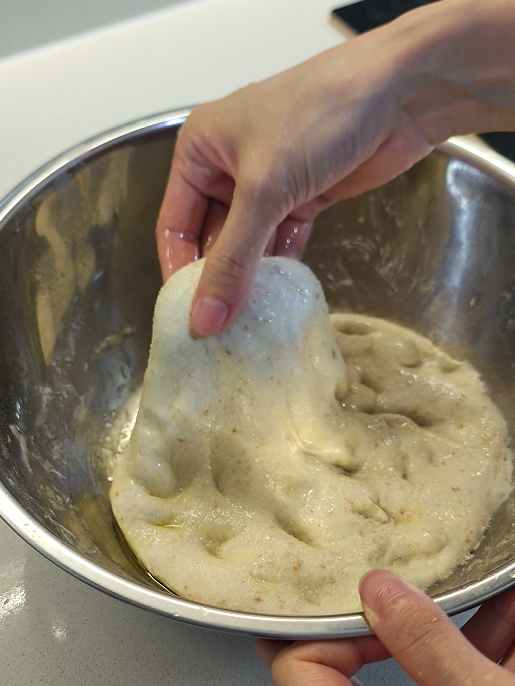
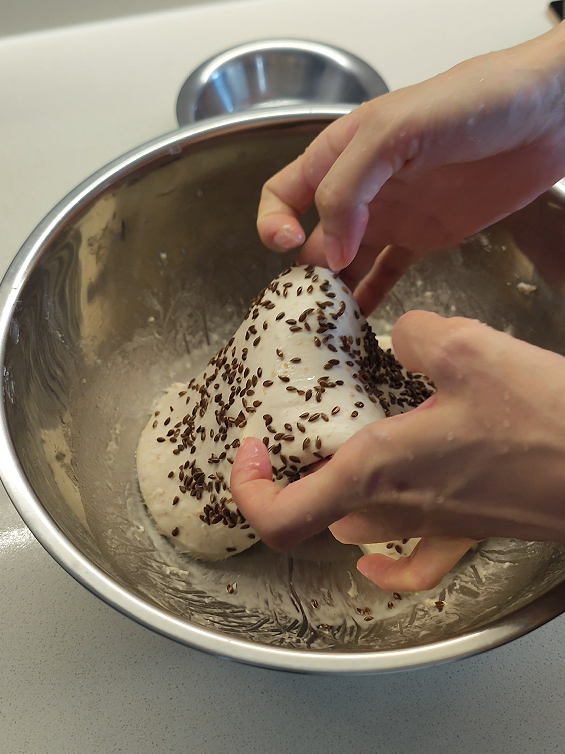
- Use finger tips to poke and push the ingredients into the dough first, then use Rubaud method to mix everything well, then shape it into a round dough.
-
- Rest for another 30 minutes.
- Then we do 4 sets of coil folds, with 30 minutes intervals.
-
- After last set of coil folding, continue the bulk fermentation of the dough, until it is airy and became 1.5x in size.
- Keep in chiller for cold fermentation for 12-24 hours. (For my time, I do 18 hours here)
- And take it out from the fridge and proof it at room temp until doubled in size. (If your dough has proofed enough thourgh cold fermentation, skip this step)
Shaping:
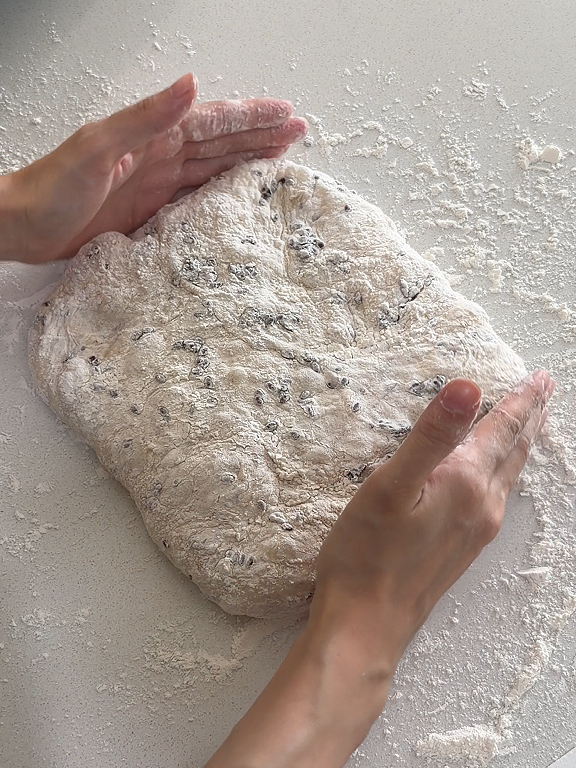
- Sprinkle enough flour on your counter and the top side of the bread, and toss it out to the counter top.
- Sprinkle enough flour on the bottom part of the dough as well.
- Tidy up the shape of the dough into a squarish or rectangular dough (or it already is if you use a square container to proof overnight)
-
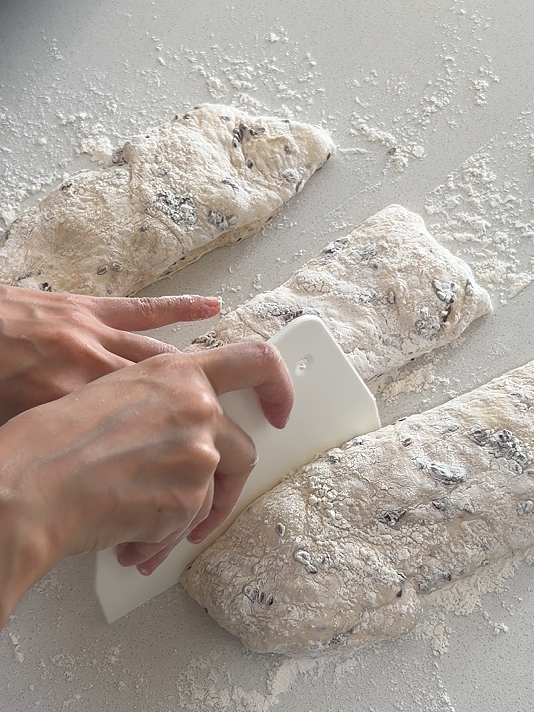
- Cut it into the numbers and portion size you want, I do 3 here, but you can do 4, 6 or even 9 (mini).
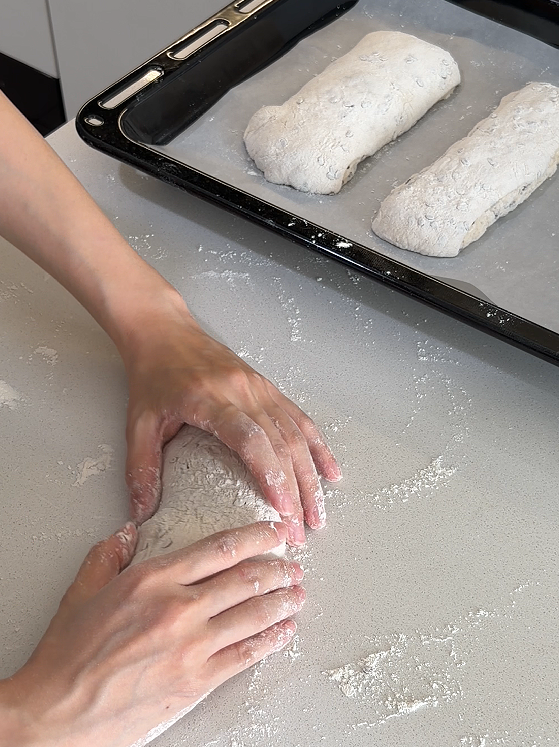
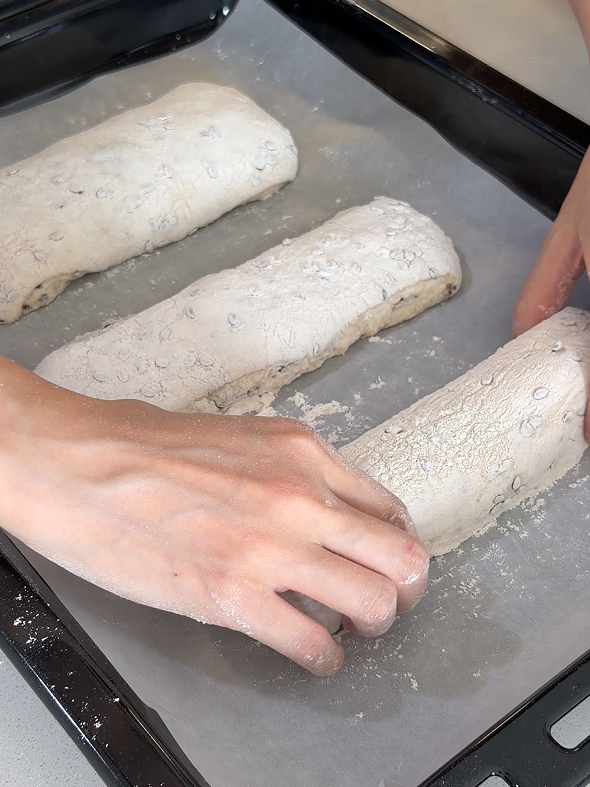
- Dust the edges with some flour and transfer it to a baking tray, lined with baking paper, then tidy up the shape.
-
Baking:
- Make sure your oven is now preheated well, with some baking stones or trays if you are planning to create steam for best result.
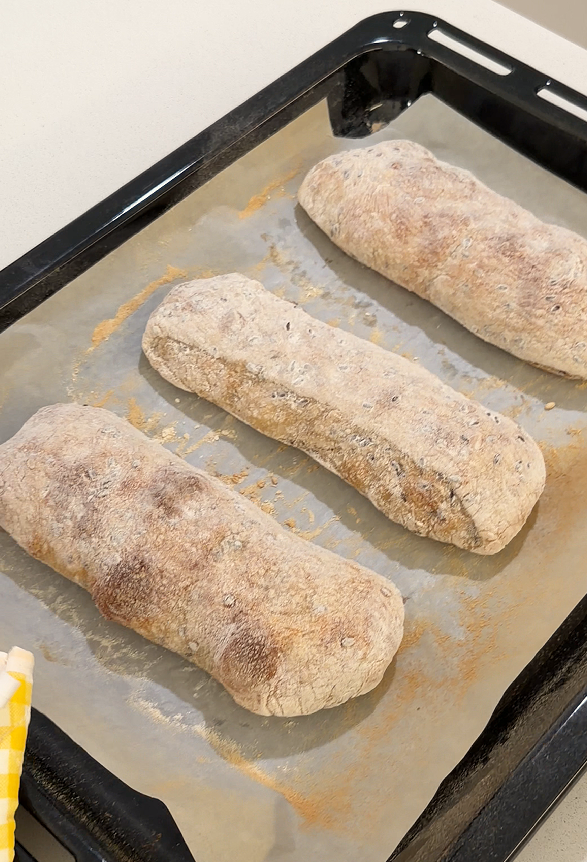
- Bake your ciabatta at 220C, preferably conventional mode, for 15 mins, or until nice and golden brown.
- Remove the ciabatta from the oven, rest for 5-10 mins before serving it, or let it cool completely before keeping it in freezer as your meal prep bread!
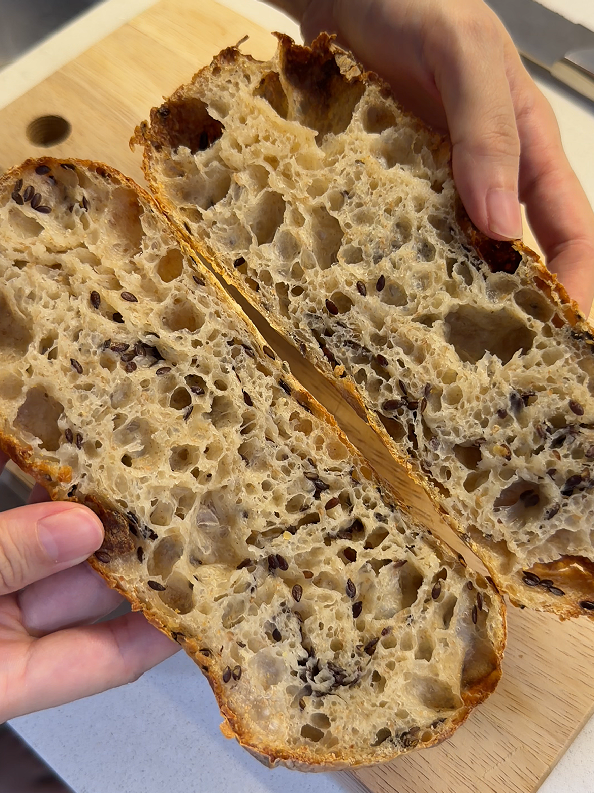
Flaxseed Sourdough Ciabatta
食材 Ingredients
步骤 Method
- First thing to do, feed your levain with 1:1:1 ratio or 1:1:1.5 (last part is flour)
- Mix bread flour, whole wheat flour and water together, until no dry flour left, cover, and keep in chiller to autolyse, at least for 2 hours, or until your levain has reaches its peak.
- Put flaxseeds in a cold pan, start with low heat, keep stirring and toasting until some of the seeds can pop or when it starts to smoke, then pour it out and set aside to let cool.
- When your levain reaches its peak, add it in to your chilled dough, spread the levain out with your hand first, then do a set of stretch and fold.
- Rest the dough for 30 mins.
- Now add in salt, oil, and flaxseedss (or if you want add flaxseeds later while coil folding, also works)
- Use finger tips to poke and push the ingredients into the dough first, then use Rubaud method to mix everything well, then shape it into a round dough.
- Rest for another 30 minutes.
- Then we do 4 sets of coil folds, with 30 minutes intervals.
- After last set of coil folding, continue the bulk fermentation of the dough, until it is airy and became 1.5x in size.
- Keep in chiller for cold fermentation for 12-24 hours. (For my time, I do 18 hours here)
- And take it out from the fridge and proof it at room temp until doubled in size. (If your dough has proofed enough thourgh cold fermentation, skip this step)
- Sprinkle enough flour on your counter and the top side of the bread, and toss it out to the counter top.
- Sprinkle enough flour on the bottom part of the dough as well.
- Tidy up the shape of the dough into a squarish or rectangular dough (or it already is if you use a square container to proof overnight)
- Cut it into the numbers and portion size you want, I do 3 here, but you can do 4, 6 or even 9 (mini).
- Dust the edges with some flour and transfer it to a baking tray, lined with baking paper, then tidy up the shape.
- Make sure your oven is now preheated well, with some baking stones or trays if you are planning to create steam for best result.
- Bake your ciabatta at 220C, preferably conventional mode, for 15 mins, or until nice and golden brown.
- Remove the ciabatta from the oven, rest for 5-10 mins before serving it, or let it cool completely before keeping it in freezer as your meal prep bread!
小贴士 Tips
酸种亚麻籽拖鞋面包
你喜欢吃拖鞋吗?欸不是,我是说恰巴塔哦!这个名字在意大利语里其实就是“拖鞋”的意思,灵感来自它扁平、细长的形状。恰巴塔最迷人的地方在于它薄而酥脆的外壳,以及轻盈、不规则的孔洞。用天然酵种来制作,它会发展出更深层次的酸香与复杂风味,同时也更容易消化。再加上亚麻籽,你就能品尝到坚果般的余韵,为任何三明治增添一份额外的香气!
为什么你会喜欢这款酸种亚麻籽恰巴塔?
每当我提起恰巴塔,我就会想到三明治——像 Subway 那样,塞满馅料、酱汁丰富,但面包依然能完美支撑,不会像普通白面包那样变得湿软坍塌。恰巴塔绝对是那种能做出世界上最好三明治的面包之一,至少在我的厨房里是这样。
如果你不喜欢切片酸面包那种硬壳、几乎戳人的脆边,但仍想在每一口里享受令人满足的酥脆感,恰巴塔就是完美的选择。用酸种制作,它的孔洞轻盈、风味酸香,让三明治更加出色!当然,单独吃也很美味,或者用最简单,最意大利的方式来享受:蘸上优质的特级初榨橄榄油和巴萨米克香醋,ecco fatto!
你所需要的食材:
- 185g 面包粉
- 45g 全麦面粉
- 200g 水
- 45g 酸种
- 5g 盐
- 5g 初榨橄榄油
- 15g 亚麻籽,烤过
啰嗦环节:
酸种 —
如果你像我一样几乎每周才会烤一次酸种面包,那么在开始做面包之前,你需要先把酸种从冰箱里取出,至少喂养两次,以让酵种回到活跃的状态。活跃有力的酵种,不会毁掉你在面团上投入的所有心血与时间,也绝对是你追求的那种轻盈、蓬松、漂亮面包的关键。
烤亚麻籽 —
为了最大化亚麻籽的香气和坚果风味,我强烈推荐在把它们加入面团之前先把它们炒香。这一小小动作,会让你在制作面团的过程中,就立刻闻到那股迷人的香气哦!
对我来说,像这种小颗粒的种子,用平底锅炒比用烤箱更合适,因为我可以随时观察它的状态。而且,我也不想为了区区 15 克种子就把大烤箱加热 XD
炒亚麻籽的时候,从冷锅开始,用小火慢炒。在过程中要不断摇晃或搅拌,让它们受热均匀。当它们开始在锅里“噼啪跳舞”时,就可以把亚麻籽倒入碗中,放置一旁,等待完全冷却后再加入面团,也因此需要提前炒起来备用。
全麦面粉—
不管是任何酸种面包,我几乎都会加入全麦面粉。是的,它可能会稍微削弱面团的筋性,尤其是当我使用颗粒较粗、麸皮碎片较大的全麦面粉时。但作为回报,我得到的面包在香气和风味上远远胜过单纯的白面粉面包。成品的质量对我来说是完全不一样的。你也可以选择像美国品牌那样的细磨全麦面粉,对新手来说会更容易操作。
不过,别太担心!我知道很多小伙伴们都是酸种面包新手宝宝,我懂你们!我会尽量把全麦面粉的比例控制在面团的 20% 左右,这样这些面团就不会在你的工作台上造成一团令人愤怒的灾难;)
初榨橄榄油 —
在制作意大利面包时,比如恰巴塔、佛卡夏或 schiacchiata,比起普通橄榄油,我更喜欢初榨橄榄油。你可能会说,哎呀,它的香气和营养在高温烘烤后其实会减少甚至消失,但老实说,对我来说差别真的很明显。初榨橄榄油总能让面包在每一口之后咀嚼之后留下一丝微妙的果甜味,而它的香气,尤其是当你刚把面包从烤箱里拿出来时,更是令人着迷!
不过,这次的配方里用量非常少,因为恰巴塔不像佛卡夏或其他面包那样需要大量的油,所以差别也比较有限,有啥用啥 😀
视频教程
拖鞋面包的制作过程 (无机器)
- 首先,确保有把你的酵种喂养好:用 1:1:1 或 1:1:1.5 的比例喂养你的酵种(最后一部分是面粉的分量)
- 然后,将高筋面粉、全麦面粉和水混合,直到没有干粉为止,盖上盖子,放入冰箱冷藏水合,至少 2 小时,或者直到你的酵种涨到峰值。
-
- 把亚麻籽放入冷锅中,用小火开始炒,不断搅拌和翻炒,直到亚麻籽开始“噼啪爆开”或出现轻微冒烟时,就可以倒出,放置一旁冷却备用。
- 当你的酵种达到峰值时,将它加入面团里,先用手把酵种均匀铺开,然后进行一套拉伸折叠(stretch and fold)。
-
- 让面团静置 30 分钟。
- 接着加入盐、油和亚麻籽(或者你也可以选择在之后做抱叠 coil folding 时再加入亚麻籽,同样可行)。
-
- 先用指尖把食材轻轻按压、推入面团中。 接着使用 Rubaud 手法将所有材料充分混合均匀。 最后,将面团整形成一个圆形面团。
-
- 让面团再静置 30 分钟。
- 然后进行 4 次抱叠(coil folds),每次间隔 30 分钟。
-
- 在最后一次抱叠之后,继续让面团进行主发酵,直到面团变得轻盈蓬松,体积达到原来的 1.5 倍。
- 接着放入冰箱进行 12–24 小时的冷藏发酵。(我用了 18 小时)
- 隔天,将面团从冰箱取出,在室温下进行最后发酵,直到体积是原来面团的 2 倍。(如果你的面团在冷藏发酵过程中已经充分发酵,可以跳过这一步)
整型:
- 在工作台上和面团表面撒上足够的面粉,然后把面团倒到台上。
- 在面团底部也撒上一层适量的面粉。
- 将面团整理成方形或长方形(如果你是用方形容器进行隔夜发酵,它可能已经是这个形状了)。
-
- 将面团切成你想要的份数和大小。我这里分成 3 份,但你也可以分成 4、6,甚至 9 份(迷你版)。
- 在切口边缘裹上一些面粉,然后把面团转移到垫着烘焙纸的烤盘上, 再整理一下形状。
-
烘烤:
- 确保你的烤箱这时候已经充分预热,如果你打算制造蒸汽以获得最佳效果,可以在里面放烘焙石或烤盘。
- 最好使用平炉模式,以 220’C 烘烤,约 15 分钟,或直到表面上色。
- 把恰巴塔从烤箱取出,静置 5–10 分钟再享用;或者让它完全冷却后再放入冷冻区,作为你的备餐面包!
可打印中文食谱
酸种亚麻籽拖鞋面包
食材 Ingredients
步骤 Method
- 首先,确保有把你的酵种喂养好:用 1:1:1 或 1:1:1.5 的比例喂养你的酵种(最后一部分是面粉的分量)
- 然后,将高筋面粉、全麦面粉和水混合,直到没有干粉为止,盖上盖子,放入冰箱冷藏水合,至少 2 小时,或者直到你的酵种涨到峰值。
- 把亚麻籽放入冷锅中,用小火开始炒,不断搅拌和翻炒,直到亚麻籽开始“噼啪爆开”或出现轻微冒烟时,就可以倒出,放置一旁冷却备用。
- 当你的酵种达到峰值时,将它加入面团里,先用手把酵种均匀铺开,然后进行一套拉伸折叠(stretch and fold)。
- 让面团静置 30 分钟。
- 接着加入盐、油和亚麻籽(或者你也可以选择在之后做抱叠 coil folding 时再加入亚麻籽,同样可行)。
- 先用指尖把食材轻轻按压、推入面团中。 接着使用 Rubaud 手法将所有材料充分混合均匀。 最后,将面团整形成一个圆形面团。
- 让面团再静置 30 分钟。
- 然后进行 4 次抱叠(coil folds),每次间隔 30 分钟。
- 在最后一次抱叠之后,继续让面团进行主发酵,直到面团变得轻盈蓬松,体积达到原来的 1.5 倍。
- 接着放入冰箱进行 12–24 小时的冷藏发酵。(我用了 18 小时)
- 隔天,将面团从冰箱取出,在室温下进行最后发酵,直到体积是原来面团的 2 倍。(如果你的面团在冷藏发酵过程中已经充分发酵,可以跳过这一步)
- 在工作台上和面团表面撒上足够的面粉,然后把面团倒到台上。
- 在面团底部也撒上一层适量的面粉。
- 将面团整理成方形或长方形(如果你是用方形容器进行隔夜发酵,它可能已经是这个形状了)。
- 将面团切成你想要的份数和大小。我这里分成 3 份,但你也可以分成 4、6,甚至 9 份(迷你版)。
- 在切口边缘裹上一些面粉,然后把面团转移到垫着烘焙纸的烤盘上, 再整理一下形状。
- 确保你的烤箱这时候已经充分预热,如果你打算制造蒸汽以获得最佳效果,可以在里面放烘焙石或烤盘。
- 最好使用平炉模式,以 220’C 烘烤,约 15 分钟,或直到表面上色。
- 把恰巴塔从烤箱取出,静置 5–10 分钟再享用;或者让它完全冷却后再放入冷冻区,作为你的备餐面包!
小贴士 Tips
Disclosure:
The links below will take you to Shopee, making it easy to check out the actual products. Please do compare prices — sometimes local markets can be cheaper! If you purchase through them, I may earn a small commission ❤️ — a tiny sprinkle of support that fuels more recipes. This won’t add any extra cost for you. I only recommend products I personally use and trust; these are items I’ve repurchased many times, so you can be confident they’re truly my reliable picks.
What I Use | 我的好物分享
Extra virgin olive oil | 初榨橄榄油