Pistachio Butter
Among all the nut butters I’ve made, pistachio butter stands out as the most distinctive. Its flavor carries a kind of elegance—almost a noble touch—that sets it apart from the rest. Of course, the cost is just as unique, but after checking the prices of pistachio butter on the market, I realized something: if you truly enjoy it, making your own is actually a pretty smart bargain.
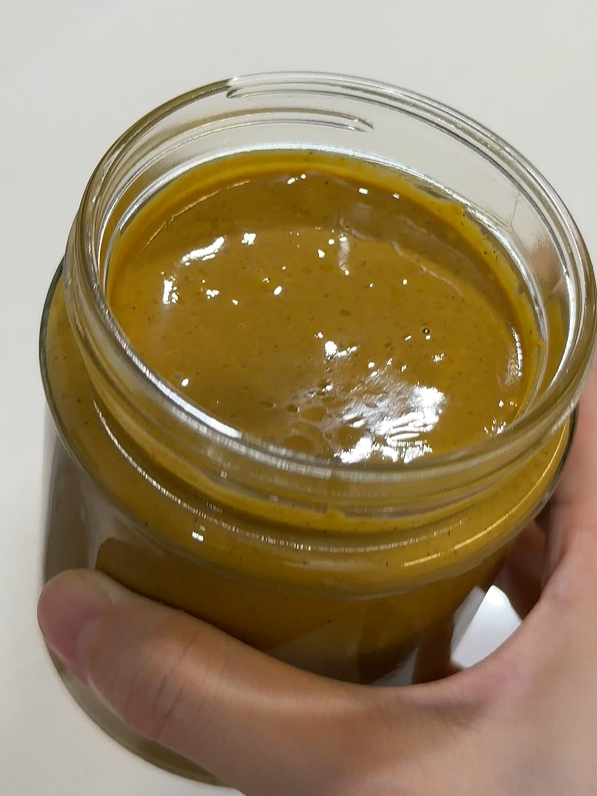
Homemade Pistachio Butter
- Why I choose to make pistachio butter this time?
- Is pistachio butter really good?
- Why pistachio needs longer time to grind into nut butter?
- Details you need to know before you start
- The misconception of nut butter
- Does nut butter contain butter?
- All you need to make pistachio butter
- Steps of making
- How to store & How long is the shelflife?
- What I Use
Why I choose to make pistachio butter this time?
Last time I shared my peanut butter and chocolate spread with chia and flax seeds, plus that “cement‑like” black sesame and walnut flavor peanut butter. When I almost finished it, I put up a poll on IG Story with three options: Peanutella, Pistachio Butter, and Mocha Peanut Butter. I honestly thought Mocha would win—but pistachio came out on top and proved me wrong, so I promised everyone I’d make it.
Beyond the classic pistachio butter, so many people urged me to try recreating IIao IIao’s version pistachio sauce. Normally, I only pair their frozen yogurt with Caramelized Biscuit Sauce, but for research I went back and ordered the pistachio sauce. To my surprise… it was overwhelmingly sweet, almost throat‑burning. Yes, they add crunchy bits for texture, but it only tasted decent when mixed with a big spoonful of tangy frozen yogurt. That’s just my personal take though—no shade if you love it!
So I started with pure pistachio butter, then experimented to see if I could mimic the ice cream topping. I never shared that recipe, but I did make it. The truth is, that flowing, glossy texture comes from loading in extra oil, sweeteners, and milk powder. The final product just wasn’t as good as pure nut butter. Which is why I strongly recommend trying the simple, all‑pistachio version—and trust me, it won’t disappoint!
And if there’s something you’re craving for, feel free to drop me a comment. Next round, I’ll make whatever wins the vote again!
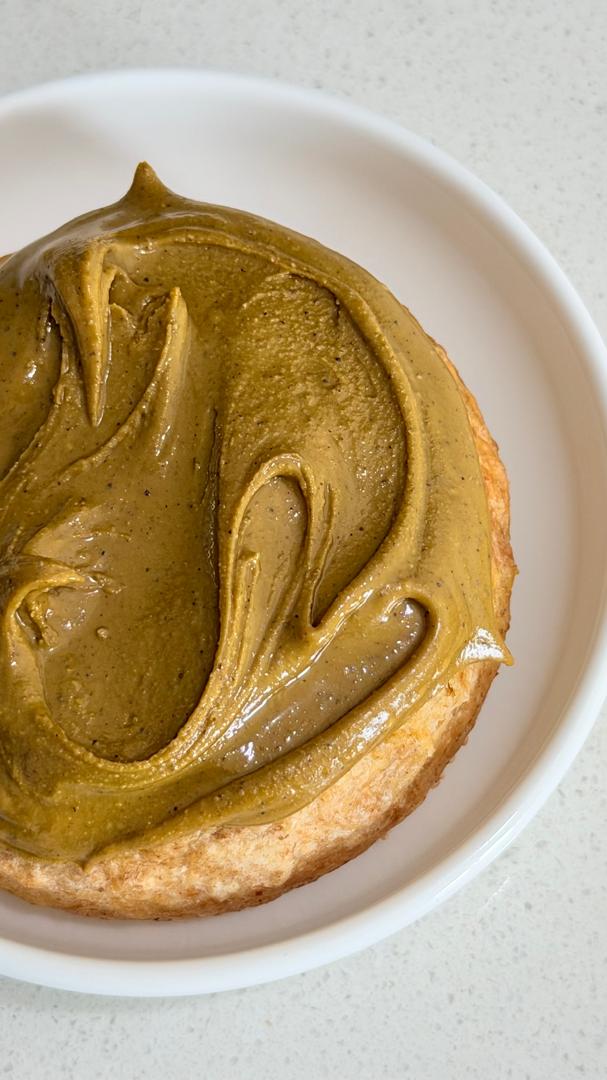
Is pistachio butter really good?
It’s clear that pistachios have a huge fan base—just look at the recent craze over Dubai’s pistachio chocolate. Desserts made with pistachios almost never flop, unless the nut content is so minimal that the flavor falls flat. Pistachios naturally carry a gentle sweetness, and when combined with their unique aroma and vibrant color, they truly shine as the most outstanding of all nuts. That’s why they’ve become an essential flavor on so many dessert menus. And once you grind them into pistachio butter, every spread on bread delivers a double dose of richness and sweetness. How could that ever taste bad?
Why pistachio needs longer time to grind into nut butter?
The main reasons come down to two factors:
- Pistachios have a denser fiber structure, which makes them tougher and harder to break down.
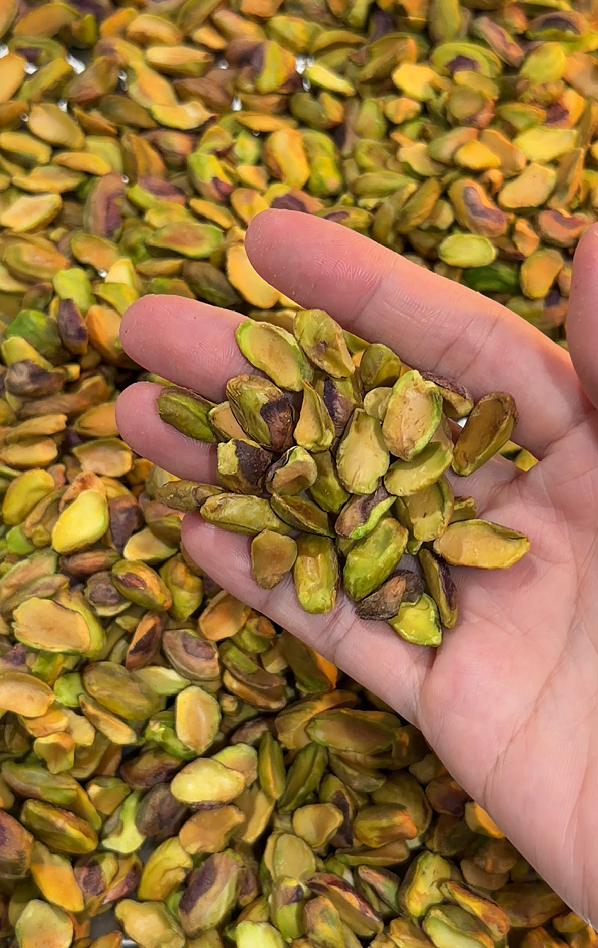
Compared to peanuts, which grind more easily, pistachios have tighter cell walls and denser fibers. That makes it harder for the blades of a blender to break them down. On top of that, pistachio skins are extremely high in fiber. When you grind the nuts together with their skins, the oil released from the kernels is quickly reabsorbed by the skins. Without enough free oil to lubricate the mixture, friction stays high, so making pistachio butter takes more time and patience. Still, the skins are packed with nutrients, so I never bother peeling them (a little shortcut, I admit). And since I’m making it for myself, I don’t mind if the color isn’t as bright—right?
- Pistachios contain relatively less natural oil.
Pistachios contain less fat than peanuts, plus, because their fibers and cell walls are tougher, that makes the limited oil is even harder to release. Peanuts, on the other hand, once ground into powder, quickly transform into a smooth, flowing paste—the peanut oil jumps in to help, making the process effortless.
Details you need to know before you start
- The temperature of nuts
Nuts are best ground while still warm, but fresh‑from‑the‑oven nuts are scorching hot and not friendly to the machine. The sweet spot is to let them rest for about five minutes—still warm, but no longer too hot to touch. That’s the perfect moment to start grinding.
The reason warmth matters is simple: when nuts hold a bit of heat, their oils become more fluid. This speeds up the release of oil and helps the mixture turn into a smooth, creamy paste.
- Need to stop and rest between grinding process
If you’ve watched my video, you might have noticed a little hand gesture I made (I called it “zip it” because the blender was so loud, but what I really meant was “pause”). That’s my signal when I hear the blades struggling. At that point, you must stop—don’t force it. After all, our blenders aren’t designed specifically for nut butter. Pause, use a spatula or tool to stir the mixture, because some nut fragments or paste are definitely jamming the blades. Let the machine rest for 1–2 minutes, then continue. Repeat this cycle until you reach the texture you like.
Another benefit of pausing is that it prevents the nut butter from overheating. Too much heat isn’t just tough on the machine—it can also dull the flavor of pistachio butter when it’s ground continuously at high temperatures.
The misconception of nut butter
Does nut butter contain butter?
Although nut spreads are commonly called “butters”—like Peanut Butter, Almond Butter, or Cashew Butter—the word “butter” here simply refers to the smooth, butter‑like texture created when the nuts are ground. It doesn’t mean the recipe contains actual dairy butter. In fact, store‑bought nut butters are meant to be kept at room temperature, while real butter contains water and therefore could never be part of a shelf‑stable nut spread.
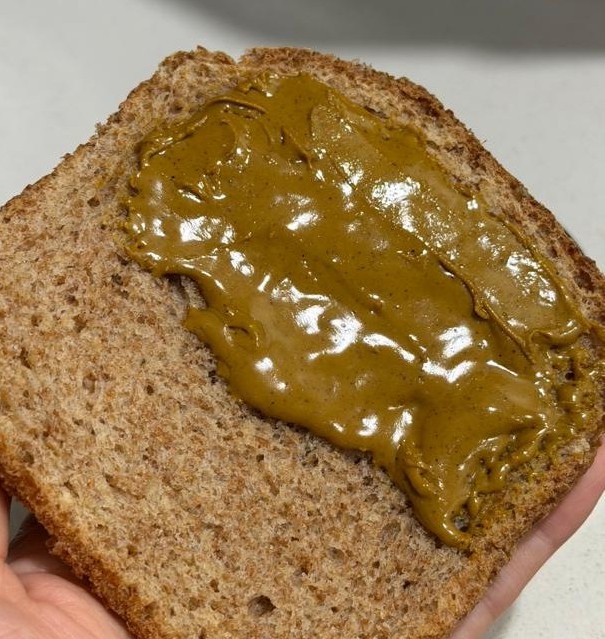
All you need to make pistachio butter
ONLY 3!
- 450g Pistachio kernels
- 1/8 tsp Salt
- 1/2 tbsp Sugar
If you wish to make the process easier:
- Some neutral oil, Exp: corn oil, sunflower oil
Video Tutorial
Steps of making
- Preheat your oven to 140C.
- Spread the pistachio kernels in a single layer on a baking tray, avoiding too much overlap so they roast evenly.
- Place the tray in the preheated oven and bake for about 13–15 minutes. Halfway through, you can turnover the tray or stir the pistachios for even roasting.
- Roast until they’re slightly golden brown. Let them cool for 2–3 minutes—when they taste crunchy (it is the sign of them roasted enough), leave them to rest until warm but not hot to the touch (about 5 minutes).
- Now transfer all the pistachios into a blender and begin grinding.
- If you hear or notice the blades getting stuck, pause for 1–2 minutes and use a spatula to stir the mixture.
- Once the pistachios form a smoother paste, add salt and sugar and continue grinding.
- If you’d like to add oil, this is the stage to do it. Add in small amounts gradually if you’re unsure how much is needed.
- Keep repeating the grind‑pause‑stir cycle until the pistachio butter reaches a smooth consistency. Mine took about 15 minutes, with more than half of that time were spent on letting the machine rest.
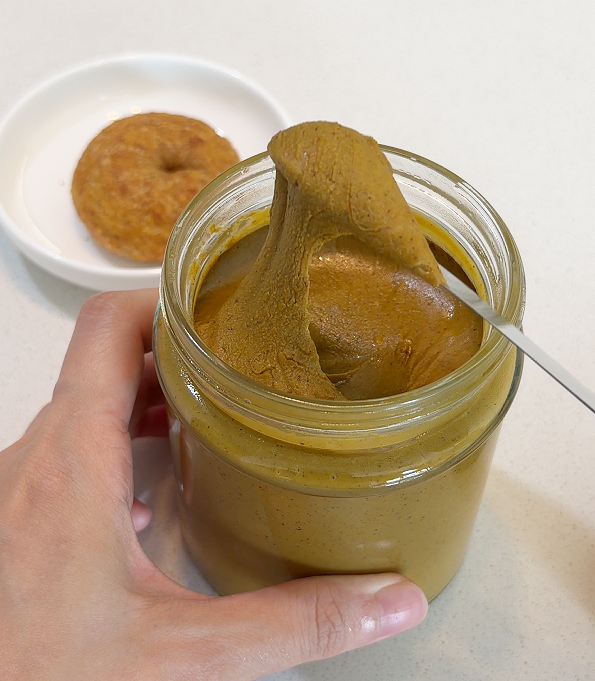
- Transfer the finished pistachio butter into a clean jar.
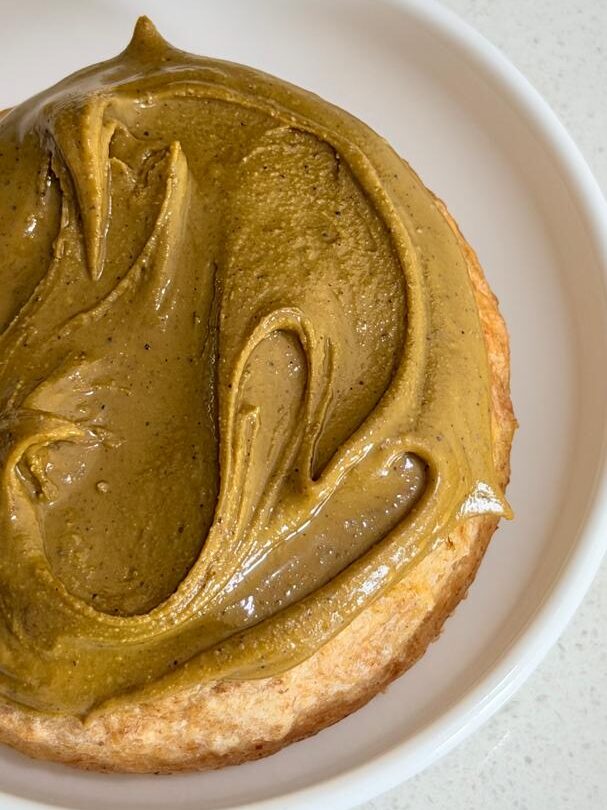
- Congratulations—your homemade pistachio butter, which worth a hundred on the market, is now complete! Hehe!
How to store & How long is the shelflife?
When the pistachio butter is cool, keep it in the refrigerator, and enjoy it within 2 months.
Printable Recipe
Pistachio Butter
食材 Ingredients
步骤 Method
- Preheat your oven to 140C.
- Spread the pistachio kernels in a single layer on a baking tray, avoiding too much overlap so they roast evenly.
- Place the tray in the preheated oven and bake for about 13–15 minutes. Halfway through, you can turnover the tray or stir the pistachios for even roasting.
- Roast until they’re slightly golden brown. Let them cool for 2–3 minutes—when they taste crunchy (it is the sign of them roasted enough), leave them to rest until warm but not hot to the touch (about 5 minutes).
- Now transfer all the pistachios into a blender and begin grinding.
- If you hear or notice the blades getting stuck, pause for 1–2 minutes and use a spatula to stir the mixture.
- Once the pistachios form a smoother paste, add salt and sugar and continue grinding.
- If you’d like to add oil, this is the stage to do it. Add in small amounts gradually if you’re unsure how much is needed.
- Keep repeating the grind‑pause‑stir cycle until the pistachio butter reaches a smooth consistency. Mine took about 15 minutes, with more than half of that time were spent on letting the machine rest.
- Transfer the finished pistachio butter into a clean jar.
- Congratulations—your homemade pistachio butter, which worth a hundred on the market, is now complete! Hehe!
小贴士 Tips
开心果酱
在我做过的所有坚果抹酱当中,我觉得开心果酱是风味最特殊那个,味觉上的反馈甚至让我觉得有点高贵感,或许是因为在所有坚果当中,它的味道最为别具一格。当然了,成本价格也很别具一格,不过我看了看市面上的开心果酱的售价,嗯,总的来说,如果你喜欢吃,那自己做其实很划算!
为什么这次选做开心果酱?
之前跟大家分享过带有奇亚籽和亚麻籽的原味花生和巧克力酱,还有长得像水泥的黑芝麻核桃花生酱。吃完的时候我在 IG Story 给了大家三个选择进行投票,花生 Nutella, 开心果酱,和摩卡花生酱。我本来以为票选最多的应该是摩卡花生酱,没想到我被开心果酱重重打脸,因此就答应了大家会做开心果酱。
除了基础的开心果酱以外,其实还有超多人狂推我做 IIao IIao 的开心果酱。每次我吃 IIao IIao 都只是搭配 Caramelized Biscuit Sauce ,所以我还为了给大家研发而刻意去吃一次他家的开心果酱。万万没想到这开心果酱。。。是甜到辣喉咙的角色。。。虽然该品牌还加了脆脆的东西,比较有口感,但只有在混合一大口的酸奶冰淇凌的情况下才能算得上还不错,额。。。这只是个人口味,小伙伴们别喷哈!
因此我也从开心果酱开始做,再看能不能延伸出大家想要的那款冰淇淋上的开心果酱。虽然后来我没跟大家分享冰淇淋开心果酱的食谱,但其实我有做出来,不过这种流动性比较好的坚果酱,其实就是加了大量的油,甜味剂和,奶粉才会有的质地,最后成品确实没有比纯坚果酱好吃 ,所以我强烈大推大家试试这非常纯的开心果酱!一定不会让你失望哒!
如果你有什么想吃的,也可以留言告诉我哟!下一次做的依然是大家票选最多那个!
开心果酱真的这么好吃?
其实喜欢吃开心果的人非常多,看近期爆火的杜拜开心果巧克力就很明显了对吧。一般跟开心果有关系的甜品都不会销量很差,除非开心果的成分非常少,导致吃起来不够醇香。开心果本身自带一种天然甜,加上它独特的坚果香气和颜色,让它成为了一众坚果里,最出色的坚果,也是很多甜品菜单里不可或缺的口味之一。因此,把开心果磨成开心果酱后,涂抹在面包上的每一口都是浓醇香甜的双倍感受,怎么可能不好吃!
为什么开心果需要比较多的时间磨成酱?
开心果酱比较难磨的主要原因有 2 个:
- 纤维密度比较高,比较坚硬
以更好打磨的花生来做比较,开心果的细胞壁和纤维更加紧密和结实,导致破壁机的刀片比较难把它们粉碎。加上开心果的皮也是纤维含量极高的薄膜,把它跟果仁一起打磨的时候,果仁释放出来的油脂会快速被它的皮再次吸收,导致没有足够的油脂帮助润滑,降低摩擦的阻力,因此打磨这开心果酱需要更长的时间和耐心。不过坚果皮自带非常丰富的营养价值,所以我从来不去皮(也算是小小偷懒一下),而且自己吃的也没有颜色不够鲜艳的顾虑,对吧?
- 天然油脂较少
开心果的脂肪含量比花生少一些,再加上纤维和细胞壁比较坚硬的关系,让它这本来就比较少的油脂更难被释放,换句话或就是不容易自己出油。而花生呢,把它磨得粉碎后,再磨一下子就会瞬间变成流动性超级好的糊糊,因为花生油出来助攻了!
打磨坚果酱须注意的小细节
- 坚果的温度
虽然打磨坚果需要趁热,但刚出炉的坚果非常烫,对机器不友好。烤好坚果后,让它们静置 5 分钟左右,直到还是温热,但不烫手了,那才是最好的打磨时机哦~
至于需要趁热打坚果的原因,是因为有点温度的坚果,它们内里的油脂流动性比较高,可以提高“出油”的速度,帮助更好地打磨成糊糊。
- 打磨过程需要停机休息
如果你有看我的影片,应该会注意到中间打磨的过程中有个小手势(虽然我比成了闭嘴,因为破壁机很吵,但我想跟你们说的是暂停)。那是当我听到破壁机磨不动的时候,这时一定要停下来,而不是硬磨,毕竟我们的破壁机也不是专门设计给研磨坚果酱的。停一停,用一个工具翻一翻里面的坚果碎,因为一定是有坚果碎/泥卡住了你的刀片,让你的机器休息1-2分钟后再继续,然后再重复,直到它磨成你满意的质地为止。
另外一点是,让机器休息的同时,其实也是在预防坚果酱的温度持续升温。温度太高不但对机器不友好,也会让持续在高温被打磨的开心果酱损失些许风味哦~
对于坚果酱的误解
坚果酱的成分里有黄油?
虽然坚果酱的英文名字都普遍称为 “Butter“, 比如说 Peanut Butter (花生酱) , Almond Butter (杏仁酱), Cashew Butter (腰豆酱), 但其实这里的 Butter 指的是坚果被磨成像是黄油般的顺滑质地,而不是成分里有黄油哦~ 再加上市售的坚果酱本来就是室温储存的,黄油本身有水份,更不可能让它参与成为坚果酱的一份子了!
你需要的食材
就三种~
- 450g 开心果仁
- 1/8 tsp 盐
- 1/2 tbsp 糖
如果想要打得轻松一些,可选择添加:
- 少许无味油脂,比如葵花籽油,玉米油
视频教程
开心果酱的料理步骤
- 首先,预热烤箱至 140C。
- 把开心果仁铺单层在烤盘上,尽量不要重叠太多,以确保烤的均匀。
- 送入预热好的烤箱里,烤 13-15 分钟左右,中间可以给烤盘翻面,或搅拌一下开心果。
- 直到表面微微上色,放凉 2-3 分钟后吃起来是脆口,就可以让它们静置至不烫手,大约 5 分钟左右。
- 把开心果仁全部放进破壁机里,开始打磨。
- 过程中只要听到或者观察到破壁机的刀片卡住了,那就暂停 1-2 分钟,并手动借助工具翻一翻开心果碎。
- 当开心果酱变成泥状时,就可以加入盐和糖一起研磨了。
- (想要加油的话,也在这时候就可以加了,如果不确定需要加多少,那可以少量多次加哦)
- 就这样打打停停,直到你的开心果酱变成顺滑的糊糊,我用了大约15分钟左右,一半以上的时间都是停机的时间哦!
- 把开心果酱装到一个干净的罐子里。
- 恭喜你,身价上百的开心果酱这就完成啦!嘿嘿!
保存方式 & 建议保存期限
待开心果酱比较凉后就可以放冰箱冷藏,建议在两个月内享用完哦~
可打印中文食谱
食材 Ingredients
步骤 Method
- 首先,预热烤箱至 140C。
- 把开心果仁铺单层在烤盘上,尽量不要重叠太多,以确保烤的均匀。
- 送入预热好的烤箱里,烤 13-15 分钟左右,中间可以给烤盘翻面,或搅拌一下开心果。
- 直到表面微微上色,放凉 2-3 分钟后吃起来是脆口,就可以让它们静置至不烫手,大约 5 分钟左右。
- 把开心果仁全部放进破壁机里,开始打磨。
- 过程中只要听到或者观察到破壁机的刀片卡住了,那就暂停 1-2 分钟,并手动借助工具翻一翻开心果碎。
- 当开心果酱变成泥状时,就可以加入盐和糖一起研磨了。
- (想要加油的话,也在这时候就可以加了,如果不确定需要加多少,那可以少量多次加哦)
- 就这样打打停停,直到你的开心果酱变成顺滑的糊糊,我用了大约15分钟左右,一半以上的时间都是停机的时间哦!
- 把开心果酱装到一个干净的罐子里。
- 恭喜你,身价上百的开心果酱这就完成啦!嘿嘿!
- 保存方式 & 建议保存期限
- 待开心果酱比较凉后就可以放冰箱冷藏,建议在两个月内享用完哦~
小贴士 Tips
Disclosure:
The links below will take you to Shopee, making it easy to check out the actual products. Please do compare prices — sometimes local markets can be cheaper! If you purchase through them, I may earn a small commission ❤️ — a tiny sprinkle of support that fuels more recipes. This won’t add any extra cost for you. I only recommend products I personally use and trust; these are items I’ve repurchased many times, so you can be confident they’re truly my reliable picks.
What I Use | 我的好物分享