Black Pepper Grilled Chicken Burger
It’s been a long time since we did something for the Copycat Series! This round, we’re tackling one of McDonald’s all‑time hot sellers—the Black Pepper Grilled Chicken Burger, aka GCB. I’ve had it maybe twice (if I’m not mistaken), and while the black pepper sauce was pretty good, the filling just didn’t satisfy me enough—it felt too little to be truly satiating.
So here you go: a GCB that’s packed with meat and vegetables in every single bite!
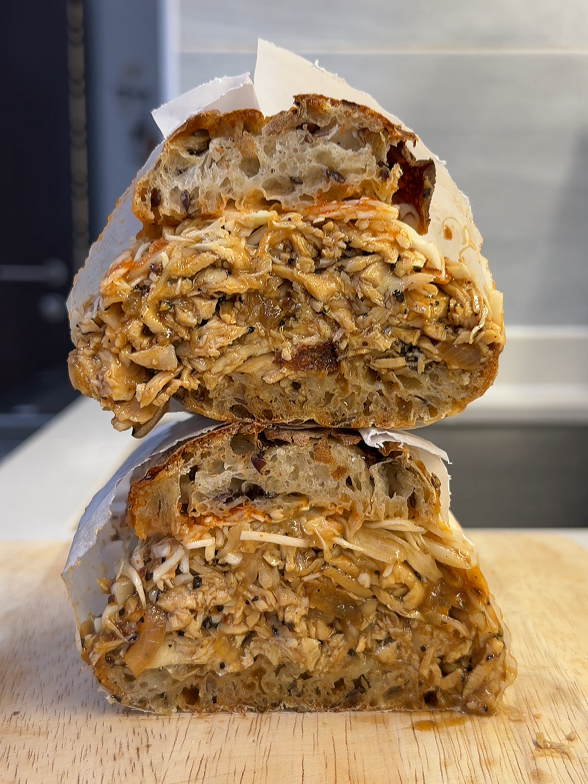
Homemade GCB for 2
- Why would you love Grilled Chicken Burger?
- All you need for this “burger”
- Some ingredients notes and explainations
- Chicken Breast, brined in advanced
- Do not brown your garlic
- Make the black pepper sauce for your meal prep!
- Steps of making this GCB
- What I Use, for your reference 🙂
Why would you love this Grilled Chicken Burger with Black Pepper Sauce?
McDonald’s GCB is usually made with chicken thigh, but today we’re using chicken breast. The reason? I want to turn it into something like a pulled pork–style chicken burger. With the larger surface area of shredded chicken soaking up all that peppery, saucy goodness, this might just be one of the best chicken breast burgers you’ll ever have—trust me 😉
Plus, hey, we’re making our own black pepper sauce. There’s no way this can go wrong!
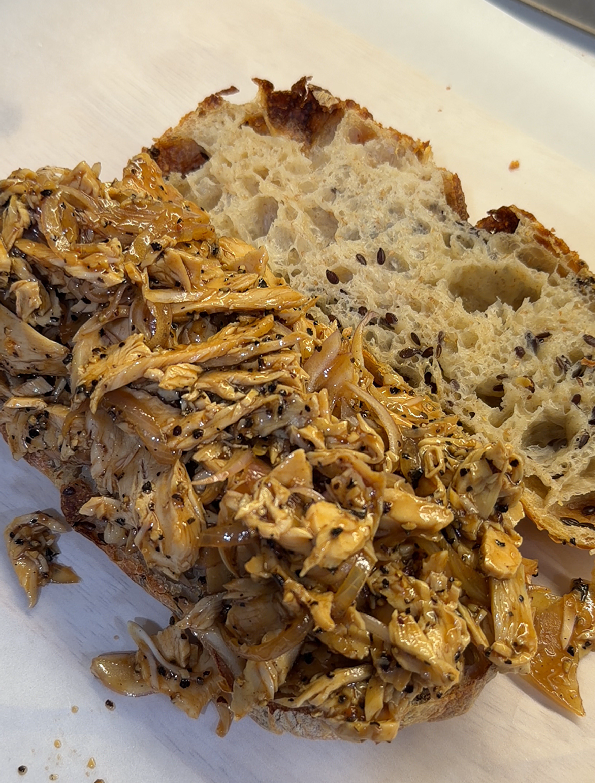
All you need for this GCB!
For 2 servings:
- 2 pcs Chicken breast, brined
- 3-4 Cabbage leaves, thinly sliced/shredded
- 1/4 Red Onion, thinly sliced
- Ciabatta, or any bread you preferred
- Japanese mayo, as needed
- Sriracha sauce, as needed, or any chili sauce you preferred
Black pepper sauce:
- 1/2 tbsp Butter
- 1/4 Red Onion, thick slices
- 3 cloves Garlic, minced
- 2 tbsp Black Pepper, crushed
- 1/8 tsp White pepper powder
- Seasoning mixture:
- 1 tbsp Oyster sauce
- 1 tsp Soy sauce
- 1/4 tsp Dark soy sauce
- 1 tsp Lea & Perrins (Worcestershire Sauce)
- 1/2 tsp Maggi seasoning
- 2 tbsp Ketchup
- 1 pinch Salt
- 1 pinch MSG (ajinomoto)
- 1-1.5 tsp Sugar
- 1 tsp Corn Starch
- 8 tbsp Water
Ingredients Notes & Explanations
Chicken breast, brined in advanced —
Whenever you see chicken in my content or recipes, it’s always brined or marinated in advance—not just chicken breast, but every part of the bird. That said, brining is my preferred method for chicken breast because it’s very lean and lacks the fat in between the muscle fibers. That’s what makes it feel tough and dry once cooked.
Brining uses a salt solution to increase the water content of chicken breast, and the salt also changes the muscle structure slightly. That’s why the meat turns out tender and juicy after brining.
This time, I used an 8% brine solution—about 4 tablespoons—for two pieces of chicken breast, soaked overnight. For more details on how to brine chicken breast step by step, check out the blog post here.
Alternatively, you could simply marinate it with some salt and pepper for at least 30 mins, if you’re on the rush.
Do not brown your garlic —
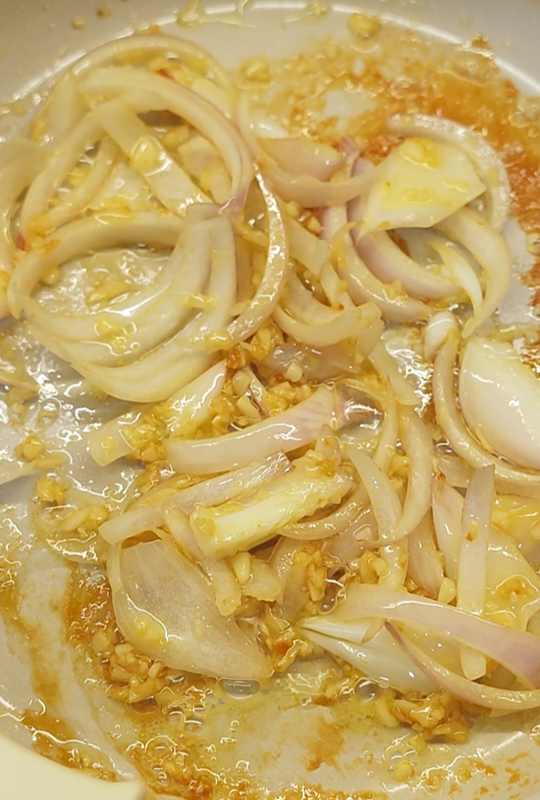
I know not everyone will read through the full recipe steps, so let me remind you here—don’t brown your garlic. In my video it might look like I did, but that color actually came from the browned bits stuck to the pan. Since this is Western food, browning garlic isn’t always the go‑to choice like it often is in Chinese cuisine. To keep it more “angmo” style, just use low heat to stir‑fry the onion and garlic until fragrant, and then we’re good to move on to the next step.
Make the black pepper sauce for your meal prep!
This sauce works with everything—chicken, beef, pork, seafood, tofu, or even vegetables. You can definitely make a bigger batch and keep it frozen as your go‑to meal prep sauce. If you do, I recommend a few tweaks:
- Leave out the cornstarch, and thicken it later when you reheat.
- Reduce the water to make a concentrated version (saves freezer space!). Just remember to dilute it when you use it.
- Swap the water for chicken stock—or beef stock if you’ll mostly use it for beef dishes—for extra flavor.
Video tutorial
Steps of making Black Pepper Grilled Chicken Burger
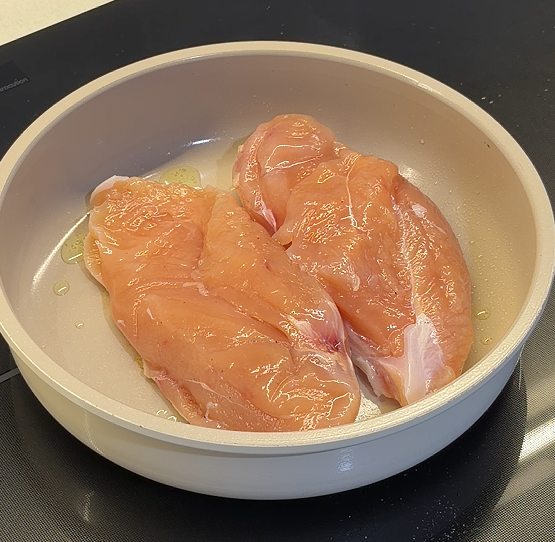
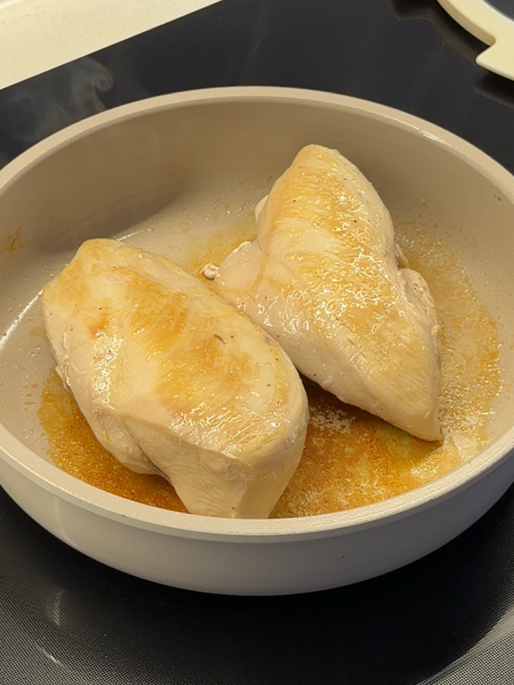
- Firstly, sear the chicken breast in pan, with medium low to low heat, cover with lid to make it cooked quicker.
- Meanwhile, mix up all the ingredients of the seasoning mixture, and standby for black pepper sauce.
- About 3-4 minutes later, make sure it is nicely browned, then flip it over, sear for another 3 minutes on the other side.

- Remove the chicken breast from the pan.
- Add in butter, use low heat to melt it.
- Put in thicker onion slices and miced garlic into it and saute until fragrant, do not brown it.
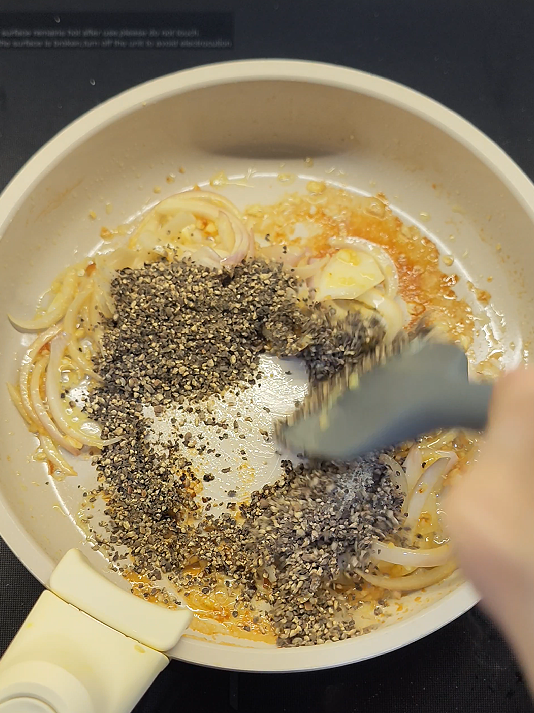
- Then add in crushed black pepper and white pepper powder, continue to stir on low for about 30 seconds, or until you smell the aroma of peppers.
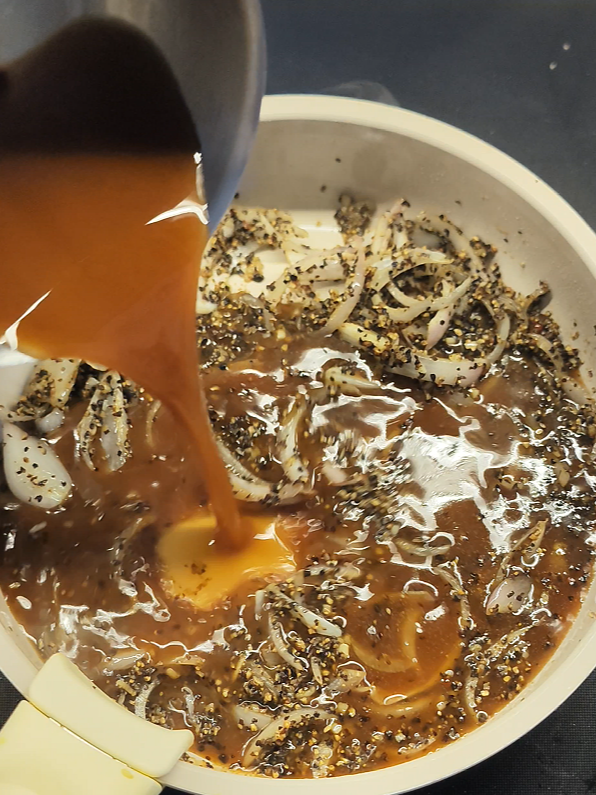
- Before pouring in the seasoning mixture, give it a good stir to make sure the corn starch isn’t stuck at the bottom.
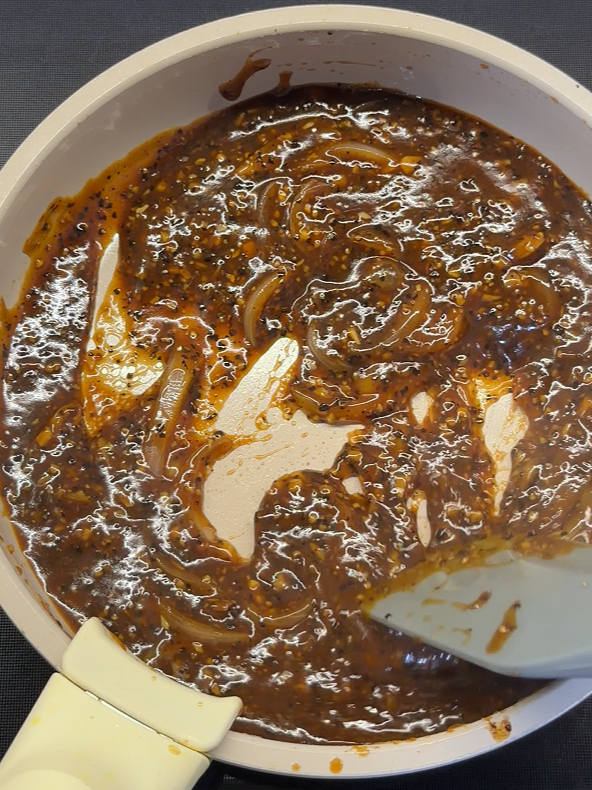
- Then pour in the seasoning sauce and bring it to a boil. Once the back of your spatula or spoon can be coated with a thin layer of sauce, your black pepper sauce is ready!
-
- Take out 1/3 of the sauce from the pan and set aside.
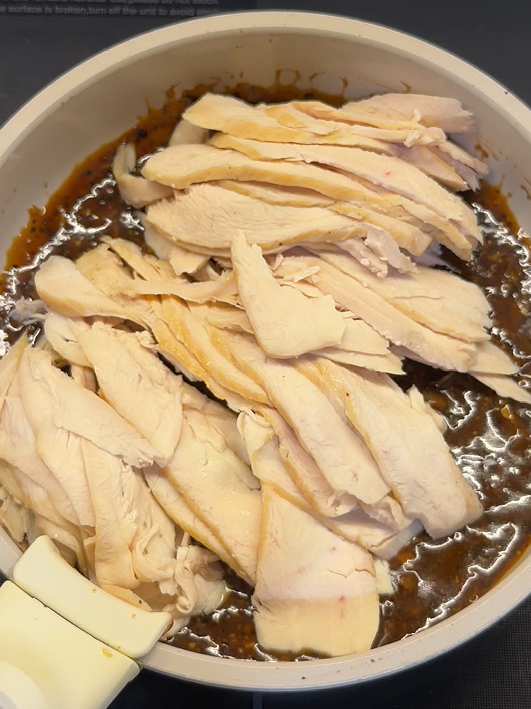
- Slice the chicken breast thinly (or shredded, if your preferred), then throw them into the pan.
- Coat all the chickens with the sauce, add in some more sauce, if needed.
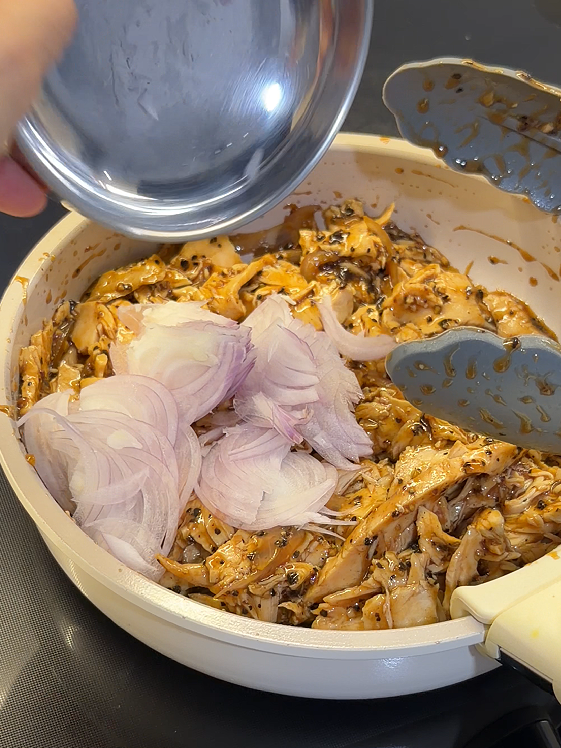
- Put the thinly sliced red onion in, and mix evenly (keep it out and add together with shredded cabbage, if you want the raw spiciness of onion).
-
- Make sure everything is well coated with black pepper sauce.
To Assemble:
- Bake or toast your bread or buns until nice and hot.
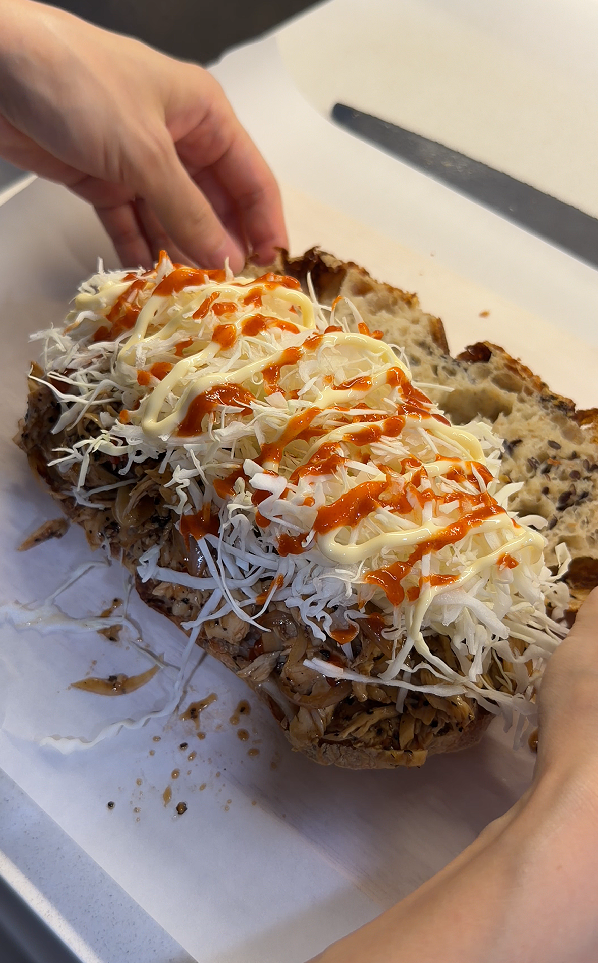
- Place the black pepper shredded chicken breast on the bread—make sure you really pile it on, haha!
- Top with shredded cabbage.
- Drizzle over Japanese mayo and a touch of sriracha.
- Cover with the other half of the bread and wrap it up.
- Dinner’s ready!
Black Pepper Grilled Chicken Burger
食材 Ingredients
步骤 Method
- Firstly, sear the chicken breast in pan, with medium low to low heat, cover with lid to make it cooked quicker.
- Meanwhile, mix up all the ingredients of the seasoning mixture, and standby for black pepper sauce.
- About 3-4 minutes later, make sure it is nicely browned, then flip it over, sear for another 3 minutes on the other side.
- Remove the chicken breast from the pan.
- Add in butter, use low heat to melt it.
- Put in thicker onion slices and miced garlic into it and saute until fragrant, do not brown it.
- Then add in crushed black pepper and white pepper powder, continue to stir on low for about 30 seconds, or until you smell the aroma of peppers.
- Before pouring in the seasoning mixture, give it a good stir to make sure the corn starch isn’t stuck at the bottom.
- Then pour in the seasoning sauce and bring it to a boil. Once the back of your spatula or spoon can be coated with a thin layer of sauce, your black pepper sauce is ready!
- Take out 1/3 of the sauce from the pan and set aside.
- Slice the chicken breast thinly (or shredded, if your preferred), then throw them into the pan.
- Coat all the chickens with the sauce, add in some more sauce, if needed.
- Put the thinly sliced red onion in, and mix evenly (keep it out and add together with shredded cabbage, if you want the raw spiciness of onion).
- Make sure everything is well coated with black pepper sauce.
- Bake or toast your bread or buns until nice and hot.
- Place the black pepper shredded chicken breast on the bread—make sure you really pile it on, haha!
- Top with shredded cabbage.
- Drizzle over Japanese mayo and a touch of sriracha.
- Cover with the other half of the bread and wrap it up.
- Dinner’s ready!
小贴士 Tips
* Do not brown your garlic
黑胡椒酱GCB
好久没有更新我们的「复刻系列」了!这一次要复刻麦当劳的经典热卖——黑胡椒烤鸡汉堡,也就是大家熟悉的 GCB。 我好像吃过两到三次(如果没记错的话),黑胡椒酱的味道还不错,但馅料真的很不满意——太!少!了!
所以,这里给你一个升级版的 GCB:每一口都有满满的肉和蔬菜!
在家自制 GCB
- 为什么你会喜欢这黑胡椒鸡肉汉堡?
- 你所需要的食材
- 食材注释和说明
- 鸡胸肉,提前腌制
- 别让你的蒜炒至金黄
- 这酱汁适合作为备餐酱料哦!
- 详细的料理步骤
- 我的好物分享
为什么你会喜欢这黑胡椒鸡胸汉堡?
麦当劳的 GCB 通常是用鸡腿肉做的,但今天我们要用鸡胸肉。为什么呢?因为我想把它做成类似“Pulled pork”的鸡肉汉堡。撕碎的鸡胸肉表面积更大,可以吸收满满的黑胡椒酱汁,这可能会是你吃过最好吃的鸡胸肉汉堡之一,相信我 😉
而且,黑胡椒也是自己做的,错不了!
你需要的食材
2人份:
- 2 块鸡胸,腌制好的
- 3-4 片高丽菜,切细丝
- 1/4 红洋葱,切细丝
- 恰巴塔,或任何你喜欢的面包
- 日式美乃滋
- Sriracha 辣酱,或任何你喜欢的辣椒酱
黑胡椒酱
- 1/2 tbsp 牛油
- 1/4 红洋葱,切厚丝
- 3 颗蒜末
- 2 tbsp 黑胡椒碎
- 1/8 tsp 白胡椒粉
- 调味酱:
- 1 tbsp 蚝油
- 1 tsp 酱油
- 1/4 tsp 黑酱油
- 1 tsp Lea & Perrins (Worcestershire Sauce)
- 1/2 tsp Maggi seasoning
- 2 tbsp 番茄酱
- 1 pinch 盐
- 1 pinch 味精
- 1-1.5 tsp 糖
- 1 tsp 玉米淀粉
- 8 tbsp 水
食材注释和说明
提前腌制鸡胸肉 —
在我的视频或食谱里,只要出现鸡肉,几乎都会提前腌制——不仅是鸡胸肉,整只鸡的各个部位都是如此。鸡胸肉的话我更偏爱用湿腌的方式(Wet Brine),因为鸡胸很瘦,肌肉纤维之间缺乏脂肪,这也是为什么鸡胸肉在煮熟后常常显得干硬。
湿腌能让鸡胸肉吸收更多水分,同时盐也会轻微改变肌肉结构,因此湿腌后的鸡胸肉会更嫩、更多汁。
这一次,我用了 8% 的盐水,大约 4 大匙,来腌渍两块鸡胸肉,浸泡过夜。想要了解更多鸡胸肉湿腌的方式,可以参考我的这篇文章。如果你赶时间,也可以简单地用盐和胡椒粉来腌制,至少 30 分钟,虽然效果比较弱,但总比没腌制来得好~
别让你的蒜炒至金黄 —
我知道并不是每个人都会仔细看完整个食谱步骤,所以在这里特别提醒一个小细节,不要把蒜炒到金黄。在我的视频里可能看起来像是我炒焦了蒜,但其实那只是锅底的焦化残渣的颜色。
因为这是西式料理,蒜头不像在中餐里那样常常需要爆香至金黄,所以为了保持更“angmo”的风格,只需用小火把洋葱和蒜炒香,然后就可以进入下一步了哟。
这酱汁适合作为备餐酱料哦!
这黑胡椒酱几乎百搭,不管是鸡肉、牛肉、猪肉、海鲜、豆腐,甚至蔬菜都能用的上哦!你当然可以一次多做一些,冷冻保存,作为备用酱料。不过,我建议做一些调整:
- 先不放玉米淀粉,等到重新加热时再勾芡。
- 减少水量,做成浓缩版(更省冰箱的空间!)。使用时记得加水稀释就好。
- 用鸡汤代替水——如果主要搭配牛肉料理的话,可以改用牛骨汤,味道更佳。
视频教程
制作汉堡的料理步骤
- 首先,用中小火 – 小火在平底锅里煎鸡胸肉,盖上锅盖可以让它更快熟透。
- 同时,把所有调味酱汁的材料混合好,备用。
- 大约 3–4 分钟后,鸡胸肉已经煎至金黄色,翻面,另一面再煎 3 -4分钟左右。
- 把煎好的鸡胸肉从锅里取出。
- 加入黄油,用小火将其融化。
- 放入较厚的洋葱丝和蒜末,翻炒至散发出香味,但不要炒至焦黄。
- 接着加入黑胡椒碎和白胡椒粉,继续用小火炒约 30 秒,或直到闻到胡椒的香气为止。
- 在倒入调味酱汁之前,先充分搅拌一下,确保玉米淀粉没有沉在底部。
- 然后把调味酱汁倒入锅中,加热至沸腾。等到铲子或勺子的背面能被酱汁均匀裹上一层薄薄的酱时,黑胡椒酱就完成了!
-
- 先把锅里的三分之一酱汁取出备用。
- 将鸡胸肉切成薄片(或者撕成丝,如果你更喜欢这方式),然后放到锅里的酱汁中。
- 让鸡肉均匀裹上酱汁,如果需要的话可以再加一些黑胡椒酱。
- 加入洋葱细丝,拌匀即可。(如果你喜欢生洋葱的辛辣味,可以把洋葱留到最后和高丽菜丝一起加入汉堡中。)
-
- 确保所有食材都裹上满满的酱汁哦~
组装:
- 把面包烘烤至温热。
- 放上鸡胸肉,一定要堆得满满的,哈哈!
- 再铺上高丽菜丝。
- 挤上日式美乃滋和少许 Sriracha 辣酱。
- 最后盖上另一半面包,包好。
- 开动啦!
可打印中文食谱
黑胡椒酱 GCB
食材 Ingredients
步骤 Method
- 首先,用中小火 – 小火在平底锅里煎鸡胸肉,盖上锅盖可以让它更快熟透。
- 同时,把所有调味酱汁的材料混合好,备用。
- 大约 3–4 分钟后,鸡胸肉已经煎至金黄色,翻面,另一面再煎 3 -4分钟左右。
- 把煎好的鸡胸肉从锅里取出。
- 加入黄油,用小火将其融化。
- 放入较厚的洋葱丝和蒜末,翻炒至散发出香味,但不要炒至焦黄。
- 接着加入黑胡椒碎和白胡椒粉,继续用小火炒约 30 秒,或直到闻到胡椒的香气为止。
- 在倒入调味酱汁之前,先充分搅拌一下,确保玉米淀粉没有沉在底部。
- 然后把调味酱汁倒入锅中,加热至沸腾。等到铲子或勺子的背面能被酱汁均匀裹上一层薄薄的酱时,黑胡椒酱就完成了!
- 先把锅里的三分之一酱汁取出备用。
- 将鸡胸肉切成薄片(或者撕成丝,如果你更喜欢这方式),然后放到锅里的酱汁中。
- 让鸡肉均匀裹上酱汁,如果需要的话可以再加一些黑胡椒酱。
- 加入洋葱细丝,拌匀即可。(如果你喜欢生洋葱的辛辣味,可以把洋葱留到最后和高丽菜丝一起加入汉堡中。)
- 确保所有食材都裹上满满的酱汁哦~
- 把面包烘烤至温热。
- 放上鸡胸肉,一定要堆得满满的,哈哈!
- 再铺上高丽菜丝。
- 挤上日式美乃滋和少许 Sriracha 辣酱。
- 最后盖上另一半面包,包好。
- 开动啦!
小贴士 Tips
* 别让你的蒜炒至金黄
Disclosure:
The links below will take you to Shopee, making it easy to check out the actual products. Please do compare prices — sometimes local markets can be cheaper! If you purchase through them, I may earn a small commission ❤️ — a tiny sprinkle of support that fuels more recipes. This won’t add any extra cost for you. I only recommend products I personally use and trust; these are items I’ve repurchased many times, so you can be confident they’re truly my reliable picks.
What I Use | 我的好物分享
Lea & Perrins Worcestershire Sauce