酥皮胡椒牛肉饼 Flaky Peppery Beef Bun
去过几次台湾的饶河夜市,街头的胡椒饼每次都是我的必买~ 除了我本身很喜欢胡椒以外,我还很喜欢他们的饼皮,好脆好香!所以这个食谱是因为想念台湾的胡椒饼而做的!虽然饼皮跟他们的不一样,我的是“酥皮胡椒牛肉饼”,但也别有另一种风味,而且吃了也非常满足呢嘻嘻~
为什么你会喜欢这道小吃?
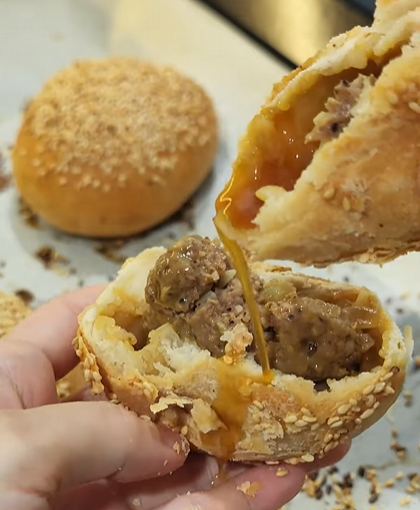
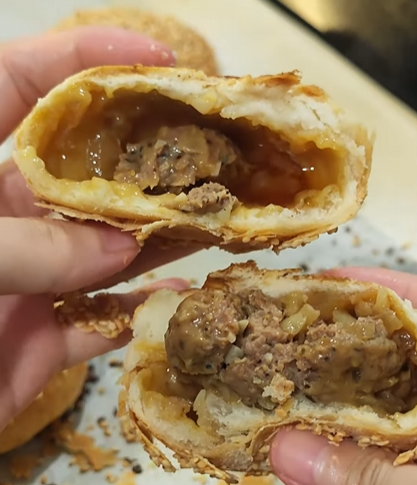
半发酵的油酥面团,在烘烤之后外皮酥脆,内层则像包子那样柔软吸汁。现烤现吃就能完美地体验到层层的口感和味道。从香酥-柔软-多汁-有嚼劲-到辛辣,每一个食材都有它存在的理由,是个吃了停不下来的酥皮包子!
所需要的食材
馅料(5份)
- 250g 牛肉碎
- 1.5 tsp 黑胡椒粗粒
- 1/2 tsp 白胡椒粉
- 1/8 tsp 姜粉
- 1/8 tsp 13香
- 1 tsp 盐
- 1/8 tsp 鸡粉
- 2 tsp 蚝油
- 2 tsp 酱油
- 1/2 tsp 黑酱油
- 1.5 tbsp 米酒
- 1 tbsp 麻油
- 1 tsp 玉米淀粉
- 3-4 颗蒜米
- 50g 洋葱碎
饼皮
- 150g 中筋面粉
- 10g 糖
- 1g 酵母
- 90g 水
- 8g 猪油
油酥
- 28g 猪油
- 40g 低筋面粉
- 一撮盐
- 1/4tsp 13香
糖水 (放凉)
- 100g 热水
- 5g 白糖
其他
- 生白芝麻
~ 视频教程EP 1 ~
~ 视频教程EP 2 ~
料理步骤
馅料
- 把所有调味料加进牛肉碎里,混合均匀
- 再放入麻油,玉米淀粉,蒜米和洋葱碎
- 混合均匀后冷藏备用
饼皮&油酥
- 把饼皮的干料混合均匀
- 加水,搓成团
- 加入猪油,把猪油充分地揉进面团里面
- 最后把面团收成圆柱形
- 静置松弛5分钟,同时把油酥做起来
- 把油酥的所有食材混合均匀,冷藏备用
- 这时候面团松弛完毕,分成5等份
- 把面团大致收成圆形,不用收紧
- 收口朝上,压扁面团
- 把油酥放在中间,平均一份13克油酥
- 在避免收口碰到油酥的情况下,给面团封口
- 用保鲜膜做好保湿
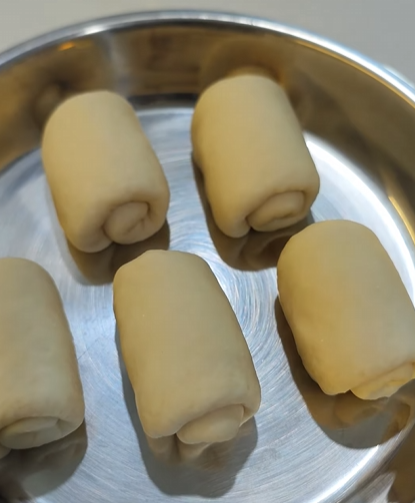
- 收口朝下,把面团从中间轻轻上下杆开
- 收口处朝上,卷起来
- 让所有面团完成第一次擀卷
- 再按顺序做第二次擀卷
- 松弛5-10分钟
整形&烘烤
- 面团的收口朝上,收成圆形
- 再擀成外薄内厚的面皮
- 在收口那一面,放入馅料,每份大约50g
- 给面团封口,放上垫了烘焙纸的烤盘
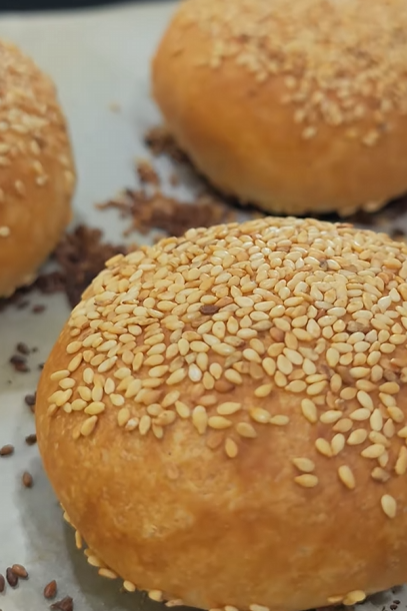
- 刷上糖水,撒上满满的白芝麻
- 烤箱200C, 18-20分钟
- 最后两分钟转成风炉模式
- 趁热吃哦!:D
食材 Ingredients
步骤 Method
- 把所有调味料加进牛肉碎里,混合均匀
- 再放入麻油,玉米淀粉,蒜米和洋葱碎
- 混合均匀后冷藏备用
- 把饼皮的干料混合均匀
- 加水,搓成团
- 加入猪油,把猪油充分地揉进面团里面
- 最后把面团收成圆柱形
- 静置松弛5分钟,同时把油酥做起来
- 把油酥的所有食材混合均匀,冷藏备用
- 这时候面团松弛完毕,分成5等份
- 把面团大致收成圆形,不用收紧
- 收口朝上,压扁面团
- 把油酥放在中间,平均一份13克油酥
- 在避免收口碰到油酥的情况下,给面团封口
- 用保鲜膜做好保湿
- 收口朝下,把面团从中间轻轻上下杆开
- 收口处朝上,卷起来
- 让所有面团完成第一次擀卷
- 再按顺序重复一样的操作,做第二次擀卷
- 松弛5-10分钟
- 面团的收口朝上,收成圆形
- 再擀成外薄内厚的面皮
- 在收口那一面,放入馅料,每份大约50g
- 给面团封口,放上垫了烘焙纸的烤盘
- 刷上糖水,撒上满满的白芝麻
- 烤箱200C, 18-20分钟
- 最后两分钟转成风炉模式
- 趁热吃哦!:D
小贴士 Tips
I’ve been to Raohe Night Market in Taiwan a few times, and the pepper buns are always my must‑buy! Besides I’m a pepper lover, I love their pastry as well—it’s so crispy and fragrant! That’s why I created this recipe, inspired by my longing for Taiwan’s pepper buns. Although my pastry isn’t exactly the same as theirs, but it has its own specialty, and it is just as satisfying after eating it, hehe!
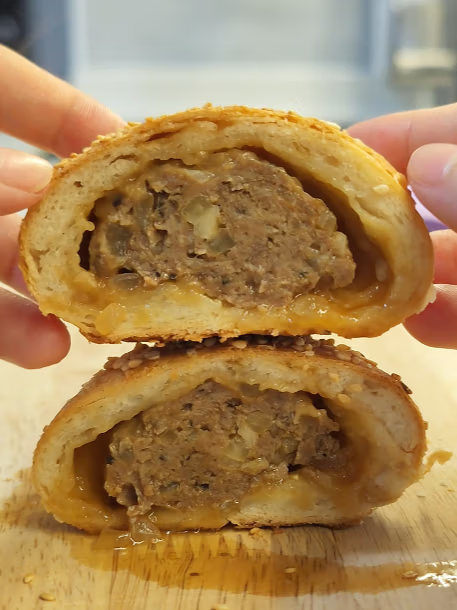
Flaky Peppery Beef Bun
Why would you love this snacks?
Semi‑fermented laminated dough bakes up with a crisp, flaky crust while the inner layers stay soft and juicy like a steamed bun. Fresh out of the oven, you can fully enjoy the layers of texture and flavor—from crispy, soft, juicy, chewy, to spicy. Every ingredient has its purpose, making you can’t stop eating this peppery meat bun!
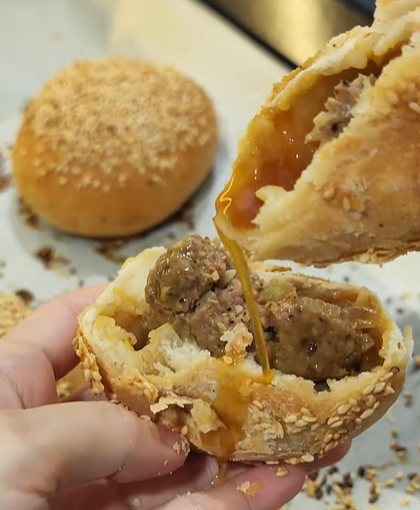
All you need
Filling(5 portion)
- 250g Ground beef
- 1.5 tsp Coarse black pepper
- 1/2 tsp White pepper powder
- 1/8 tsp Ginger powder
- 1/8 tsp 13 Spices mix
- 1 tsp Salt
- 1/8 tsp Chicken powder
- 2 tsp Oyster sauce
- 2 tsp Soy sauce
- 1/2 tsp Dark soy sauce
- 1.5 tbsp Rice wine
- 1 tbsp Sesame oil
- 1 tsp Corn starch
- 3-4 cloves of minced garlic
- 50g roughly chopped onion
Dough
- 150g All purpose flour
- 10g Sugar
- 1g Yeast
- 90g Water
- 8g Pork Lard
Lard roux (for laminating)
- 28g Pork lard
- 40g Cake flour
- A pinch of salt
- 1/4tsp 13 spices mix
Sugar glaze(let cool)
- 100g Hot water
- 5g Sugar
Others
- Raw white sesame
~ Video tutorial EP 1 ~
~ Video tutorial EP 2 ~
Steps of making
Filling
- Mix all seasonings into the ground beef.
- Add sesame oil, corn starch, garlic, and onion.
- Mix well and keep chill to standby.
Dough & Lard roux
- Combine dry ingredients of the dough.
- Add water, knead into a dough.
- Then incorporate the lard into the dough thoroughly.
- Shape into a cylinder, rest 5 minutes.
- At the same time, mix all the ingredients for Lard roux, and keep chill.
- Divide dough into 5 portions,
- Roughly shape it into round, don’t make the dough too tight
- Seam side up, flatten it with your palm
- Place 13g lard roux in the center, seal the dough without letting the roux touch the seam
- Cover with cling film to keep moist.
- Grease your work table slightly to prevent stick
- Place the dough seam side down, flatten slightly with your palm
- Roll it up and down, starting from the middle of the dough
- Then roll it up, and repeat this 1st set of rolling on the rest of the dough
- From the first piece of dough you rolled, repeat the same step to make 2nd set of rolling
- Rest 5–10 minutes.
Shaping & Baking
- Now seam side up, shape all the dough into a round dough, without tightening it too much
- After all the dough has been shaped, roll them into a thick wrapper, with thinner edges
- Place 50g of filling on the seam side of the dough, then seal it tightly
- Place the bun on baking tray that’s lined with parchment paper.
- Brush with sugar glaze, sprinkle generously with sesame seeds.
- Bake at 200°C for 18–20 minutes.
- Switch to fan mode for the last 2 minutes.
- Serve Hot!:D
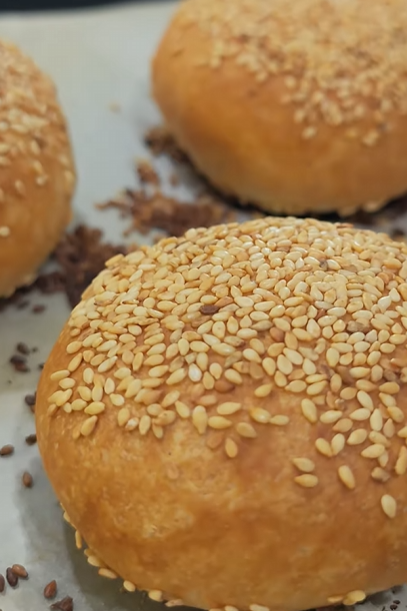
Printable Full Recipe
食材 Ingredients
步骤 Method
- Mix all seasonings into the ground beef.
- Add sesame oil, corn starch, garlic, and onion.
- Mix well and keep chill to standby.
- Combine dry ingredients of the dough.
- Add water, knead into a dough.
- Then incorporate the lard into the dough thoroughly.
- Shape into a cylinder, rest 5 minutes.
- At the same time, mix all the ingredients for Lard roux, and keep chill.
- Divide dough into 5 portions,
- Roughly shape it into round, don’t make the dough too tight
- Seam side up, flatten it with your palm
- Place 13g lard roux in the center, seal the dough without letting the roux touch the seam
- Cover with cling film to keep moist.
- Grease your work table slightly to prevent stick
- Place the dough seam side down, flatten slightly with your palm
- Roll it up and down, starting from the middle of the dough
- Then roll it up, and repeat this 1st set of rolling on the rest of the dough
- From the first piece of dough you rolled, repeat the same step to make 2nd set of rolling
- Rest 5–10 minutes.
- Now seam side up, shape all the dough into a round dough, without tightening it too much
- After all the dough has been shaped, roll them into a thick wrapper, with thinner edges
- Place 50g of filling on the seam side of the dough, then seal it tightly
- Place the bun on baking tray that’s lined with parchment paper.
- Brush with sugar glaze, sprinkle generously with sesame seeds.
- Bake at 200°C for 18–20 minutes.
- Switch to fan mode for the last 2 minutes.
- Serve Hot!:D
小贴士 Tips
声明 Disclosure:
以下的链接会带你到 Shopee,方便查看真实产品。请大家务必货比三家哦,有时候线下 market 会更便宜!如果你通过链接购买,我可能会获得少量佣金,作为支持阿琴继续创作的一小部分❤️,但不会增加你的费用哦~ 我只推荐自己实际使用并认可的产品,所有推荐均基于真实体验,也是阿琴长期复购的厨房调料,请放心参考!
The links below will take you to Shopee, making it easy to check out the actual products. Please do compare prices — sometimes local markets can be cheaper! If you purchase through them, I may earn a small commission ❤️ — a tiny sprinkle of support that fuels more recipes. This won’t add any extra cost for you. I only recommend products I personally use and trust; these are items I’ve repurchased many times, so you can be confident they’re truly my reliable picks.
我的好物分享 What I Use