红萝卜&罂粟籽酸种贝果 Carrot & Poppy seeds Sourdough Bagel
总觉得贝果和汉堡胚都点异曲同工之妙,所以通常我做贝果时,都会和做汉堡配或者吐司一样,给面团添加点甜味来源,比如糖或者是蜂蜜之类的。不过这一次在这酸种贝果里我只加了红萝卜泥,竟然出奇地好吃!天然的甜味和酸种的酸味更加搭了呢~ 而且要在面包类的主食里添加纤维和不同的风味,红萝卜确实是个非常全面和优秀的选择哦!
为什么你会喜欢这个酸种贝果?
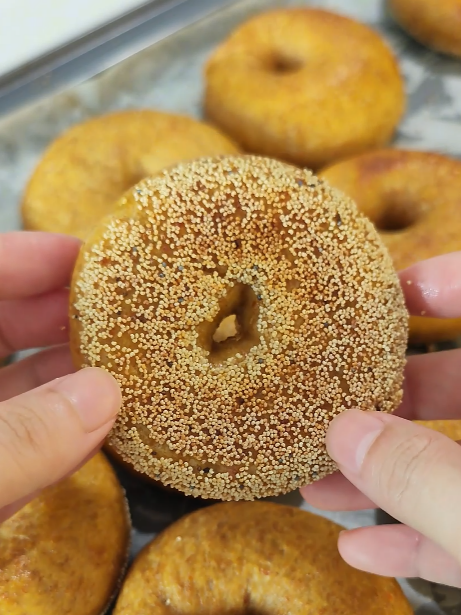
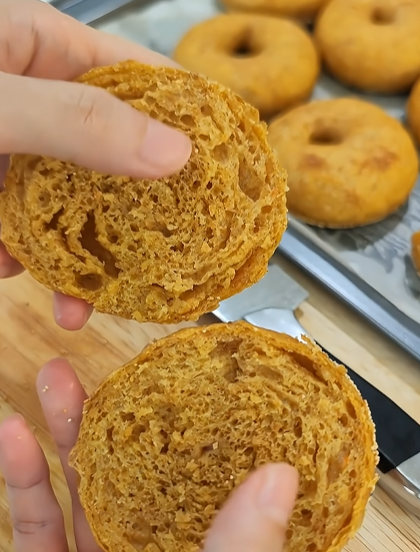
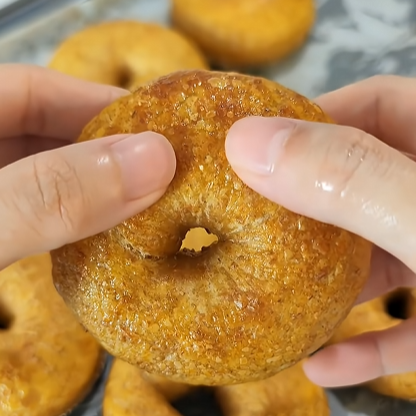
这款酸种贝果不仅有发酵的酸香,加了红萝卜泥后,内部组织更加湿润,还带点蔬菜甜!底部裹满了经过用黄油烤香的罂粟籽,带给了它们坚果香和更多口感,是我最爱空口吃的贝果之一!
所需要的食材
红萝卜泥:
- 90g 水
- 100g 红萝卜
烫种:
- 50g 全麦面粉
- 80g 热水
主面团:
- 240g 高筋面粉
- 30g 全麦面粉
- 180g 红萝卜泥
- 130g 烫种
- 70g 酸种
- 20g 黄油(室温软化)
- 3g 盐
糖水:
- 1-2 tbsp 糖/黑糖
- 1.5L 水
入炉前的配料:
- 黄油
- 罂粟籽
备料重点
红萝卜泥——
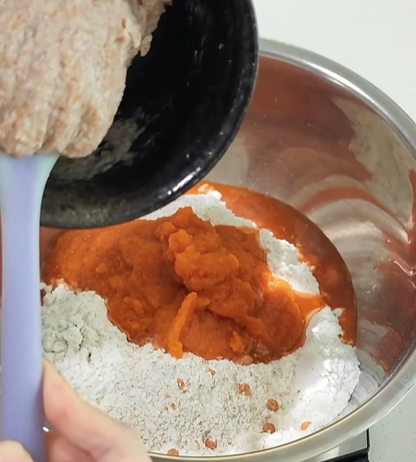
每个红萝卜的含水量不同,面粉的吸水能力也不一样,所以在把红萝卜泥加入面团的时候,可以预留10g-20g 来观察面团的吸水量,需要的话再逐步增加萝卜泥到面团里。
烫种——
烫种的制作方式非常简单,只需要把热水倒进全麦面粉里,混合均匀至无干粉,用保鲜膜贴着烫种的表面,室温放凉后,冷藏隔夜即可使用~
~ 视频教程 ~
料理步骤
- 除了盐和黄油,把其他所有主面团的食材混合均匀
- 用保鲜膜盖好,冷藏水和1小时
- 加入盐和黄油,把它们混合进面团里并搓揉成团
- 再冷藏1个小时
- 把松弛好的面团分成10份,一个60-65g(小贝果)/ 分成7份,一个90g(普通大小的贝果)
- 把面团团圆
- 用保鲜膜盖上保湿,松弛半小时
- 给面团撒粉防沾,再用擀面杖擀薄整形
- 整形好的贝果放在垫了烘焙纸的烤盘上
- 用保鲜膜保湿,继续发酵1.5小时,或涨到1.5倍大
- 然后冷藏发酵12小时
- 准备一锅糖水,用黑糖或是白糖都可以
- 大火把糖水烧至微微沸腾,再用小火维持温度
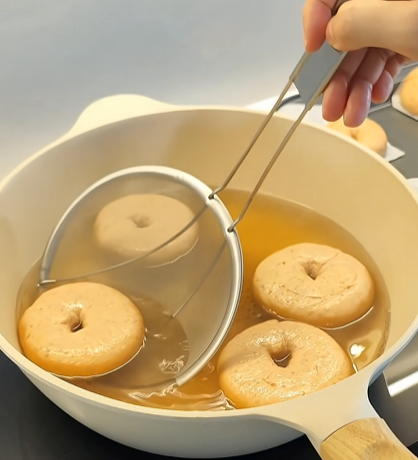
- 把面团放进糖水里,每面煮15秒-30秒
- 捞出,放在烤盘中
- 贝果底部沾上罂粟籽
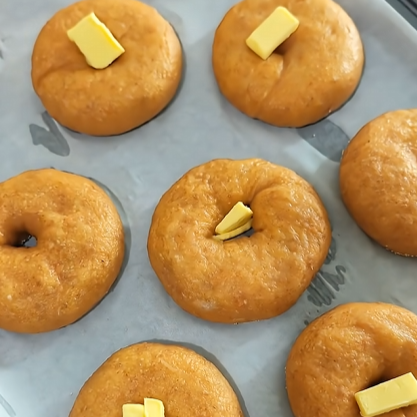
- 然后在贝果的中间放入一小块冷黄油
- 放入预热好的烤箱,200C,烤15分钟
- 再用风炉模式继续烤多3分钟,让它们上色
- 没忍住的话就趁热吃一个吧!
水煮贝果的时间
煮贝果的时间取决于你想要这个贝果有多厚的表皮,表皮越厚,贝果吃起来就越有嚼劲。换句话说,如果你想要贝果更松软,更牙齿友好XD, 那水煮的时间就缩短一些,甚至是不煮也没关系~ 不过煮过的贝果上色会更好看哦!
食材 Ingredients
步骤 Method
- 除了盐和黄油,把其他所有主面团的食材混合均匀
- 用保鲜膜盖好,冷藏水和1小时
- 加入盐和黄油,把它们混合进面团里并搓揉成团
- 再冷藏1个小时
- 把松弛好的面团分成10份,一个60-65g(小贝果)/ 分成7份,一个90g(普通大小的贝果)
- 把面团团圆
- 用保鲜膜盖上保湿,松弛半小时
- 给面团撒粉防沾,再用擀面杖擀薄整形
- 整形好的贝果放在垫了烘焙纸的烤盘上
- 用保鲜膜保湿,继续发酵1.5小时,或涨到1.5倍大
- 然后冷藏发酵12小时
- 准备一锅糖水,用黑糖或是白糖都可以
- 大火把糖水烧至微微沸腾,再用小火维持温度
- 把面团放进糖水里,每面煮15秒-30秒
- 捞出,放在烤盘中
- 贝果底部沾上罂粟籽
- 然后在贝果的中间放入一小块冷黄油
- 放入预热好的烤箱,200C,烤15分钟
- 再用风炉模式继续烤多3分钟,让它们上色
- 没忍住的话就趁热吃一个吧!
小贴士 Tips
I’ve always felt that bagels and burger buns share a certain kinship. So when I make bagels, I usually treat the dough the same way I would for burgers or toast—adding a touch of sweetness from sugar or honey. But this time, I only added carrot puree, and it turned out surprisingly delicious! The natural sweetness pairs beautifully with the tang of sourdough. And if you’re looking to add fiber and a new layer of flavor to bread‑based staples, carrots really are a wonderfully versatile and excellent choice.
Carrot and Poppy Seeds Sourdough Bagel
- Why would you love these bagels?
- All you need
- Ingredients Notes
- Carrot Puree
- Tang Zhong
- Steps of cooking
- Blanching time for Bagels
Why would you love these bagel?
This sourdough bagel not only carries the tangy aroma of fermentation, but with the addition of carrot purée, its crumb becomes more moist and has a subtle sweet aftertaste. The bottom is coated with poppy seeds toasted in butter, which brings extra nuttiness and crunchiness to the bagel, making it one of my favorite bagels to enjoy without any topping or filling!
All you need
Carrot puree:
- 90g Water
- 100g Carrot
Tang Zhong:
- 50g Whole meal flour
- 80g Hot water
Main Dough:
- 240g Bread flour
- 30g Whole meal flour
- 180g Carrot Puree
- 130g Tang zhong
- 70g Levain
- 20g Butter, Softened
- 3g Salt
Water for blanching bagels:
- 1-2 tbsp Sugar/Brown sugar
- 1.5L Water
Ingredients before baking:
- Butter
- Poppy seeds
Ingredients Notes
Carrot puree——
Each carrot has a different water content, and flour also varies in its ability to absorb moisture. So when adding carrot purée into the dough, it’s best to reserve 10g–20g and observe how they incorporated into the dough. If needed, gradually add more purée into the dough.”
Tang Zhong——
Making tang zhong is very simple: just pour hot water into whole wheat flour and mix until no dry flour remains. Cover the tang zhong and stick the cling wrap on the surface directly, let it cool at room temperature, then refrigerate overnight before use.
~ Video Tutorial ~
Steps of making
- In a mixing bowl, mix all the ingredients for the main dough except salt and butter.
- Cover with plastic wrap and refrigerate for 1 hour.
- Add the salt and butter, knead and well combine them with the dough.
- Refrigerate for another hour.
- Divide the relaxed dough into 10 portions (60-65g each for small bagels) or 7 portions (90g each for regular bagels).
- Shape each portion into a ball.
- Cover with plastic wrap to keep moist and let rest for 30 minutes.
- Dust with flour to prevent sticking, then roll out with a rolling pin and shape into a bagel.
- Place the shaped bagels on a baking tray lined with parchment paper.
- Cover with plastic wrap to keep moist, and let proof for 1.5 hours or until 1.5 times larger.
- Refrigerate for 12 hours for cold fermentation.
- Prepare a pot of water with added brown or white sugar.
- Bring to a gentle boil over high heat, then keep it at almost simmering with low heat.
- Place the dough into the hot water, blanch each side for 15–30 seconds.
- Remove and place on a baking tray.
- Coat the bottom of each bagel with poppy seeds.
- Add a small piece of cold butter in the center of each bagel.
- Bake in a preheated oven at 200°C for 15 minutes.
- Then switch to fan mode for another 3 minutes to create a better crust.
How long should you blanch the bagels
The blanching time for bagels depends on how thick you want the crust to be—the thicker the crust, the chewier the bagel. In other words, if you prefer a softer, more tooth‑friendly bagels XD, you can shorten the blanching time, or even skip this step. However, bagels that are blanched will develop a better crust and more even colour after baking.
Printable Full Recipe
食材 Ingredients
步骤 Method
- In a mixing bowl, mix all the ingredients for the main dough except salt and butter.
- Cover with plastic wrap and refrigerate for 1 hour.
- Add the salt and butter, knead and well combine them with the dough.
- Refrigerate for another hour.
- Divide the relaxed dough into 10 portions (60-65g each for small bagels) or 7 portions (90g each for regular bagels).
- Shape each portion into a ball.
- Cover with plastic wrap to keep moist and let rest for 30 minutes.
- Dust with flour to prevent sticking, then roll out with a rolling pin and shape into a bagel.
- Place the shaped bagels on a baking tray lined with parchment paper.
- Cover with plastic wrap to keep moist, and let proof for 1.5 hours or until 1.5 times larger.
- Refrigerate for 12 hours for cold fermentation.
- Prepare a pot of water with added brown or white sugar.
- Bring to a gentle boil over high heat, then keep it at almost simmering with low heat.
- Place the dough into the hot water, blanch each side for 15–30 seconds.
- Remove and place on a baking tray.
- Coat the bottom of each bagel with poppy seeds.
- Add a small piece of cold butter in the center of each bagel.
- Bake in a preheated oven at 200°C for 15 minutes.
- Then switch to fan mode for another 3 minutes to create a better crust.