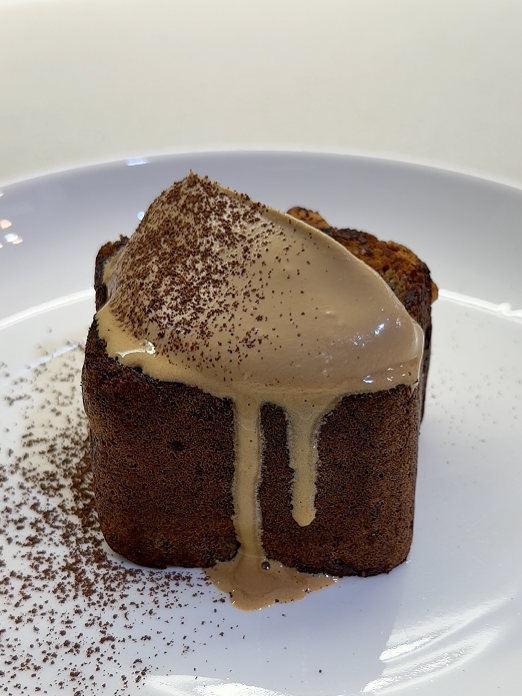
焦化牛油伯爵茶松饼 Brown Butter Earl Grey Pancake
偶尔突然馋甜品的时候,通常第一个会出现在我脑海中的,就是松饼。为什么呢?因为简单,快速,不甜腻,食材也是家里常备哈哈!真的想不到还有什么是比松饼所具备的条件更优秀的快熟甜品!今天这款伯爵茶松饼 ,加了伯爵茶,还加了焦化奶油,听着就很香了对吧!赶快再跟着我一起做起来吧!
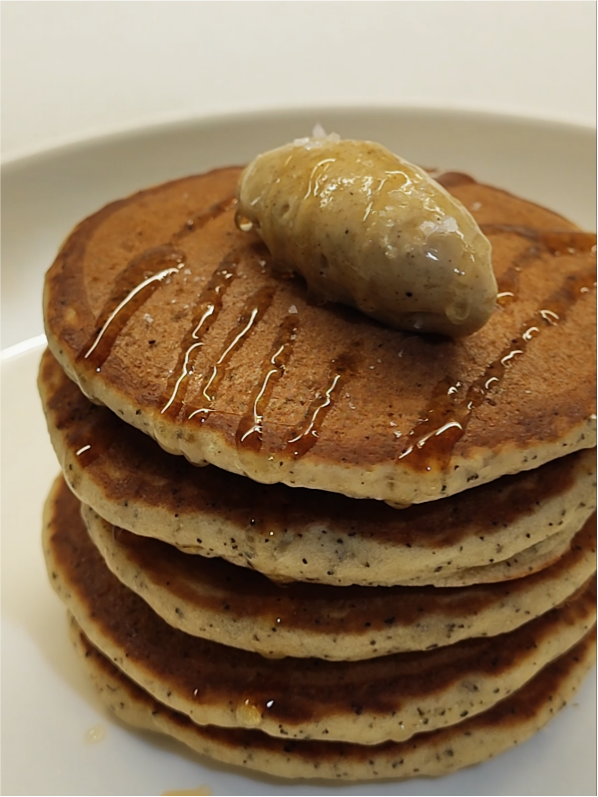
焦化牛油伯爵茶松饼
- 为什么你会喜欢这道甜品?
- 所需要的食材
- 备料重点
- 焦化牛油 & 视频教程
- 食材温度
- 伯爵茶叶
- 料理步骤
- 一样的食谱,可是松饼为什么不松?
- 你的松饼是不是干干扁扁?
- 掌握熟成度
- 我的好物分享
为什么你会喜欢这道甜品?
原味的松饼本来就很好吃,但在这个食谱里加入了伯爵茶叶和焦化牛油,简直香气扑鼻,让你忍不住一口接一口!制作方式也没什么技术含量,超级简单的~ 试试看吧
所需要的食材
材料A
- 27g 糖
- 一小撮盐
- 1个鸡蛋,55g+-
- 80g 优格
- 40g 牛奶
- 15g 焦化牛油,室温软化/融化
- 几滴 香草精
- 1包 伯爵茶叶,茶包装细茶叶(2-3g)
材料B
- 90g 普通面粉
- 1 tsp 泡打粉
- 1/4tsp 苏打粉
配料:
- 焦化黄油
- 蜂蜜/枫糖浆
- 海盐
备料重点
焦化牛油——
除了茶香,焦化牛油也是这道甜品的独特香气关键。家里没有常备焦化牛油的话,可以看看以下焦化牛油的视频教程,非常非常简单!只需要把无盐牛油适当地焦化而已哦~嘻嘻
食材温度——
由于在松饼的面糊里加了软化/融化的牛油,所以所有食材必须要是室温,尤其是材料A的湿性食材。否则牛油就会结块哦
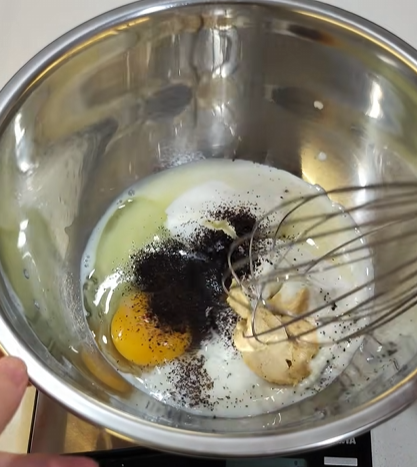
伯爵茶叶——
茶叶比茶粉保留了更多精油和茶叶当中的天然成分,同常给甜品带来的香味会更有层次。茶叶包的茶叶不但香气足够,口感也不会很粗糙,微微的颗粒感甚至不太察觉得到。当然了,不同的牌子也会有不一样的质地。我会把我爱用的平价茶叶牌子放在文章的最后供大家参考~ 但如果你只有茶粉也是可行,不过用量可能需要自行加减,甚至是代替一小部分的面粉,以保持面糊的湿润。
~ 视频教程 ~
料理步骤
- 把室温的材料A全部用打蛋器混合均匀
- 把材料B过筛进材料A里
- 用打蛋器轻柔的翻拌,是翻拌哦!
- 让面糊休息5分钟
- 全程用最小的火,锅子温热后抹一层非常薄的油
- 放入适量的面糊,盖盖
- 面糊的外围开始不沾粘的时候,就可以缓缓翻面
- 每面小火煎45秒-1分钟
- 煎好的松饼得叠起来,以保持温热和湿润
- 最后来上一小勺焦化牛油,淋上适量的蜂蜜,和一点海盐
- 开吃!
一样的食谱,可是松饼为什么不松?
你的松饼是不是干干扁扁?
如果不知道这一点,那即便是一样的食谱,可能你做出来的成品也会和我的截然不同——松饼面糊绝对不可以过度搅拌。松饼的蓬松全靠泡打粉和苏打粉,而这两者在遇到优格之后会立即产生化学反应,如果看不惯那些小小的面粉疙瘩,硬是要把这面糊搅拌成非常顺滑,不但会失去它们产生的小气泡,还会使面糊的面筋变强,那你得到的很大可能就是扎实的硬饼 XD 别问我是怎么知道的。没错,在翻拌干粉进湿性食材里的时候,有一点面粉小疙瘩是没关系的,休息的过程中这些面粉疙瘩会自己再吸水,煎好之后就会看不见了哦~
如果你仔细看我的视频,会发现在我翻拌好面糊之后的状态,和我煎的时候,是不一样的,这就是因为面粉吸水得更全面,泡打粉也开始工作了。所以除了在制作面糊的时候不可以过度翻拌,静置之后的面糊,也千万不要再搅拌,以免面糊泄气哦!
掌握熟成度
为什么我要刻意强调熟成度这一点呢~ 因为煎太久的松饼,会过度挥发水份,使其变得干硬。这松饼的食谱,做出来不会是厚厚的,除非你用模具。所以基本上,当煎第一面的时候,外围开始熟,不像面糊那样粘手了,就可以慢慢刮起底部,翻面了。一般一面不需要超过1分钟,而第二面可能也会比第一面熟得更快。除了观察松饼外围来判断熟成度以外,还可以用偷看的方式来决定是否翻面/起锅。一旦两面都上色了,松饼就是熟鲁~
食材 Ingredients
步骤 Method
- 把室温的材料A全部用打蛋器混合均匀
- 把材料B过筛进材料A里
- 用打蛋器轻柔的翻拌,是翻拌哦!
- 让面糊休息5分钟
- 全程用最小的火,锅子温热后抹一层非常薄的油
- 放入适量的面糊,盖盖
- 面糊的外围开始不沾粘的时候,就可以缓缓翻面
- 每面小火煎45秒-1分钟
- 煎好的松饼得叠起来,以保持温热和湿润
- 最后来上一小勺焦化牛油,淋上适量的蜂蜜,和一点海盐
- 开吃!
小贴士 Tips
- 所有食材必须要是室温哦~
- 用大点的锅子一次煎两三个就会快很多~
Brown Butter Earl Grey Pancake
Whenever a sudden craving for dessert hits, the very first thing that pops into my mind is pancakes. Why? Because they’re simple, quick, not overly sweet, and made with ingredients you usually have at home! Honestly, I just can’t think of any other dessert that beats pancakes when it comes to being the ultimate fast-fix treat
Brown Butter Earl Grey Pancake
- Why would you love these pancakes?
- All you need
- Tips on preparing ingredients
- Brown butter & video tutorial
- Temperature of ingredients
- Earl Grey tea leaves
- Steps of cooking
- Same recipe, but different in result?
- Is your pancake always dense and dry?
- Mastering the doneness of pancake
- My go‑to ingredient brands
Why would you love these pancakes?
Plain pancakes are already delicious, but in this recipe, the addition of earl grey tea leaves and brown butter makes them irresistibly fragrant—you just can’t stop eating! Plus the method of making is super easy, no skill required, so give it a try!
All you need
Ingredients A
- 27g Sugar
- a small pinch of Salt
- 1 no Egg , 55g+-
- 80g Yogurt
- 40g Milk
- 15g Brown butter
- Few drops Vanilla extract
- 1 tea bag of Earl Grey tea leaves , 2-3g
Ingredients B
- 90g All purpose flour
- 1 tsp Baking powder
- 1/4tsp Baking soda
Toppings
- Brown butter
- Honey/maple syrup
- Seasalt
Tips in preparing ingredients
Brown Butter –
Apart from the tea aroma, brown butter is also the key to this dessert’s unique fragrance. If you don’t usually have brown butter at home, check out the tutorial video below—it’s super simple! All you need to do is brown some unsalted butter to the right point, then chill it, that’s it!
Temperature of ingredients –
Since softened or melted butter is added to the batter, all ingredients must be at room temperature—especially the wet ingredients in ingredients A. Otherwise, the butter will clump when it meets cold stuffs.
Earl Grey Tea Leaves –
Tea leaves retain more essential oils and natural compounds than tea powder, usually giving desserts a more layered fragrance. While the tea leaves from tea bags are aromatic enough, their texture isn’t rough as well—the tiny granules are barely noticeable in pancakes. Of course, different brands vary in quality and textures. I’ll share my favorite affordable tea brand at the end of the article. If you only have tea powder, that works too, but you may need to adjust the amount, or even replace a small portion of the flour to keep the batter moist.
~ Video Tutorial ~
Steps of Cooking
- Mix all room-temperature Ingredients A with a whisk.
- Sift ingredients B into ingredients A.
- Gently fold with a whisk – YES, fold, not stir or whisk!
- Let the batter sit for 5 minutes.
- Warm up the pan on the lowest heat, lightly grease it with a thin layer of oil.
- Pour in batter, cover with a lid.
- When the edges no longer wet and sticky, carefully scrape the bottom and flip.
- Cook each side for 45 seconds–1 minute on low heat.
- Stack the pancakes to keep them warm and moist.
- Finish with some brown butter, drizzle of honey or maple syrup, and a pinch of sea salt.
Same recipe, but different in result?
Is your pancake always dense and dry?
Even with the same recipe, results can differ if you don’t know this: never overmix the batter. Pancake’s fluffiness relies on baking powder and baking soda, which react immediately the moment it mixed with yogurt. If you insist on whisking until perfectly smooth, you’ll lose the air bubbles, and also strengthen the gluten of batter at the same time, resulting in dense, tough pancakes (yes, I’ve learned the hard way 😅). A few tiny flour lumps are fine—they’ll be hydrated during batter resting time and disappear once cooked.
If you watch my video closely, the batter, after resting, looks different from when I’ve just done mixing it—this is because the flour is hydrated better and the baking soda starts working. That’s also why you should never stir the batter again after resting, or it will deflate.
Mastering the doneness of pancakes
Why am I emphasizing on doneness? Because overcooking evaporates too much moisture, making pancakes dry and dense as well. This recipe doesn’t yield thick pancakes unless you use a mold. So when the edges of the first side look set and no longer sticky, gently lift and flip. Usually, one side takes only a minute or lesser, and the second side cooks even faster. Besides watching the edges, you can “peek” underneath to decide when to flip it over. Once both sides are golden brown, the pancake is good to go!
Printable Full Recipe
食材 Ingredients
步骤 Method
- Mix all Ingredients A with a whisk.
- Sift ingredients B into ingredients A.
- Gently fold with a whisk – YES, fold, not stir or whisk!
- Let the batter sit for 5 minutes.
- Warm up the pan on the lowest heat, lightly grease it with a thin layer of oil.
- Pour in batter, cover with a lid.
- When the edges no longer wet and sticky, carefully scrape the bottom and flip.
- Cook each side for 45 seconds–1 minute on low heat.
- Stack the pancakes to keep them warm and moist.
- Finish with some brown butter, drizzle of honey or maple syrup, and a pinch of sea salt.
小贴士 Tips
- All ingredients must be at room temperature.
- Use a larger pan to cook 2-3 pancake at once can be a lot faster!
声明 Disclosure:
以下的链接会带你到 Shopee,方便查看真实产品。请大家务必货比三家哦,有时候线下 market 会更便宜!如果你通过链接购买,我可能会获得少量佣金,作为支持阿琴继续创作的一小部分❤️,但不会增加你的费用哦~ 我只推荐自己实际使用并认可的产品,所有推荐均基于真实体验,也是阿琴长期复购的厨房调料,请放心参考!
The links below will take you to Shopee, making it easy to check out the actual products. Please do compare prices — sometimes local markets can be cheaper! If you purchase through them, I may earn a small commission ❤️ — a tiny sprinkle of support that fuels more recipes. This won’t add any extra cost for you. I only recommend products I personally use and trust; these are items I’ve repurchased many times, so you can be confident they’re truly my reliable picks.
我的好物分享 My go‑to ingredient brands