100%全麦弃种Pita 100%Wholemeal Sourdough Discard Pita
虽然自从养了酵种之后我就很少买酵母这件事让我觉得,养酵种挺值得的,但是要用活跃的酵种来做面包就避免不了产生弃种,即便是喂养得再少~ 前几天不是给大家做了几天的起种实验么?正好可以用发酵成功的全麦酵种来跟大家分享平时我最常用来消灭弃种的 100%全麦弃种Pita bread 做法!
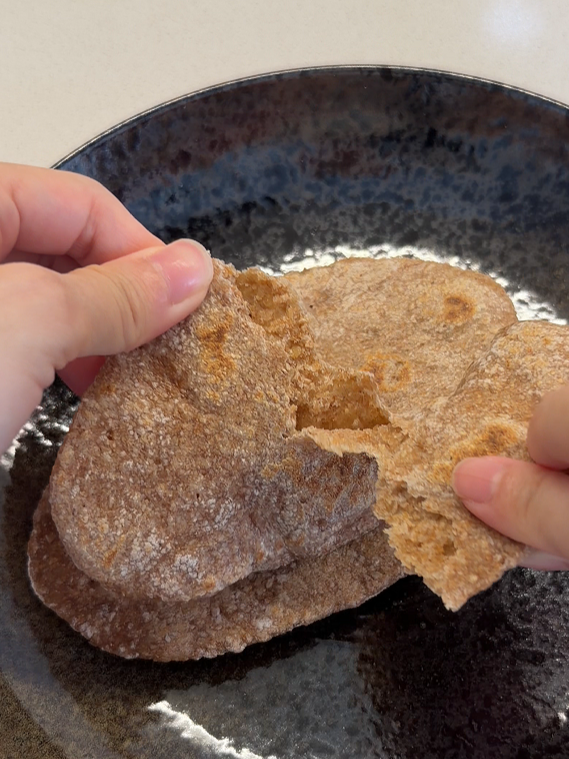
为什么你会喜欢这个全麦 Pita?
比起淡淡无味的面粉,全麦当然是香多了,平时做面包非常难用100% 这浓度的全麦量,但类似 Pita 这种饼就另当别论了,不仅简单还0失败!
超市里的薄饼配料表都非常复杂,但其实在家里做这类薄饼,不仅是可以清理冰箱的好选择,食材简单干净,也吃的很安心!
所需要的食材
- 40g 全麦弃种
- 40g 水
- 70g 全麦面粉
- 一小撮 苏打粉
- 2g 初榨橄榄油
- 一撮 盐
- 3g 熟芝麻
备料重点
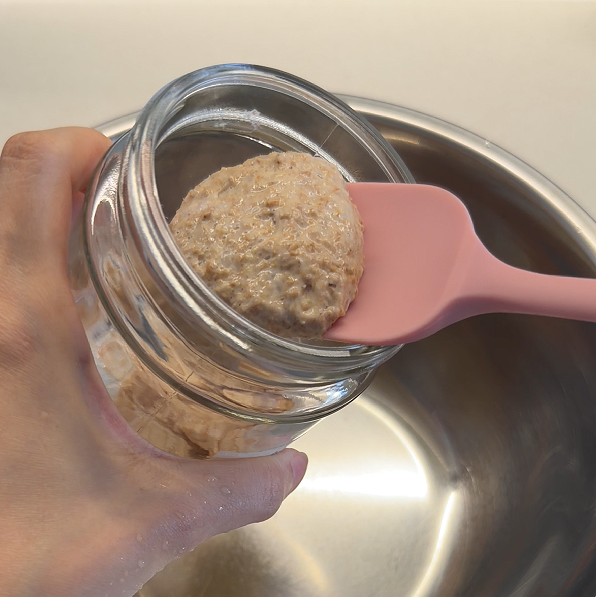
弃种——
因为最近好多新手宝宝在培养酵种,所以为了避免你们误用弃种,拉肚子,我首先想强调的是,这食谱里说的弃种,是成熟的酵种的弃种哦,不是培养酵种过程中的弃种蛤~
一般上我也不会喂养很多酵种来做面包,都是按食谱需要的量,再预算5-10克酵种来续养而已。不过即便是如此,像我一样一个星期做一次面包的话,每次激活正在冰箱里休眠的酵种,都需要翻喂至少两次,这个过程必然会累计弃种。我的做法是把弃种累计在一个干净的小碗里,然后有多少酵种就做多少的饼,反正这还可以冷冻当备用主食呢!
既然是100%的全麦 Pita, 那喂养酵种来做面包的时候也可以选择用全麦来喂,剩下的全麦弃种拿来做饼,才会是100%全麦哦~ 当然了,如果你对这纯度不太执着,什么酵种都没问题哒!哈哈~
~ 视频教程 ~
料理步骤
- 把弃种和水混合均匀,加入面粉(保留10g) 和苏打粉,用刮刀混合成团
- 放入初榨橄榄油,盐,和熟芝麻,再混合均匀
- 撒上先前保留的全麦面粉,用刮刀让面团表面都沾上面粉,再下手揉成圆团即可
- 保鲜膜包上,让面团休息10分钟
- 面团上撒粉,用刮刀刮起,取出,背面也撒上粉防沾
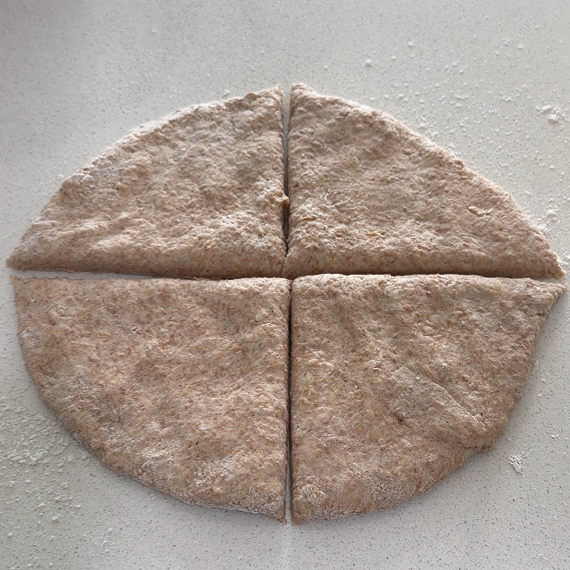
- 用手按压面团成圆形的饼,再分成4等份
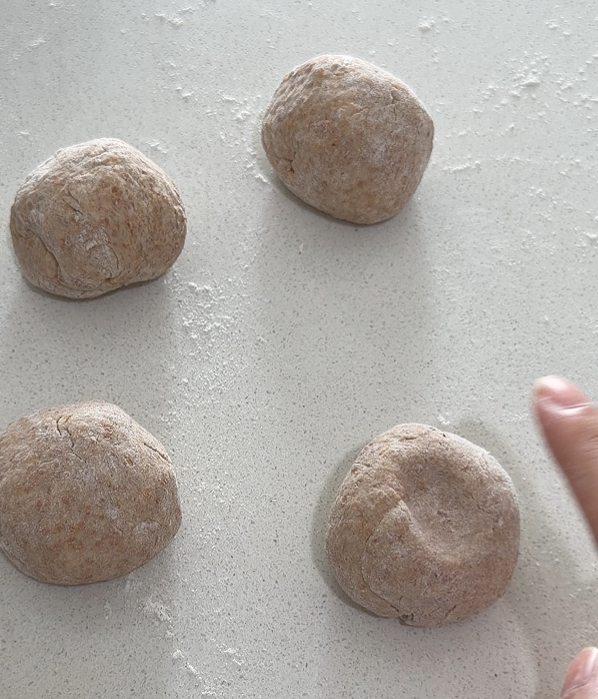
- 把面团卷起,收角,再稍稍整圆
- 在一片烘焙纸上,放上其中一个面团,用手压扁
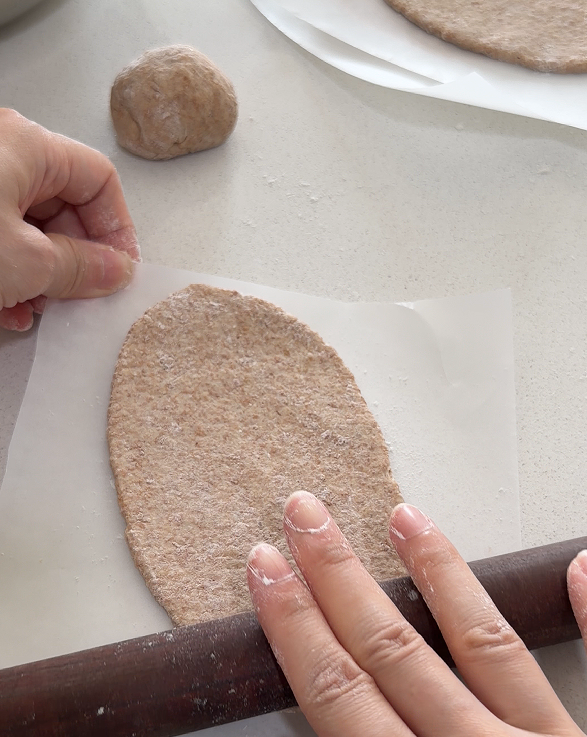
- 撒上薄粉,再用擀面杖往上擀1-2次,接着往下擀,至大约3-4mm的薄度
- 热好锅子,保持中大-大火来干煎
- 先把烘焙纸那一面朝下来煎, 大约10秒后翻面,撕下烘焙纸,也是煎10秒左右再翻面
- 每次反面都煎10秒左右就好,大约4-5次之后,面团会鼓起来,表面也有点上色的时候就可以出锅啦!
- 出锅时要用干净的布保湿哦~
如何储存 & 复热
可冷藏保存,但建议最多隔天就食用咯,因为冷藏会使面包更快老化粉干。不管是什么面包或者面食,吃不完的更建议冷冻保存。
复热这 Pita 的时候可以在两面喷上点水,可以干煎,微波,或者水蒸,但我最喜欢方式是用黄油煎得脆香脆香的!
阿琴小贴士
刚开始混合材料时,千万别用手,否则会沾粘得你怀疑人生!先用工具把食材混合均匀,再利用保留的10g 面粉,手动把面团搓揉成圆,就会很顺利哦!
不管是在把食材混合均匀搓成团的时候,或是整形的时候,我们都可以点到为止就好咯~ 不建议玩太久哈,还是那句话,因为会很黏 XD 而如果不停加干面粉的话呢也会让这 Pita变得很干硬呢!
食材 Ingredients
步骤 Method
- 把弃种和水混合均匀,加入面粉(保留10g) 和苏打粉,用刮刀混合成团
- 放入初榨橄榄油,盐,和熟芝麻,再混合均匀
- 撒上先前保留的全麦面粉,用刮刀让面团表面都沾上面粉,再下手揉成圆团即可
- 保鲜膜包上,让面团休息10分钟
- 面团上撒粉,用刮刀刮起,取出,背面也撒上粉防沾
- 用手按压面团成圆形的饼,再分成4等份
- 把面团卷起,收角,再稍稍整圆
- 在一片烘焙纸上,放上其中一个面团,用手压扁
- 撒上薄粉,再用擀面杖往上擀1-2次,接着往下擀,至大约3-4mm的薄度
- 热好锅子,保持中大-大火来干煎
- 先把烘焙纸那一面朝下来煎, 大约10秒后翻面,撕下烘焙纸,也是煎10秒左右再翻面
- 每次反面都煎10秒左右就好,大约4-5次之后,面团会鼓起来,表面也有点上色的时候就可以出锅啦!
- 出锅时要用干净的布保湿哦~
小贴士 Tips
Ever since I started keeping a sourdough starter, I’ve hardly bought commercial yeast anymore—which makes me feel that maintaining a starter is truly worth it. But of course, if you want to bake bread with an active starter, you can’t avoid producing some discard, no matter how little you feed it.
Remember the starter experiments I shared with you all recently? Perfect timing—because I can now use the successfully fermented whole‑wheat starter to show you my favorite way to deal with discard: Pita bread!
100% Whole Wheat Pita Bread
Why would you love this Pita Bread?
Compared to plain, flavorless white flour, whole wheat is so much more fragrant. While it’s usually tricky to bake bread with 100% whole wheat, flatbreads like pita are a different story—they’re simple, forgiving, and practically fail‑proof!
If you’ve ever looked at the ingredient list on store‑bought flatbreads, you’ll notice how complicated they can be. But making them at home is the complete opposite: the recipe is clean and straightforward, a great way to clear out the fridge, and you’ll know exactly what’s going into your food. That makes every bite feel extra reassuring.
All you need
- 40g Wholemeal sourdough discard
- 40g Water
- 70g Wholemeal flour
- A small pinch of baking soda
- 2g Extra Virgin Olive Oil
- A pinch of salt
- 3g Toasted sesame seeds
Ingredients Notes
Sourdough discard——
Since so many of you are currently nurturing new starters, I would like to emphasize first to make sure you don’t get diarrhea because of my recipe: when I say “discard” in this recipe, I mean discard from a mature starter, not the bits you throw away during the initial cultivation stage!
Personally, I never feed a huge amount of starter just to bake bread. I usually measure out exactly what the recipe calls for, plus an extra 5–10 grams to keep the culture going. But even with that approach, if you bake once a week like I do, every time you wake up the levain that’s been resting in the fridge, you’ll need at least two feedings to activate it—and that inevitably creates discard. My method is simple: I collect the discard in a clean little bowl, and however much I end up with, I’ll use everything to make these flatbread. They freezer friendly too, so you’ll always have a backup staple on hand.
And since this recipe is for 100% whole‑wheat pita, you can also choose to feed your starter with whole wheat when prepping for bread. That way, the discard you save for pita will truly be 100% whole wheat. Of course, if you’re not too strict about the content percentage, any levain discard will work just fine—no worries at all!
~ Video Tutorial ~
Steps of making
- Mix the discard with water until smooth. Add flour (reserve 10 g) and baking soda, then stir with a spatula until it comes together.
- Add extra‑virgin olive oil, salt, and toasted sesame seeds. Mix well.
- Sprinkle the reserved whole‑wheat flour over the dough. Use the spatula to coat the surface of the dough with the flour
- Then knead lightly by hand into a round dough.
- Wrap with plastic wrap and let the dough rest for 10 minutes.
- Dust the dough with flour, scrape it out with a scrapper, and flip onto the worktop, lightly dust the other side as well.
- Press the dough into a round flat shape, then divide into 4 equal portions.
- Roll each piece up, tuck in the edges, and shape into small rounds dough.
- Place a dough on a piece of baking paper, press flat with your hand.
- Dust lightly with flour, then roll out with a rolling pin—roll upward then downward 1-2 times, until about 3–4 mm thick.
- Heat a pan over medium‑high to high heat.
- Place the dough in with the baking paper side down first. Cook for 10 seconds, flip, peel off the paper, cook another 10 seconds, then flip again.
- Continue flipping every 10 seconds, about 4–5 times, until the pita puffs up and the surface is lightly charred.
- Remove from the pan and keep them covered with a clean cloth to retain moisture.
Storage and Reheating
You can keep it in the fridge, but it’s best to finish by the next day since refrigeration makes bread dry and stale faster. No matter which kind of bread, freezing is actually the better option if you can’t finish it within 2 days.
When reheating this pita, lightly spray both sides with water. You can pan‑toast, microwave, or steam it. My favorite way, though, is to pan‑fry it in butter until it’s crisp and fragrant!
Ah Cheen’s Little Tip
When you first mix the ingredients, don’t dive in with your hands — it’ll stick so badly making you start doubting your life! Use a tool to combine everything evenly first, then use the reserved 10g of flour to knead the dough into a smooth ball by hand. It’ll be much easier that way.
Whether you’re bringing the dough together or shaping it, stop once it feels nicely formed. Don’t overwork it — the more you play, the stickier it gets XD. And if you keep sprinkling in extra flour, the pita will turn out dry and tough. So for this recipe, resist the urge to chase “perfect” at every step — a little rustic charm is exactly what makes it simple and delicious!
Full Printable Recipe
食材 Ingredients
步骤 Method
- Mix the discard with water until smooth. Add flour (reserve 10 g) and baking soda, then stir with a spatula until it comes together.
- Add extra‑virgin olive oil, salt, and toasted sesame seeds. Mix well.
- Sprinkle the reserved whole‑wheat flour over the dough. Use the spatula to coat the surface of the dough with the flour
- Then knead lightly by hand into a round dough.
- Wrap with plastic wrap and let the dough rest for 10 minutes.
- Dust the dough with flour, scrape it out with a scrapper, and flip onto the worktop, lightly dust the other side as well.
- Press the dough into a round flat shape, then divide into 4 equal portions.
- Roll each piece up, tuck in the edges, and shape into small rounds dough.
- Place a dough on a piece of baking paper, press flat with your hand.
- Dust lightly with flour, then roll out with a rolling pin—roll upward then downward 1-2 times, until about 3–4 mm thick.
- Heat a pan over medium‑high to high heat.
- Place the dough in with the baking paper side down first. Cook for 10 seconds, flip, peel off the paper, cook another 10 seconds, then flip again.
- Continue flipping every 10 seconds, about 4–5 times, until the pita puffs up and the surface is lightly charred.
- Remove from the pan and keep them covered with a clean cloth to retain moisture.
小贴士 Tips
- You can keep it in the fridge, but it’s best to finish by the next day since refrigeration makes bread dry and stale faster. No matter which kind of bread, freezing is actually the better option if you can’t finish it within 2 days.
- When reheating this pita, lightly spray both sides with water. You can pan‑toast, microwave, or steam it. My favorite way, though, is to pan‑fry it in butter until it’s crisp and fragrant!