Oyster & Onion Fritters with Mee Sua
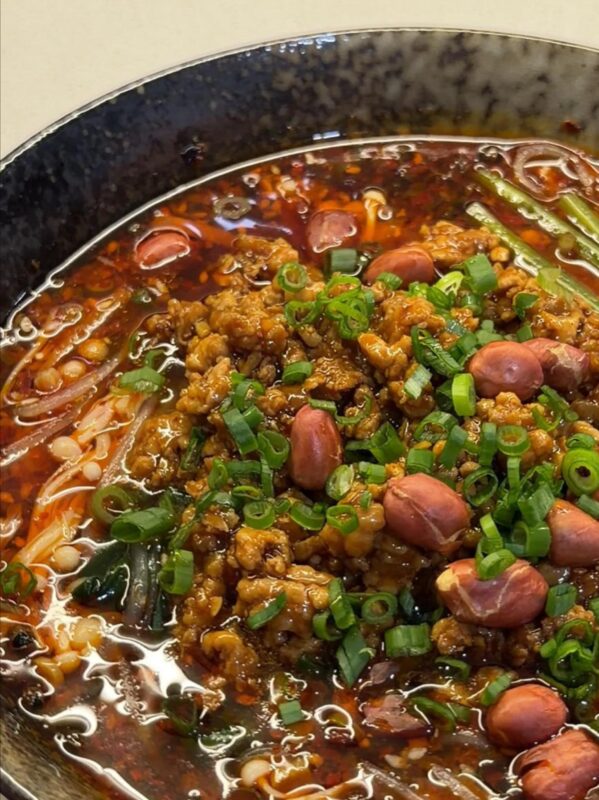
Remember the oyster mee sua recipe I shared last time? It was the inspiration when I travelled to Taiwan. For this recipe, Oyster & Onion Fritters with Mee Sua, it is a modified version from the old recipe but an upgraded one! The plump, blanched oyster has became crispy fritters along with lots of onion slices and basil leaves for extra layer of flavor!
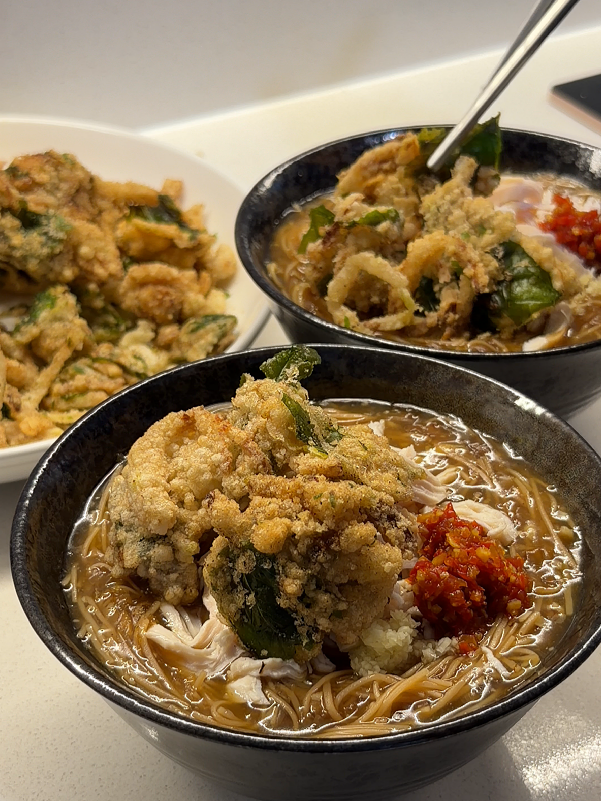
The History of Famous Taiwanese street food
Mee Sua , the delicate wheat vermicelli, was first introduced to Taiwan by Hokkien settlers during the Qing Dynasty (17th–18th century). Its long, fine strands came to symbolize longevity in traditional celebrations, I guess most of the Chinese know about this and that’s why we make mee sua soup on our birthday right?
Later, Taiwanese cooks developed roasted mee sua, lightly toasting the noodles before drying to give them a reddish‑brown hue, a richer aroma, and greater resilience in long simmering. This innovation made the noodles ideal for thick broths.
In coastal regions such as Changhua, Chiayi, and Tainan, farmers and fishermen began adding fresh oysters—abundant in Taiwan’s subtropical waters—into the hearty soup, creating a nourishing snack after a day’s work. Over time, oyster mee sua evolved into one of Taiwan’s most beloved street foods, embodying both the island’s Fujian heritage and its vibrant local culture.
Inspiration for today’s dinner!
Today’s recipe takes inspiration from Japanese tempura udon—a comforting bowl of chewy noodles in a hearty, steaming broth, crowned with crisp, delicate tempura vegetables. Sometimes even the golden batter crumbs are sprinkled on top, adding a playful crunch to the silky soup. It’s a bit like dipping You Tiao (fried dough) into Bak Kut Teh: that perfect balance of crispy and juicy, light and rich, all in one bite. Without further ado, let’s get cooking!
ALL YOU NEED
Mee Sua Soup:
- 70g Red Mee Sua
- 2-3 tbsp cooking oil
- 1 tbsp Garlic/ 1 tbsp garlic crisps
- 2 tbsp Onion or Shallot/ 1.5 tbsp fried shallot
- 1 L Water
- 2 handful bonito flakes
- 1 Chicken breast
Seasoning:
- 1.5 tbsp Oyster sauce
- 1 tbsp Soy sauce
- 1/2 tsp Dark soy sauce
- 1/2 tsp Salt
- 1/2 tsp Dashi powder
- 1/4 tsp White pepper powder
Starch Slurry:
- 1.5 tbsp Tapioca starch
- 3 tbsp water
Oyster & Onion fritters:
- 20 pcs Oyster
- 1/2 Onion
- 1 handful Basil leaves
- 3 tbsp All purpose flour
- 1 Egg white
- 1 tbsp Water
- 1/8 tsp Baking powder
- Coarse grain potato starch
- Oil for deep frying
- Pepper salt
To serve :
- Oyster & Onion fritters
- Shredded Chicken
- Grated garlic/ finely minced garlic
- Chilli sauce/ Bird’s eye chili
- Coriander
- Black vinegar
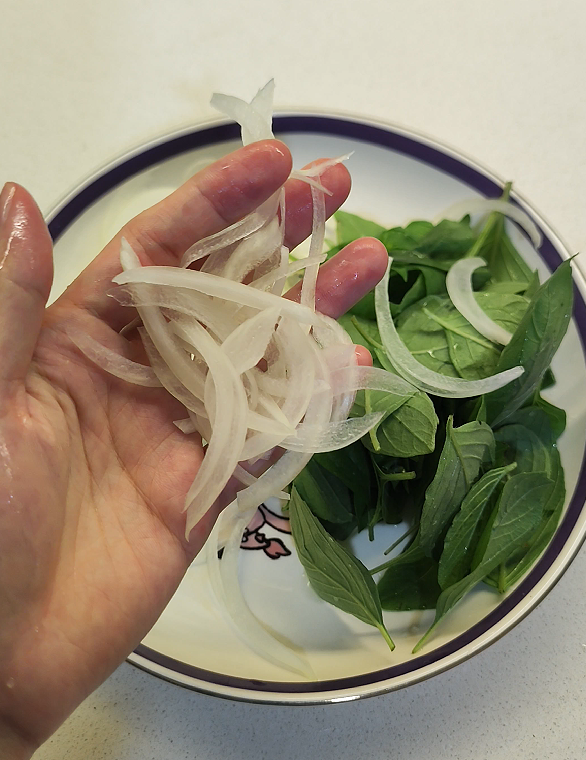
Things you need to know before you start cooking
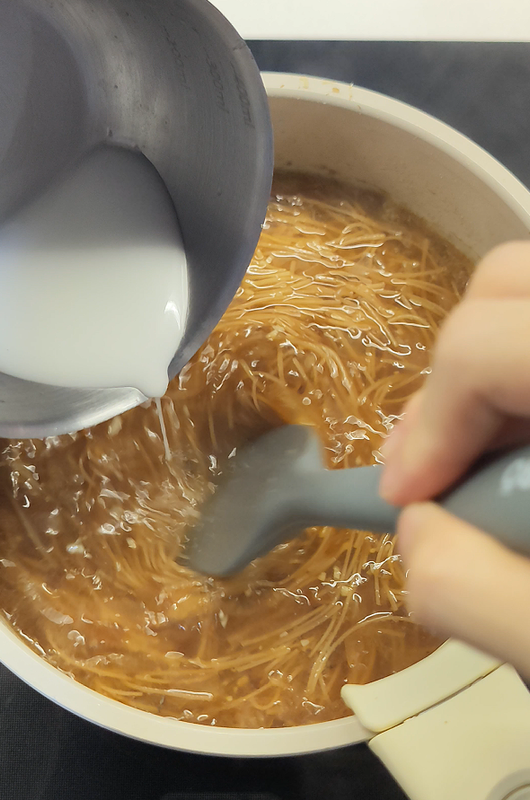
Why use tapioca starch for thickening? ——
Unlike potato and corn starch, tapioca maintains the thick, velvety texture of soup for longer without breaking down into a watery consistency. It’s the most suitable choice for long cooking and repeated reheating. However, if you’re making a small batch like I do—one that can be finished in a single meal—then potato starch is perfectly fine for thickening. In fact, it’s preferable, since corn starch tends to make the soup look cloudy.
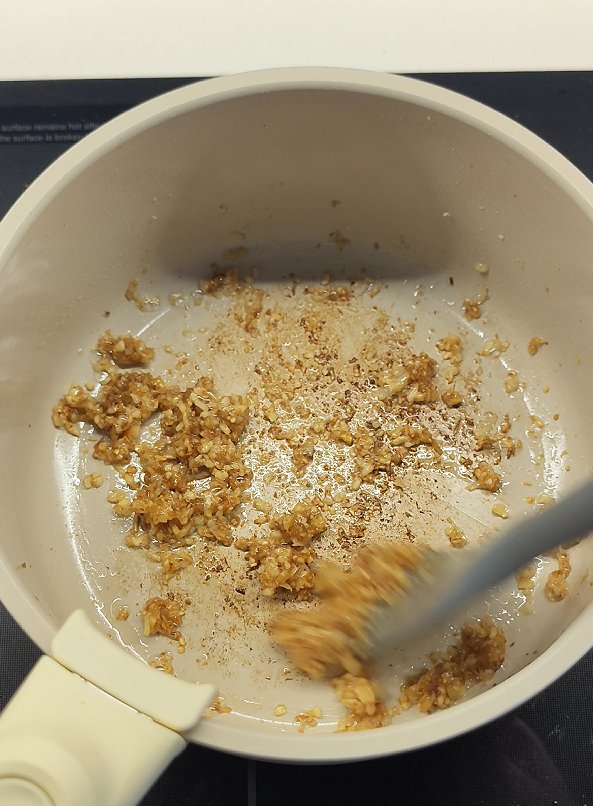
Garlic & Onion/Shallot ——
If you always have crispy fried garlic and fried shallots on hand, you can simply add them straight into the soup according to the recipe. But if not, no worries—just do it like the video shown, sauté the garlic and shallots with a good amount of oil over low heat until golden brown, then only add in the stocks.
Red Mee Sua——
Red mee sua need to wash and rinse for at least 2 time to get rid of the excess starch on the surface, then soak in clean water for at least 2 hours before cooking, or even longer, if you preferred. And to make the mee sua short and easy to eat with spoon like Taiwanese street food culture, we need to use a scissors to cut them shorter before adding them to the soup. And it actually make us easier to stir while thickening the soup with potato starch slurry as well.
Chicken breast——
I always brined my chicken breast with 8% of salt solution before use, to make sure it has flavor inside out. If wet brining is not your prefer method, as least marinate it with salt and pepper 30 mins before start cooking, to ensure it would not instantly become dry and tough after being cooked. Check out my article here for more detail information about wet brining a thick cut meat like chicken breast.
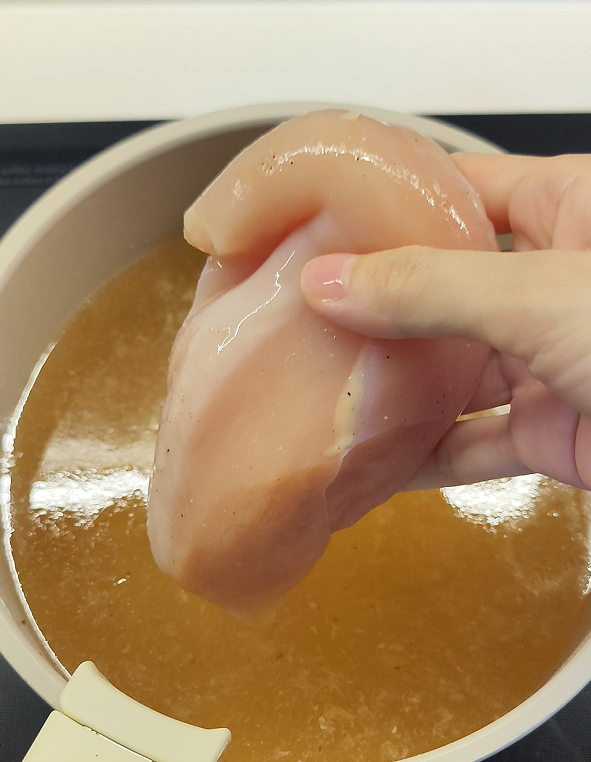
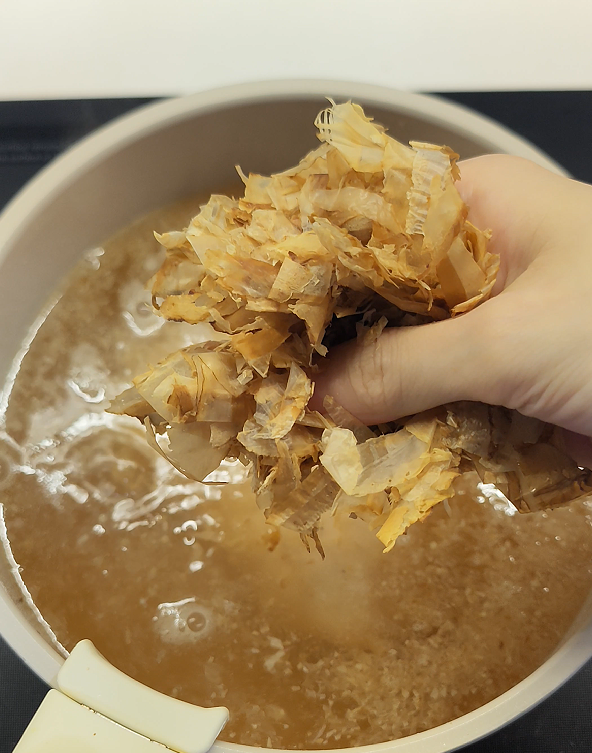
Bonito Flakes——
It is different with making dashi stocks. We no need to strain this bonito flakes out but if you do not like the chewy texture, can blend and crushed it into smaller pieces with a food processor to make it almost not visible in the vermicelli thick soup.
Video Tutorial:
Steps of cooking
Mee Sua Soup:
- Stir-fry onion until translucent with about 2-3 tbsp of cooking oil.
- Then add in garlic in the pot and stir-fry until golden brown.
- Add water, chicken breast, and bonito flakes.
- Bring the water to boil and turn to lowest heat, cook for 5mins.
- Take out the chicken breast when time’s up, if not sure whether it is cooked through, poke it with a chopstick at the center, if it goes through, then it is cooked.
- Now all in our soaked mee sua, that is already cut into smaller strand with scissors, and add in all the seasonings as well.
- Stir until seasonings are all dissolved.
- Slowly pour in tapioca starch slurry and keep stirring to make sure it don’t forms any lumps in the soup.
- Once done, bring the soup up to boil and heat off.
- Let the mee sua thick soup sit for 30 mins, for a better texture and well combined flavor.
Oyster and Onion fritters:
- Wash your oyster gently and make sure no shell left in the deshell oyster.
- Mix all purpose flour, baking powder water and egg whites until they are well incorporated.

- Put in oysters, to coat the it with batter first, then following by the onion slices and basil leaves.
- Before start coating them with another layer of dry starch, make sure the frying oil is almost ready to be use for deep frying, about 160C-170C
- Coat them with the coarse grain potato starch in batches, then put on a clean plate, it’s okay to stack.
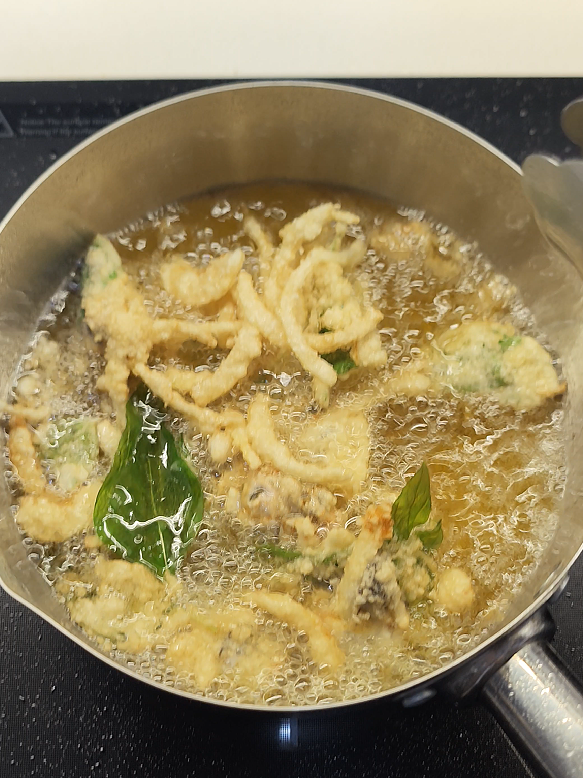
- Now drop them in chunks, not one by one, to the deep fryer. Some will stick together and form a bigger pieces, some would be fried alone, but both are good and has different texture, so just let it be and no stress on this part.
- Once you drop in the ingredients, do not stir them immediately and let the shape set for at least 30 secs.
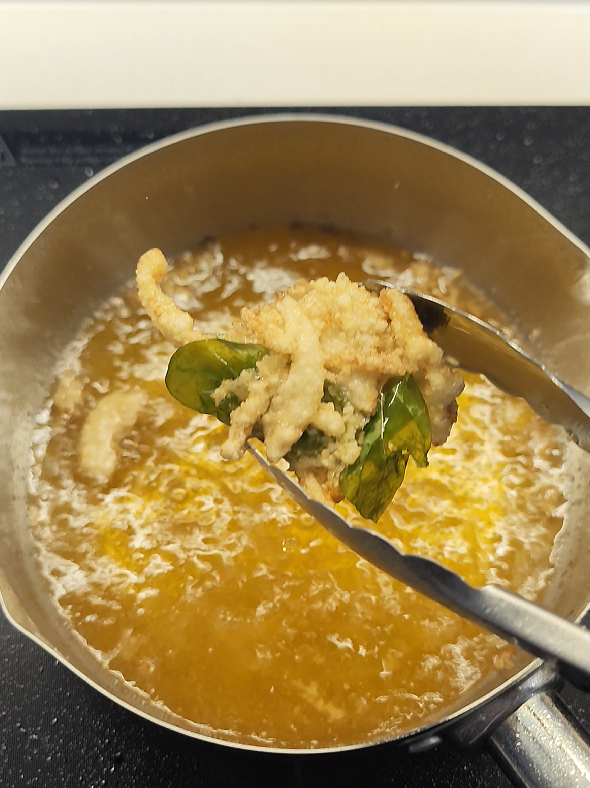
- Flip when the bottom part is darker in color, and fry the whole piece until golden-brownish, but not that heavy in color, should be looks like tempura.
- Strain and discard any brown bits in the deep fryer before start to fry another batch of oyster and onions.
- Continue until all of them are done frying.
- Season the fritters generously with pepper salt and they are done!
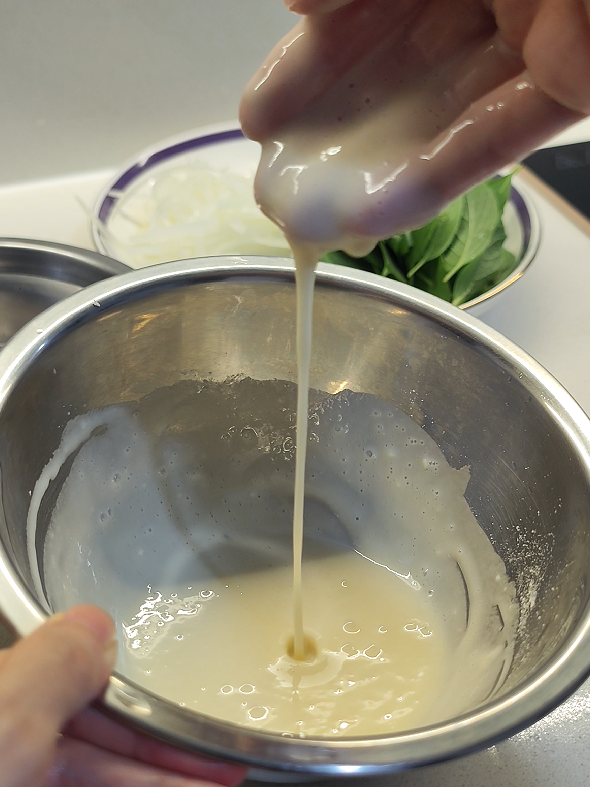
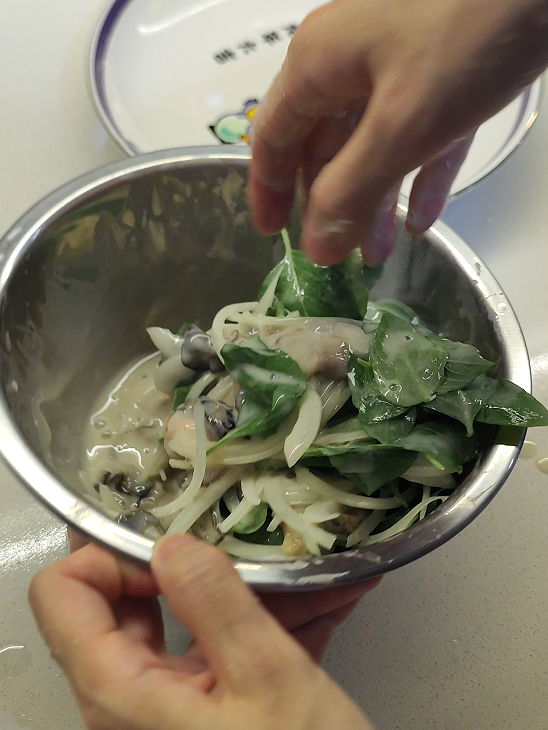
To serve:
- Shred the chicken breast we cooked earlier.
- Bring the mee sua back to simmer and ladle it into a bowl.
- Top it up with shredded chicken, grated garlic, chili sauce/chopped chili, coriander, and black vinegar.
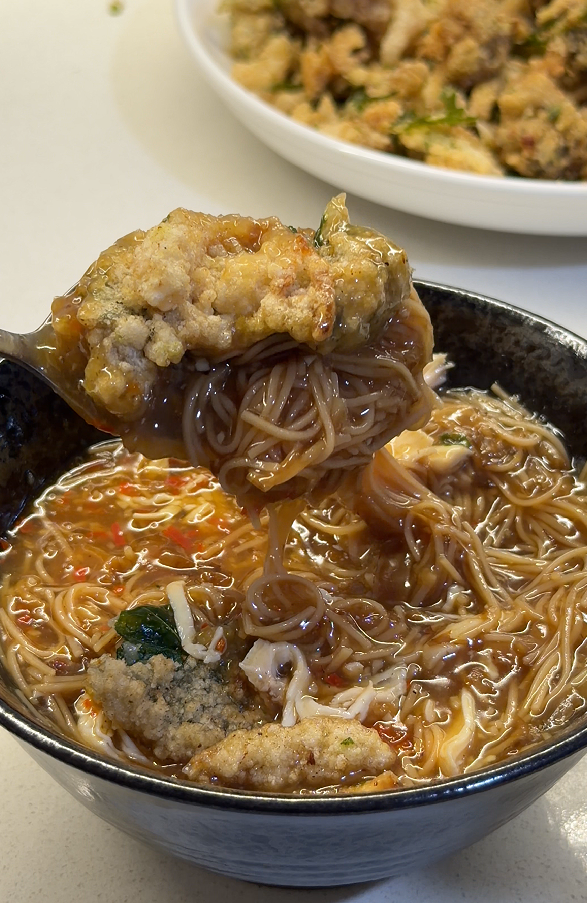
- Lastly add on the fritters on your mee sua, enjoy!
Printable Full Recipe
Oyster Fritters & Mee Sua
食材 Ingredients
步骤 Method
- Stir-fry onion until translucent with about 2-3 tbsp of cooking oil.
- Then add in garlic in the pot and stir-fry until golden brown.
- Add water, chicken breast, and bonito flakes.
- Bring the water to boil and turn to lowest heat, cook for 5mins.
- Take out the chicken breast when time’s up, if not sure whether it is cooked through, poke it with a chopstick at the center, if it goes through, then it is cooked.
- Now all in our soaked mee sua, that is already cut into smaller strand with scissors, and add in all the seasonings as well.
- Stir until seasonings are all dissolved.
- Slowly pour in tapioca starch slurry and keep stirring to make sure it don’t forms any lumps in the soup.
- Once done, bring the soup up to boil and heat off.
- Let the mee sua thick soup sit for 30 mins, for a better texture and well combined flavor.
- Wash your oyster gently and make sure no shell left in the deshell oyster.
- Mix all purpose flour, baking powder and egg whites until they are well incorporated.
- Put in oysters, to coat the it with batter first, then following by the onion slices and basil leaves.
- Before start coating them with another layer of dry starch, make sure the frying oil is almost ready to be use for deep frying, about 160C-170C
- Coat them with the coarse grain potato starch in batches, then put on a clean plate, it’s okay to stack.
- Now drop them in chunks, not one by one, to the deep fryer. Some will stick together and form a bigger pieces, some would be fried alone, but both are good and has different texture, so just let it be and no stress on this part.
- Once you drop in the ingredients, do not stir them immediately and let the shape set for at least 30 secs.
- Flip when the bottom part is darker in color, and fry the whole piece until golden-brownish, but not that heavy in color, should be looks like tempura.
- Strain and discard any brown bits in the deep fryer before start to fry another batch of oyster and onions.
- Continue until all of them are done frying.
- Shred the chicken breast we cooked earlier.
- Bring the mee sua back to simmer and ladle it into a bowl.
- Top it up with shredded chicken, grated garlic, chili sauce/chopped chili, coriander, and black vinegar.
- Lastly add on the fritters on your mee sua, enjoy!
小贴士 Tips
蚵仔洋葱酥 & 面线糊
还记得我上次分享的蚵仔面线食谱吗?当时会做是因为我去台湾旅行时让我有超想复刻这一道小吃的冲动! 而这次的豪华版本——蚵仔洋葱酥和面线糊是在旧食谱基础上的升级版! 本来只是需要烫熟的生蚝,现在搭配大量洋葱丝和九层塔叶,做成了炸物,让这碗面线增加了不少风味和满足感!
蚵仔面线的小故事
面线(Mee Sua),这种细致的麦制粉面,最早在清朝(17–18 世纪)由福建移民带入台湾。它细长柔韧的面条象征着长寿。我想大多数华人都知道这一点,所以我们生日时都会煮一碗长寿面线汤来庆祝对吧?
后来,台湾厨师们发展出了“红面线”,在晒干前先将面条低温烘烤,所以才会变成你现在看到的红褐色。红面线的麦香气更浓,更有嚼劲,而且这一创新也让它变得更加耐煮,不容易过度膨胀,绵烂,特别适合浓稠的汤底。
当时在彰化、嘉义、台南等沿海地区,农民和渔民开始把盛产于台湾热带海域的新鲜蚵仔加入这碗浓汤,成为他们劳作一天后的滋养小吃。随着时间推移,蚵仔面线逐渐演变为台湾最受喜爱的街头美食之一,既体现了福建的文化传承,也展现了台湾本土的活力与风味。
豪华版本的灵感来源!
今天的食谱灵感来自日式天妇罗乌冬——一碗热气腾腾、汤底浓郁的乌冬面,搭配脆口轻盈的天妇罗蔬菜炸物。 有时甚至会撒上金黄的炸面糊碎,让汤里多了香脆吸汁的角色。你可以想象把油条蘸进肉骨茶汤:酥脆的同时又吸汁、炸物香和药材香都在嘴里散发开来,虽然真的很难吃到卖肉骨茶的油条是脆的。。。OK 话不多说,我们开始吧!
你需要的食材
面线糊:
- 70g 红面线
- 2-3 tbsp 食用油
- 1 tbsp 蒜末/ 1 tbsp 蒜酥
- 2 tbsp 洋葱 或 红葱头/ 1.5 tbsp 红葱酥
- 1 L 水
- 2 大把柴鱼片
- 1 鸡胸肉
调味料:
- 1.5 tbsp 蚝油
- 1 tbsp 酱油
- 1/2 tsp 黑酱油
- 1/2 tsp 盐
- 1/2 tsp 日式高汤粉
- 1/4 tsp 白胡椒粉
芡水:
- 1.5 tbsp 木薯粉
- 3 tbsp 水
蚵仔洋葱酥:
- 20 个生蚝(蚵仔)
- 1/2 颗洋葱
- 1 大把九层塔叶
- 3 tbsp 普通面粉
- 1 蛋白
- 1 tbsp 水
- 1/8 tsp 泡打粉
- 粗颗薯粉
- 用于油炸的油
- 胡椒盐
组装:
- 蚵仔洋葱酥
- 鸡胸肉丝
- 蒜泥/细蒜末
- 辣椒酱/小辣椒
- 香菜
- 黑醋
一些你必须懂的小细节
为什么用木薯粉来勾芡 ——
与马铃薯粉和玉米淀粉不同,木薯粉能更持久地维持汤的浓稠、顺滑的质地,不会轻易分解成稀水状。它是长时间烹煮和反复加热的最佳选择。 不过,如果你像我一样只做一小份、能在一餐内吃完,那么用马铃薯粉来勾芡也完全没问题,而且比玉米淀粉更合适。毕竟玉米淀粉会让汤看起来浑浊。
蒜酥和葱酥——
如果你有常备的炸蒜酥和炸葱酥,就可以直接按照食谱的分量加入汤里。 但如果没有也没关系——就像影片里示范的那样,把蒜和葱用小火慢慢炒至金黄,再加入水即可。
红面线——
红面线需要经过清洗至少两次,以去除表面多余的淀粉。之后要浸泡在清水中至少两小时,更久也没问题。 为了让面线合适用汤匙食用,吃起来更顺口,且符合台湾街头小吃文化的习惯,我们需要用剪刀把面线剪短。这样不仅更好吃,也能在勾芡时更方便搅拌。
鸡胸肉——
我的鸡胸肉几乎都是先用 8% 的盐水来腌制过的,让它从里到外都有盐有味,吃起来也不干菜。 如果你不喜欢湿腌法,至少要在烹饪前用盐和黑胡椒腌制 30 分钟,以确保鸡胸肉在烹煮后不会变得干硬。 想了解更多关于如何湿腌厚切肉类(例如鸡胸肉)的更多详细解说,可以查看我这篇文章。
柴鱼片——
这和制作日式高汤(dashi)不同,我们不需要把柴鱼片滤掉。 不过,如果你不喜欢那种略带嚼劲的口感,可以用料理机把它打碎,让它在浓稠的面线汤里几乎看不见,吃不着。
视频教程:
详细的制作步骤
面线糊:
- 先用大约 2–3 大匙食用油炒洋葱,直到变得半透明。 然后加入蒜末,继续翻炒至金黄色。
- 加入清水、鸡胸肉(常温)和柴鱼片。 把水煮沸后转至最小火,煮 5 分钟。
- 时间到后取出鸡胸肉,如果不确定是否熟透,可以用筷子插入中心,能顺利穿过就表示已经熟了。
- 接着放入已经浸泡好,并剪短了的面线,同时加入所有调味料。 搅拌直到调味料完全溶解。
- 慢慢倒入芡水,并持续搅拌,避免汤里结块。
- 完成后再次把汤煮沸,然后关火。 让面线汤静置 30 分钟,使口感更佳、风味更融合。
蚵仔洋葱酥:
- 把生蚝温柔地洗干净,确保没有残留碎壳。
- 混合面粉,蛋白,水和泡打粉,搅拌至顺滑流淌的状态。
- 放入生蚝,先把它裹上粉浆,接着再捞进洋葱丝和九层塔叶。
- 在裹上另一层干薯粉之前,确保油锅已经差不多准备好可以随时油炸咯,把油锅升至 160C-170C。
- 分批给生蚝洋葱裹上薯粉,然后放到一个干净的盘里,可以重叠。
- 把裹好粉的料分批放油锅里炸,可以一堆一堆放,粘着的会变成大块状,散散的也有散散的好吃,无所谓。
- 放入炸料后,先别翻动,让它炸 30 秒,定型。
- 当另一面颜色比较深的时候就反面,炸至有点金黄,但颜色不需要太深,就像天妇罗那样。
- 炸好了就放入一旁的滤网滤干多余的油,然后把锅里的碎碎都捞出来,再炸下一批。
- 重复至炸完所有备好的料。
- 撒上胡椒盐,这蚵仔和洋葱酥就做好咯!
组装:
- 把先前煮好的鸡胸肉撕成肉丝。
- 把面线糊加热至微滚再装至碗中。
- 放上鸡肉丝,蒜泥,辣椒酱/小辣椒,香菜,和淋点黑醋。
- 最后加上蚵仔洋葱酥,开吃!
可打印完整食谱
蚵仔洋葱酥 & 面线糊
食材 Ingredients
步骤 Method
- 先用大约 2–3 大匙食用油炒洋葱,直到变得半透明。 然后加入蒜末,继续翻炒至金黄色。
- 加入清水、鸡胸肉(常温)和柴鱼片。 把水煮沸后转至最小火,煮 5 分钟。
- 时间到后取出鸡胸肉,如果不确定是否熟透,可以用筷子插入中心,能顺利穿过就表示已经熟了。
- 接着放入已经浸泡好,并剪短了的面线,同时加入所有调味料。 搅拌直到调味料完全溶解。
- 慢慢倒入芡水,并持续搅拌,避免汤里结块。
- 完成后再次把汤煮沸,然后关火。 让面线汤静置 30 分钟,使口感更佳、风味更融合。
- 把生蚝温柔地洗干净,确保没有残留碎壳。
- 混合面粉,蛋白,泡打粉,搅拌至顺滑流淌的状态。
- 放入生蚝,先把它裹上粉浆,接着再捞进洋葱丝和九层塔叶。
- 在裹上另一层干薯粉之前,确保油锅已经差不多准备好可以随时油炸咯,把油锅升至 160C-170C。
- 分批给生蚝洋葱裹上薯粉,然后放到一个干净的盘里,可以重叠。
- 把裹好粉的料分批放油锅里炸,可以一堆一堆放,粘着的会变成大块状,散散的也有散散的好吃,无所谓。
- 放入炸料后,先别翻动,让它炸 30 秒,定型。
- 当另一面颜色比较深的时候就反面,炸至有点金黄,但颜色不需要太深,就像天妇罗那样。
- 炸好了就放入一旁的滤网滤干多余的油,然后把锅里的碎碎都捞出来,再炸下一批。
- 重复至炸完所有备好的料。
- 把先前煮好的鸡胸肉撕成肉丝。
- 把面线糊加热至微滚再装至碗中。
- 放上鸡肉丝,蒜泥,辣椒酱/小辣椒,香菜,和淋点黑醋。
- 最后加上蚵仔洋葱酥,开吃!
小贴士 Tips
Disclosure:
The links below will take you to Shopee, making it easy to check out the actual products. Please do compare prices — sometimes local markets can be cheaper! If you purchase through them, I may earn a small commission ❤️ — a tiny sprinkle of support that fuels more recipes. This won’t add any extra cost for you. I only recommend products I personally use and trust; these are items I’ve repurchased many times, so you can be confident they’re truly my reliable picks.
What I Use | 我的好物分享
Coarse Grain Potato Starch | 粗颗粒薯粉